Key Takeaways
- Setting up a barcode inventory system consists of 4 easy steps: generating barcodes, labeling your inventory, utilizing scanners, and integrating software.
- You can start the process by preparing an inventory list to associate each product with a unique barcode.
- You can generate barcodes with a free online barcode generator or barcode font for internal purposes. However, for globally recognized barcodes, you’ll need to purchase GS1-registered barcodes.
- Once your barcodes are generated, you’ll need to print them using a barcode printer and attach them to your inventory.
- Barcode scanners have various options that range from affordable USB scanners to more advanced wireless smart scanners, depending on your specific needs. Even smartphones can double as barcode scanners.
- Integrating inventory management software with barcode functionality is the best way to get the most out of your barcode inventory system.
Over the years, we’ve had countless small businesses ask about barcodes or, more specifically, how to set up a barcoding system. So, by popular demand, we’ve crafted this short tutorial to show you how to set up a barcode inventory system quickly and painlessly!
We tried to keep this article simple, but if you’re interested in a more in-depth look at how to start barcoding your small business, check out our Ultimate Barcoding Guide. It covers absolutely everything related to barcodes.
If you prefer video tutorials, you can find one below:
But since you’re here, this post provides some extra detail about the steps from our video for setting up a barcode inventory system.
Step 1: Generate barcodes for your barcoding inventory system
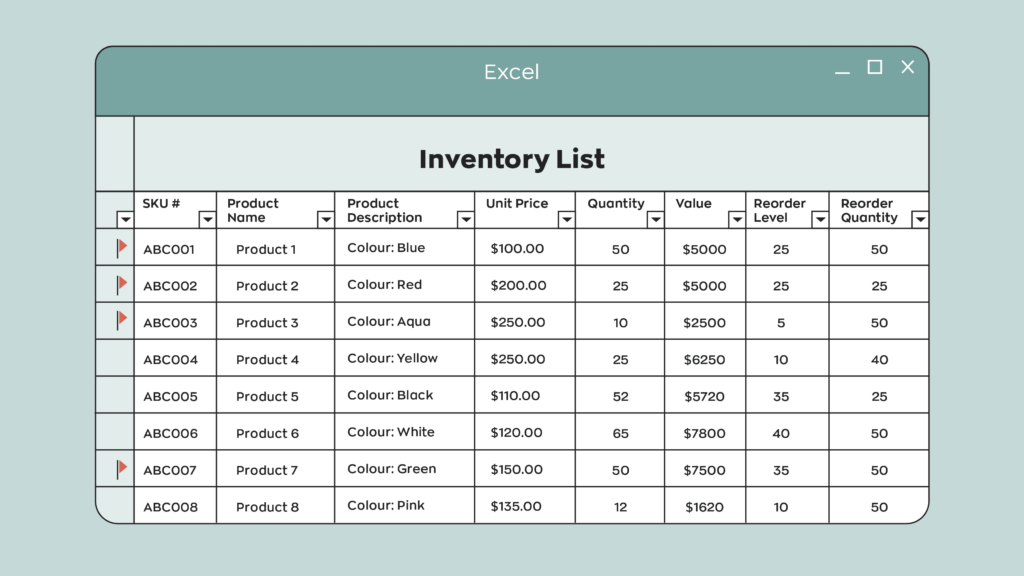
The first thing to do is prepare an inventory list spreadsheet so that you can tie barcodes to specific products.
If you haven’t prepared a spreadsheet, head over to our article about inventory lists. We walk you through what an inventory list is and how to create one. We’ve even included a free-to-download template to make your life easier. Our template is pretty barebones, but you can add any relevant information to your products, such as lot and serial numbers, for example.
Now, back to generating barcodes. You can use a free online barcode generator to generate barcodes one at a time. However, there is a better option. Barcode inventory software can automatically generate barcodes for each product. If you have custom-built software for utilizing barcodes, you can also do more with your barcode inventory system.
Generating your own barcodes, however, isn’t for everyone. If you need your barcodes to be recognized globally, you need GS1-registered barcodes. For those, you can visit our official inFlow GTIN Barcode Shop to purchase single barcodes for only $30 with no renewal fee. However, if you need more than ten barcodes, we recommend purchasing a company prefix directly from the GS1 website.
As a quick final example, here’s what an inventory list spreadsheet could look like:
Step 2: Label your inventory
Now that you’ve got a spreadsheet of your products and corresponding barcodes, you’re one step closer to a complete barcode inventory system.
Now it’s time to physically label your current inventory. For this, you’ll need a specialized printer and software to create the labels. We’ve had good experiences with DYMO printers, specifically the LabelWriter 450. DYMO also sells its own labels on its website, but you don’t have to use its branded labels. Generic labels will work as long as they’re the correct size.
The great thing about DYMO is that they offer free label software that works with their printers. It’s quick and easy to install on Windows or Mac. We also created a built-in label designer into inFlow to make it easy for users to create custom labels. Understanding your company’s brand archetypes can significantly influence how you design your product labels, making them resonate more with your target audience. Our tip is to stay moderate when adding fields first. Stick to the basics like Item Name and Barcode, and see how that fits with a few test prints. Remember that you’ll still want to be able to read some of the information on the labels, so having fewer fields on each label means they’ll be easier to skim.
This step is probably the most labor-heavy because you’ll have to print one label for each item you want to barcode. Expect this to take at least a few hours if not days. The labeling process can go faster if you have barcode inventory software that can filter your current stock and automatically print labels for just those products (more on this later).
Once you finish labeling everything you currently have, pat yourself on the back for a job well done. You’ve almost completed your barcode inventory system setup. Just keep in mind it’s a good idea to keep the process going for any incoming products.
Step 3: Get a scanner for your barcode inventory system
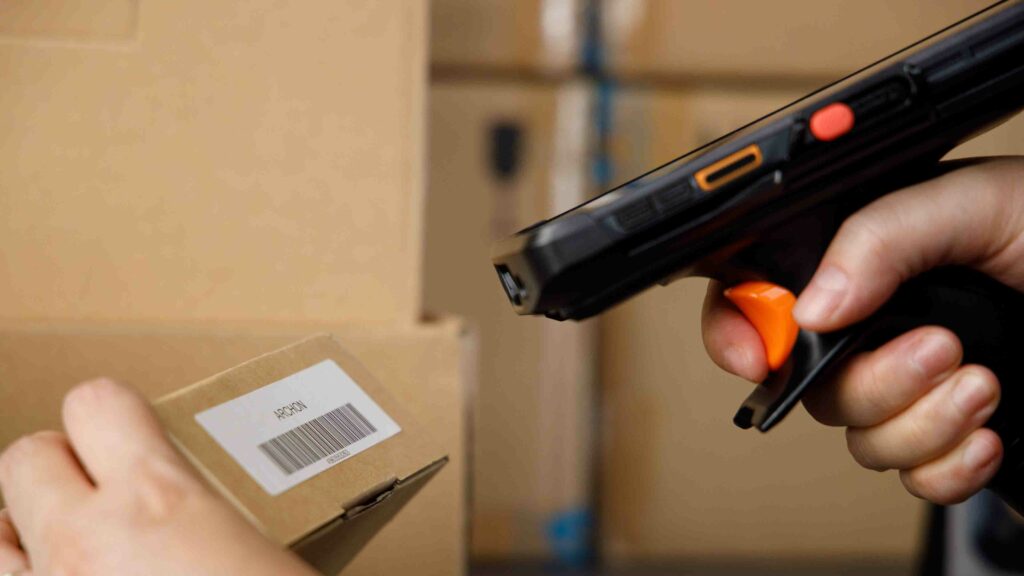
Having barcodes on your products won’t do much good without a scanner to read them. Scanners come in all shapes and sizes, from small pen models to larger portable computing systems with built-in software. Today, you can even use the smartphone in your pocket to scan barcode labels.
What scanner you choose to use depends on your workflow. Your smartphone could do the trick if you don’t scan many barcodes regularly. What’s great about this option is that it’s zero investment on your part. However, the more scanning you do, the less efficient it becomes.
We recommend buying a dedicated barcode scanner for your barcoding system. They can speed things up and save you a lot of time in the long run. If you’re in the market for something that is both affordable and reliable, you could pick up a wired USB scanner. These are an excellent option for anyone doing stationary barcode scanning. If you’re on the move, we also have the Bluetooth version of that scanner.
Anyone in a warehouse that needs speed, mobility, and overall scanning efficiency, should invest in a wireless barcode scanner like our Smart Scanner 3. Smart scanners are great because you can download your barcoding software right onto the device, making the scanning process super seamless.
Step 4: Find inventory software to tie your barcode inventory system together
Finally, you’ll need excellent inventory software to tie your barcode system together. Finding barcode scanners and label printers is pretty straightforward. But you’ll want an inventory management system designed to take advantage of a fully barcoded business. This is where inFlow comes in.
inFlow can help you build your product list from scratch or import your existing spreadsheet (kudos if you’re already this organized!). After that, you can generate unique barcodes for every product with just a few clicks.
When it’s time to physically label your product, inFlow can kickstart the process. It does this by showing your current stock and printing your labels straight to a DYMO printer. We also simplify printing labels straight from purchase orders, so you can add incoming stock to your barcode inventory system as it arrives.

Your business will reap the benefits the moment your next sale comes in. Instead of typing items onto a sales order, you can scan barcodes right onto it instead. The same goes for other tasks at your business that are heavy on data entry. Such as stock transfers or work orders.
We hope this post has helped you learn all the significant components of setting up a barcoding system. If you’d like to get started, inFlow can help!

Good day
What barcode scanner and software would you recommened that can link with a free online barcode generator? (Which free barcode generator would you recommened?
We are based in Cape Town, South Africa.
Thank you.
Kind regards
Megan Joy
Hi Megan, we’re actually working on a new post to highlight some of the best barcode generators outside of inFlow. Here’s one of the generators we’re going to highlight: https://barcode.tec-it.com/
Which sales app uses barcode and can also show inventory level notifications..
I am writing from Nigeria. I intend to start a grocery store.
Please your answer would go a long way in helping me. Thanks.
Hi Echina, our software, inFlow Inventory, does offer barcode generation and scanning. We also track inventory.
We don’t have in-app notifications right now for inventory levels, but we do offer email notifications that you can get on a daily basis for low stock items.
If you’d like to try inFlow, we offer free trials and we have a team dedicated to help you get set up and learn how inFlow could best fit your business.
You can sign up for our trial here: https://www.inflowstaging.com/signup
hi can one of u guide me for set up a full barcode for my small business
Hi Pratham, we do offer onboarding as part of your inFlow trial. So we could show you how to set up barcodes at your business if you sign up here: https://www.inflowstaging.com/signup
how can i set up barcode system for my hardware shop
How do I generate a book publishing bar code for an ISBN 13 code. What information do I place onto the generator?
Hi Tony,
Here’s a free barcode generator that can generate ISBN 13: https://barcode.tec-it.com/en/ISBN13?data=9781234567897
From some quick Googling, it *does* look like there is meaning to the numbers in the ISBN, though, so I recommend doing further research to make sure it’s valid for usage. It looks like there are country, publisher, and title identifiers built into the numbers—as well as a check digit.
How does one use this software to set up a barcoding system both for their retail division, wholesaler division, and warehouse?
Hi KVH, good question.
The quick answer is that you’d usually tie a single barcode to each product, and that barcode would bring that product up each time you scan it into our software. inFlow also provides different pricing schemes so that you can have a separate retail and wholesale price for the same product, depending on who the customer is. If you’d like to learn more, I’d encourage you to start a free trial and our team will let you know if inFlow is the right fit for your business.
https://www.inflowstaging.com/signup
Hi, I’ve been trialing the system with my own personal business but I’d like to propose to my employer that we use this in my day job – the one feature I can’t seem to find though is location barcodes. Is it possible to do this with inflow or is the only way to put stock into a location to manually add it there?
Hi Jason, sorry, inFlow doesn’t have a feature specifically for location barcodes right now.
If your locations are barcoded, you can scan them into the Windows or web apps. Just not our mobile apps—you’ll have to pick from a location list).
But I’ve passed your feedback along to our team for consideration.
Thank you for this article… A great help as I am researching barcode information. We have a good size amount of camera and lighting gear here at Minneapolis College that we check-out to students and we need a better online system. Its nice to know this was written by a fellow Photographer!
What would you recommend for a small business that is currently using Quail?Having to key in everything at time of sale/pick up is timely and mistakes are happening too often. I’m looking for a way to implement barcode scanning but need to differentiate between around 10-15 different vendors.
Hey Kathy,
For me to better answer your question could you tell why you need to differentiate between the different vendors for items with the same SKU?
When we pass the items by the barcode reader, the software needs to show us the order ID number which this items belongs to. Let’s say there is 50 orders and we need to find which order this item belongs to. Can inFlow work this way?
Hi Henry,
Thanks for reading. If you were using the inFlow desktop application you could do this in a few steps:
1. First you would open your product page.
2. Then you would scan the item.
3. Check order history for unfulfilled orders.
4. Choose one and open it.
If you’d like to try it out yourself inFlow offers a 14 day free trial with no credit card required. We also have an amazing support team to help you test it out. Just click the button at the bottom of the article to get started.
All the best,
Jared
I have a customer that has been using our blister cards with barcodes for years. We changed the barcode on one product and generated the new barcode. I sent the customer one of the cards with the new barcode and they emailed me that the scanner is not reading it. Help!
Hey Richard,
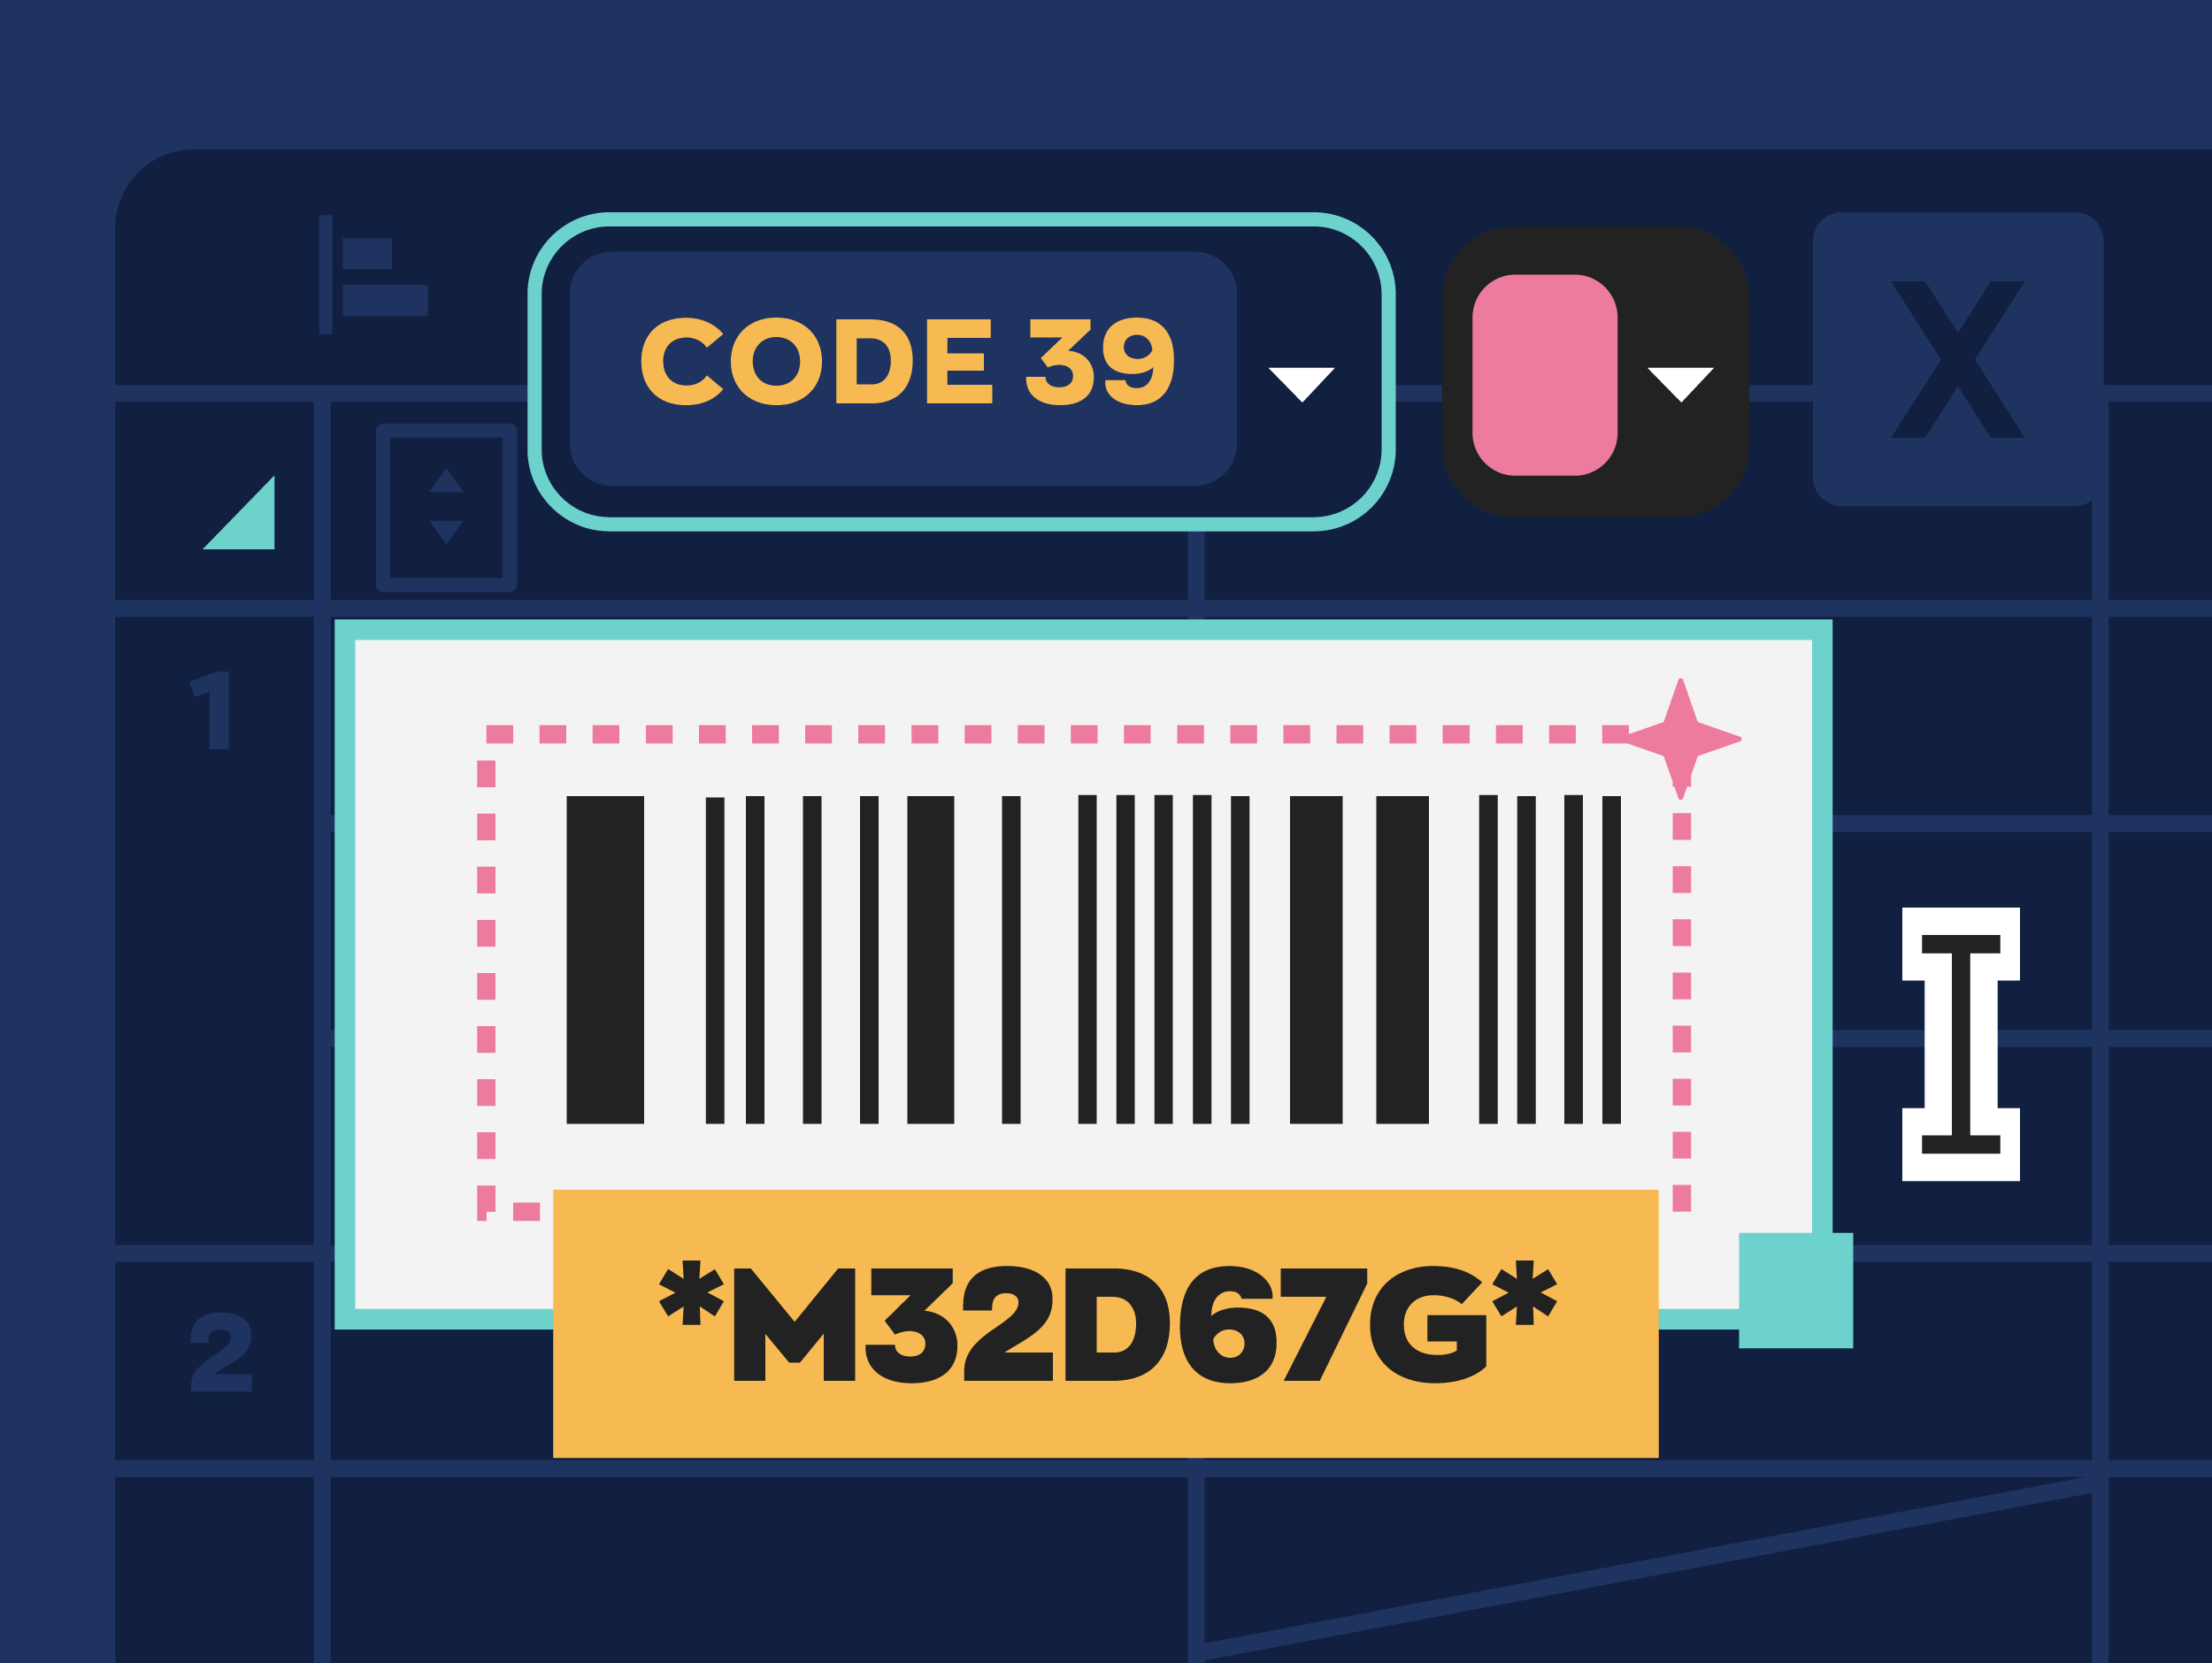
Thanks for reading. I’m sorry to hear about the problem your customer is having with your barcodes. Without knowing more details, it’s hard to know exactly what the solution would be. That being said, if I were in your position, I would test the barcodes myself at my location to ensure they are working. Try testing with two different scanners (if you only have one scanner, you can use the camera on any smartphone as a second one). Also, it’s important to note that scanners may have a hard time reading smaller barcodes usually because printers have a hard time accurately printing barcodes that are so small. I’m not sure what type of barcodes you’re using (Code39, UPC, etc.), but if you’re creating barcodes yourself, such as code 128 of code 39, maybe an asterisk was not used at either the beginning or end of the code.
I hope one of these solutions helps!
Cheers,
Jared
I am a Generator contractor that deals with large quantities of machines, repair parts on service trucks. These items already have barcodes on them from the factory. But I do have other trucks that have oil, filters and spark plugs from the parts store. I just need help keeping up with all of this without a huge amount of trouble and expense per month.
Hey Dale,
From what you’re describing, our software would be a great solution for you. It sounds like your workflow is what we call a “mobile job site.” Essentially rather than storing your equipment and materials at a centralized location, your service trucks are acting as your warehouses. With inFlow, you could set up each truck as a different location and have your technicians/subcontractors use the barcodes (once you’ve set them up in the system) to scan the parts as they use them. Your system would automatically deduct those parts from your inventory levels. You could set reorder points so that when your stock reaches a certain level, you’ll be notified it’s time to order more. We even offer various costing methods to help you track the total cost of materials used. If you want to know for sure whether or not inFlow would work for you, please reach out to our sales team and explain to them what your situation is, and they can advise you whether or not inFlow would work for you. I hope this helps.
Cheers,
Jared