


Company information & logo
It's important to add your company information and logo to tailor inFlow to your business.
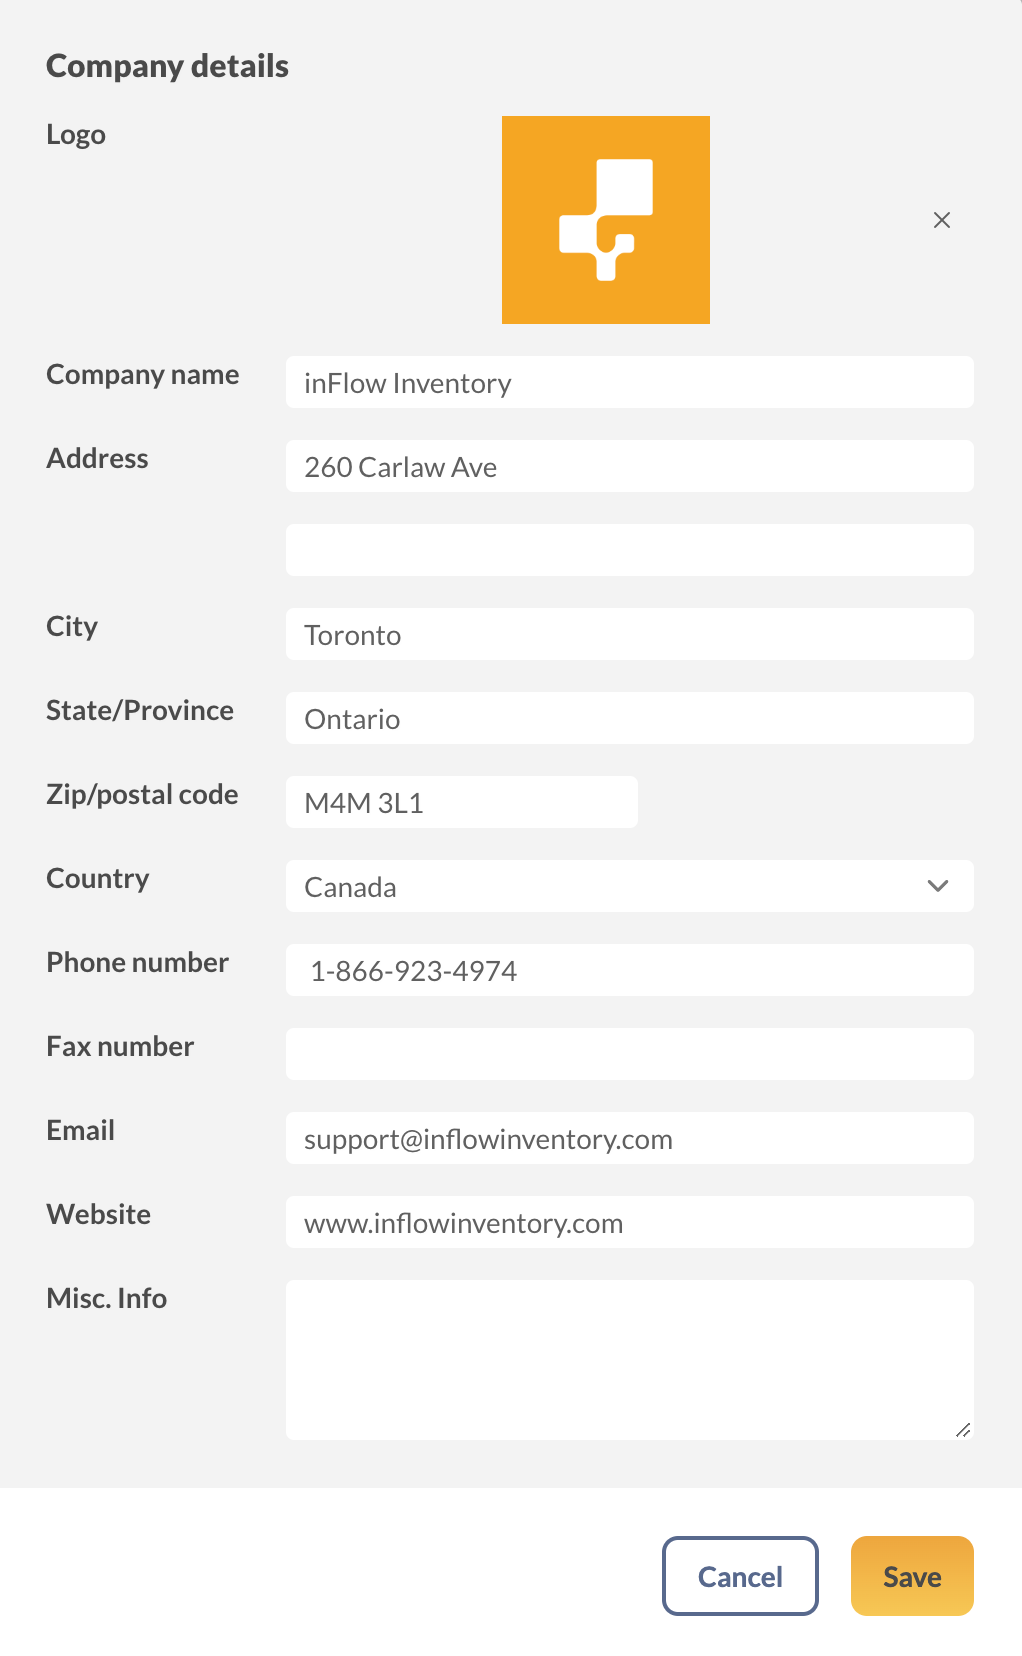
Your company name and address will appear on printed invoices and quotes, so it's essential to set them up to look professional.
- Go to inFlow's Global settings (Main Menu > Settings > Global.)
- Select Company details.
- Click on Select image to add your company's logo. Below, enter the company name, address, and other contact details.
- Click Save when done.
Costing methods
It is vital to track the cost of all your products accurately. By selecting a costing method, you can choose how inFlow will calculate your product costs.
If your company works with an accounting professional, ask them which option to choose. You should choose your costing method before adding products to inFlow.
inFlow can track costs with the following methods:
- Moving average (inFlow's default)
- First in, first out (FIFO)
- Last in, first out (LIFO)
- Manual costing
If you're not sure which one to use, we suggest using the moving average costing method. This option takes an average of your costs from past orders to determine the product costs. Here's an article on how inFlow calculates cost.
Note: changing the costing method can take inFlow a few minutes or several hours to process. Only make this change when your team doesn't immediately need to use inFlow.
To choose or change a costing method:
- Go to inFlow's Global settings (Main Menu> Settings > Global.)
- Click on Costing method.
- Select an option from this list, then click Save. If you decide not to change the costing method, click Cancel.
- If you decide to change the costing method, inFlow will calculate the new costing settings database-wide. Type CONFIRM in the field below, then click Proceed.
- You'll see an Account under maintenance message. When the calculation is complete you'll be able to log into inFlow again.
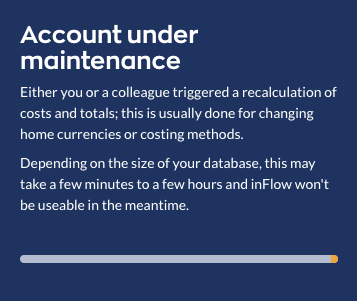
Depending on the size of your database, this might take a few minutes or a few hours.
Locations
It is important to add your locations to inFlow in order to organize your inventory effectively. Even if you only have one location, the name of the location in inFlow should correspond to the name of your physical location. This will make organization quick and easy and reduce confusion.
Note: Your location options will depend on your inFlow plan. Higher-tier plans offer unlimited locations.
- Go to the Inventory settings in inFlow (Main menu> Settings > Inventory.)
- Click on Locations.
- Click on the arrow next to Default location to rename this to the name of your main location. (You should rename this location to the name of a building, not a room within a building, for reordering to work correctly!)
- If you want to add an address to the location, click on +Add address.
- If you have another location, click on the blue arrow to the top left of the window to return to the main location screen.
- Next, click Add location to add another main location to inFlow. To return to the main locations screen, click the blue arrow at the top left-hand corner of the screen.
- Click the star to the right of a location to set that as the default location for inFlow.
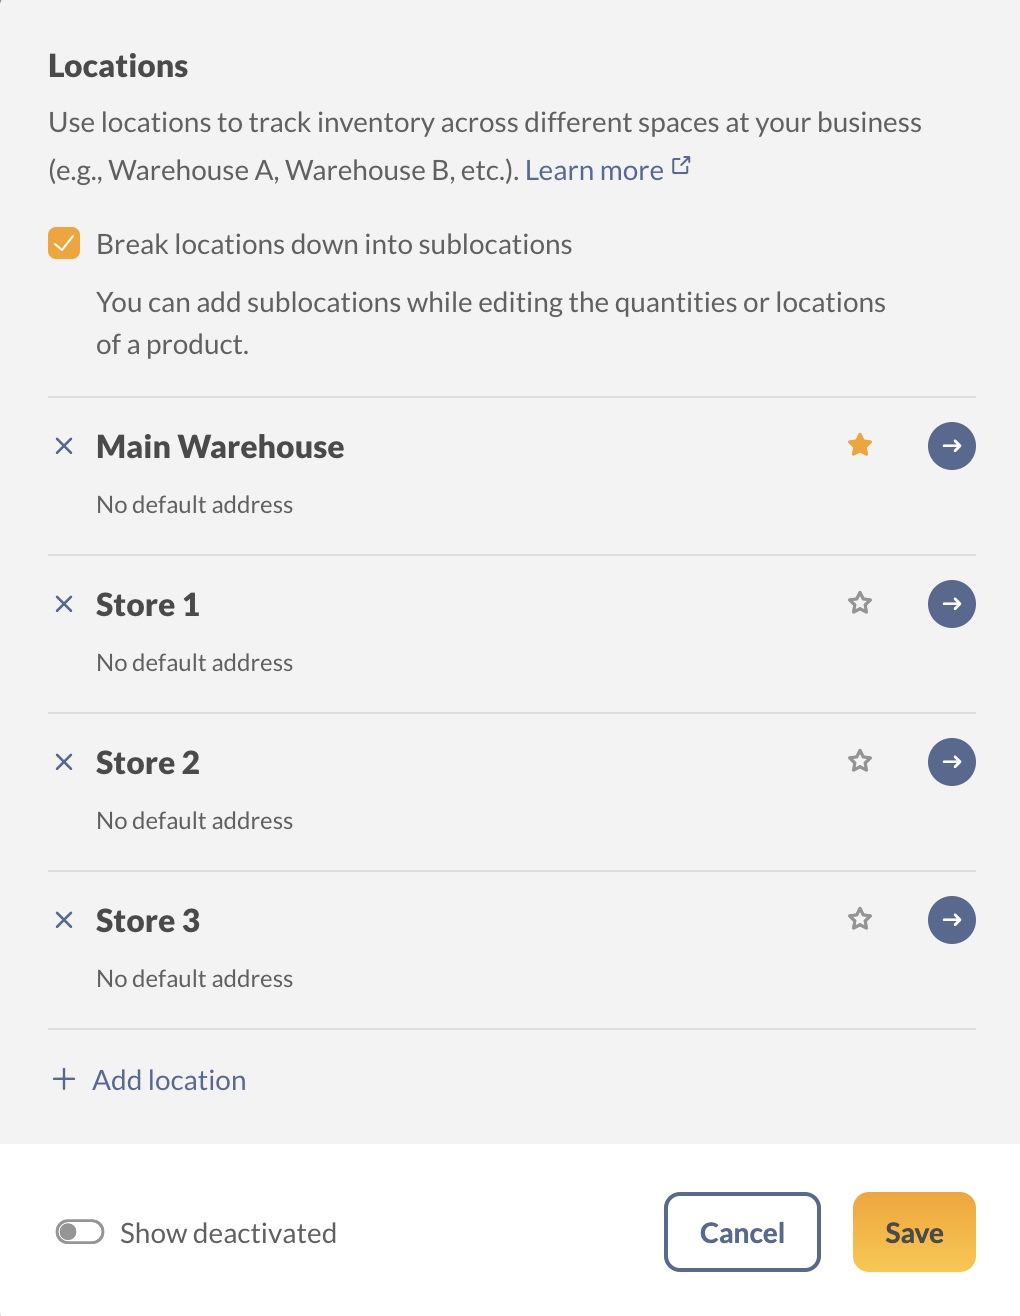
You can add sublocations to your main locations to represent rooms, aisles, shelves, or even bins in your building. To learn more, read this article on tracking inventory in sublocations.
Invite your team to inFlow
In this first step, we’ll go through the steps for inviting your team members to inFlow.
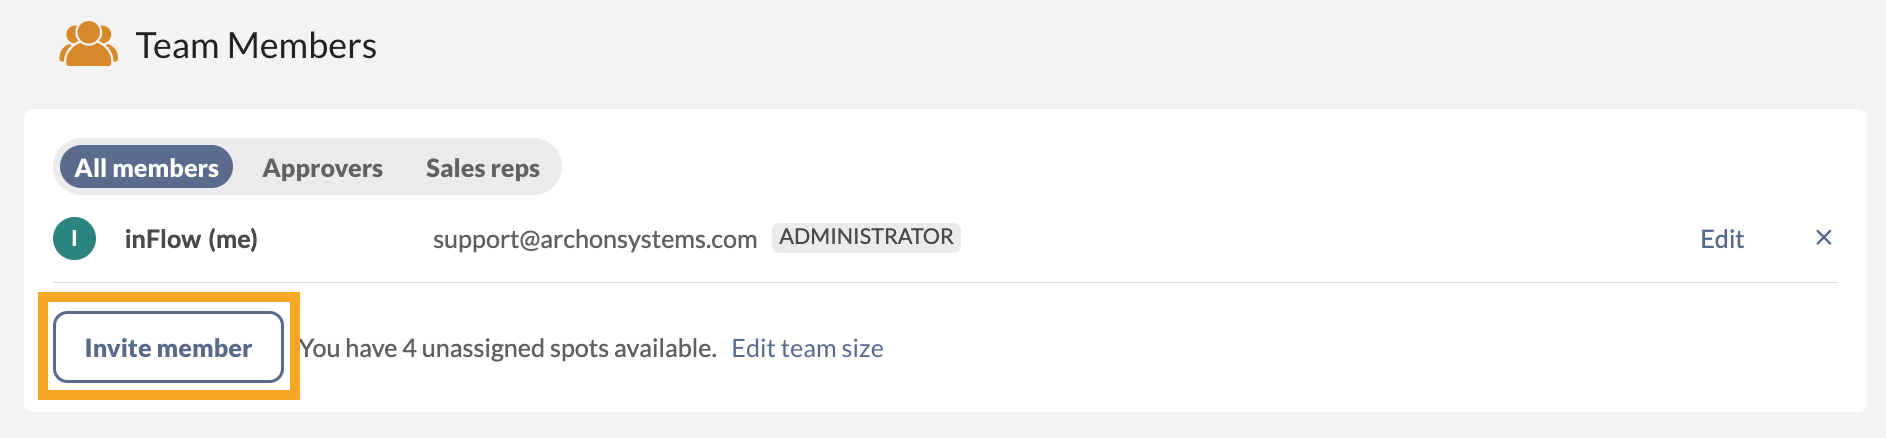
- With an administrator account, go to inFlow’s Team settings (Main Menu > Settings > Team.)
- Click on the Invite member button.
- Enter the email address and display the name of the person you’re inviting, then click Next.
If you want to learn more about managing team members, take a look at this guide.
Setting up team member’s access rights
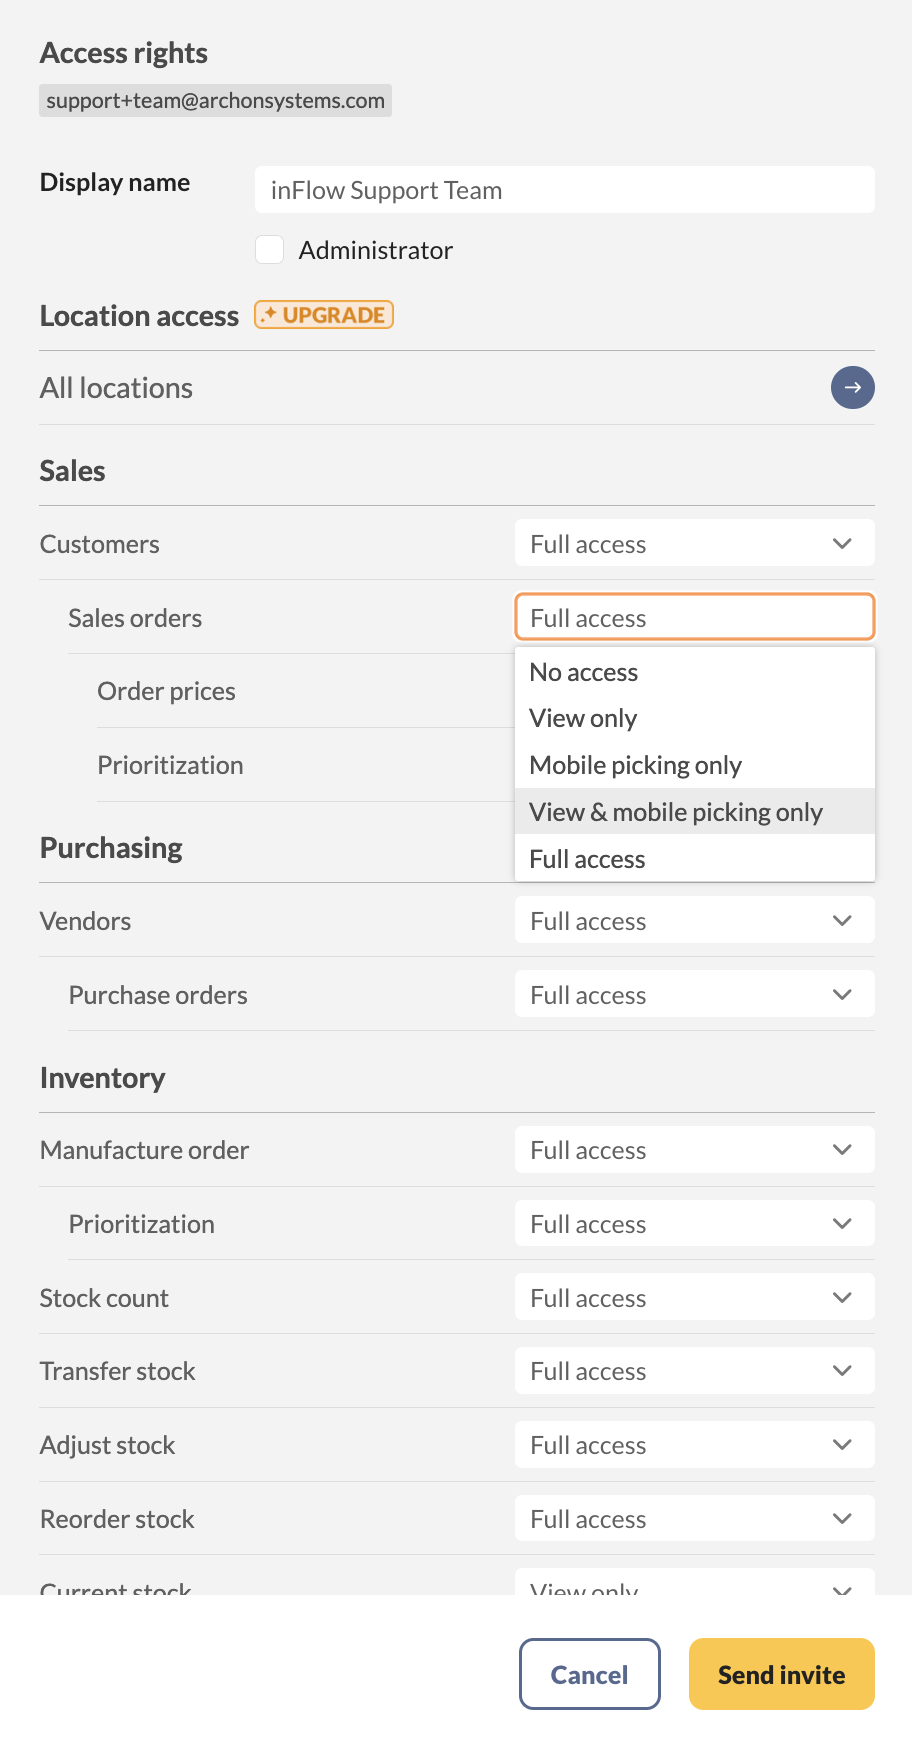
- On this page, you can edit the team member’s access rights for inFlow before you send the invitation.
- Once everything is set up, click Send invite to send the new team member a verification email to log into your inFlow database.
If you’d like to learn more, check out this detailed guide on team member access rights.

inFlow's primary function is to help your team maintain an organized inventory. This guide will walk you through adding products to get your team started with inFlow.
You can create products one at a time by selecting New Product from the inFlow homepage.
But the fastest way to set up products is by importing them from spreadsheets.
Importing data
Importing is the process of taking your product data from a spreadsheet and adding it to inFlow.
There are two basic steps:
- Creating the CSV import file
- Importing the CSV to inFlow
Creating the CSV import file
- Download the inFlow product import CSV template from here.
- Fill out the columns on the CSV spreadsheet with your product information.
- When you're done adding your products to the CSV, be sure to save the template as a CSV file. Now you're ready to import these products to inFlow!
Importing products to inFlow
Once your CSV is complete, you can import your file to inFlow.
- Click on Main Menu > Settings > Import.
- In the Data type drop-down menu, select Product details.
- Select the CSV file from your computer that you'd like to import, then click Next.
- A preview of your import file will appear, letting you know how many products are in it.
- Click on Edit data mapping to ensure that all the data on the CSV matches a field in inFlow.
- The fields below the preview represent fields in inFlow that you need to match to the fields on your CSV. This process is called mapping. Match the inFlow fields listed on the left to the fields in your CSV file that are in the drop-down menus.
- Match the inFlow fields on the left to the fields in your CSV file that are in the drop-down menus.
- Once you're satisfied with the mapping, click Import.
- A confirmation message will appear to let you know your import is in progress. Once the import is complete, the team member who started the import will get an email with the results.
If you want more control over the product information in the CSV file and prefer managing the import product mapping yourself, we suggest exporting a Product Details CSV file from inFlow and using that as a template to import products.
Take a look at the video below to learn more.


Barcoding and SKUs (Stock keeping units) are crucial for efficient inventory management and for ensuring accurate and quick fulfillment. If your products don't have barcodes or SKUs, inFlow can generate them for you.
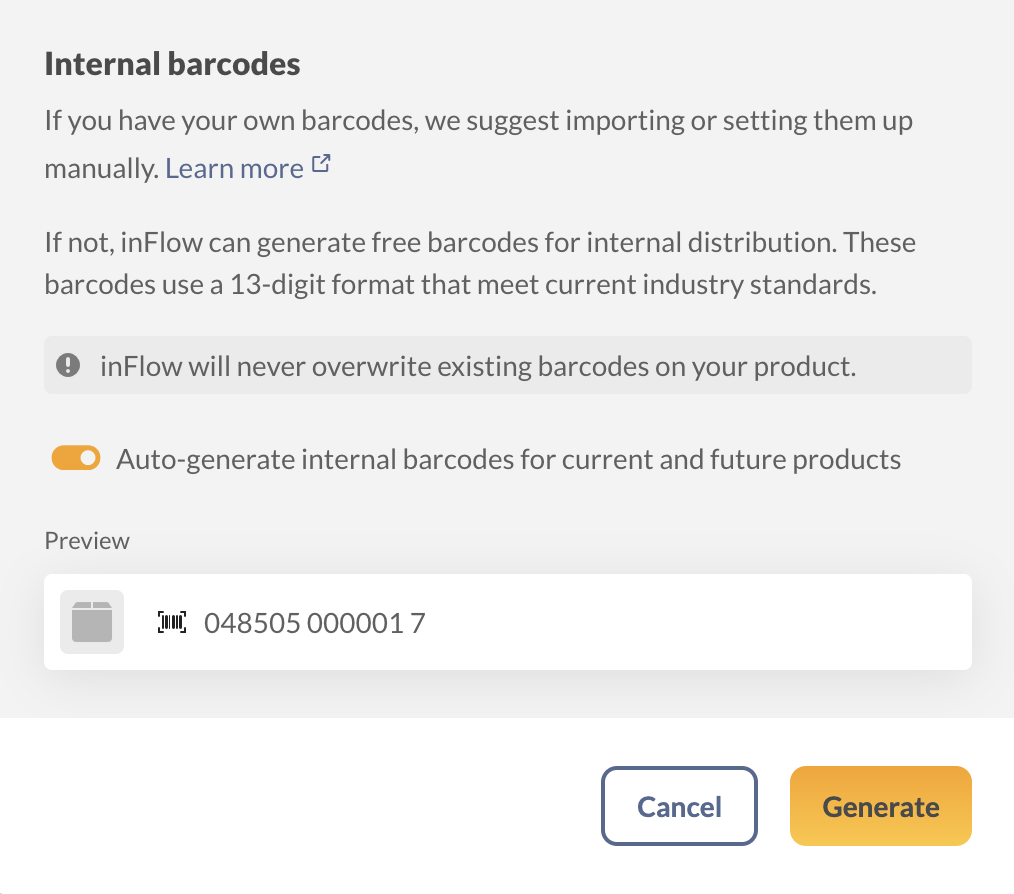
Generate barcodes
Barcodes are a visual representation of the product/item that is usually made with lines and spaces.
Barcodes have two elements: the barcode data, which consists of letters and numbers, and the barcode image, which consists of scannable lines and spaces.
- Go to the Inventory settings in inFlow (Main menu> Settings> Inventory.)
- Under Barcode types, click on Generate.
- Toggle ON Auto-generate internal barcodes for current and future products.
- Click on the Generate button when done.
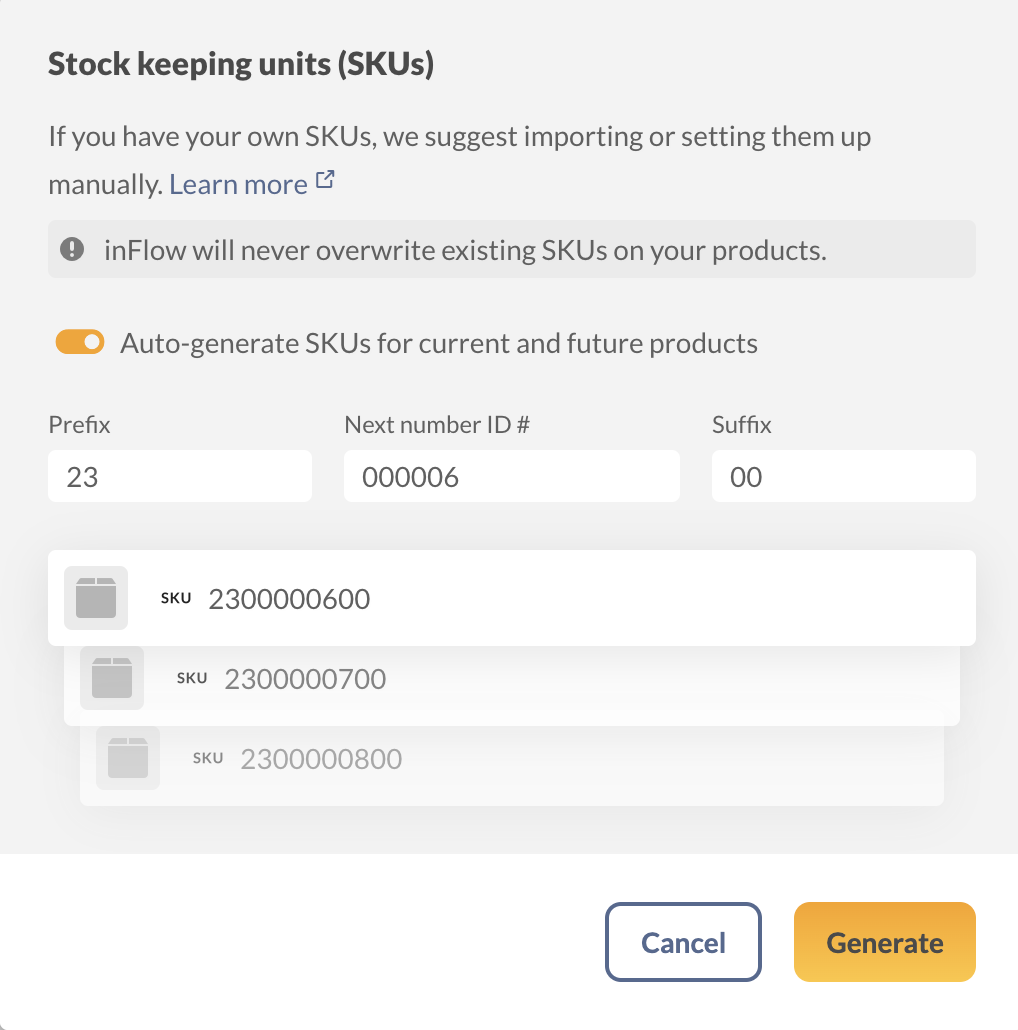
Generate SKUs
Stock-keeping units (SKUs) are your internal codenames for your products. SKUs are often required if you want to connect inFlow to ecommerce sites.
- Go to the Inventory settings in inFlow (Main menu> Settings> Inventory.)
- Select Stock keeping units.
- Toggle on Auto-generate SKUs for current and future products.
- You can set a Prefix, Next number ID#, and Suffix for inFlow to use when generating SKUs.
- Click on the Generate button.


As you continue to set up, you'll want to ensure that your product costs and inventory levels are accurate. This section discusses how to do this.
Like adding new products, you can import product costs and starting inventory levels to inFlow.
Product costs
When importing product details, the cost field on the mapping screen must be selected. This is a built-in safety feature designed to ensure that you are knowingly selecting the cost field during importing and that costs aren't updated when they shouldn't be.
You can change costs with imports when inFlow's costing method is set to manual or moving average. If you mapped the cost field when you first imported products in step 2, then you can skip to the next section of this guide.
Importing costs into inFlow
If your costs are already on a spreadsheet, you can use that to import them into inFlow.
- In inFlow, go to Main Menu > Settings > Import.
- Set the Data type to Product details, then click Next.
- If on-screen, select Edit data mapping in the bottom left-hand corner.
- On the mapping screen, map the Product name and Cost drop-down menus. You can ignore all other fields on-screen.
- Click Import when done. You'll get an email when the import is complete.
If you've selected the LIFO or FIFO costing method, read this article on setting your FIFO/LIFO costs.
Starting inventory levels
To get selling, all your products need to have their stock levels added. You can add all your product stock levels with a stock levels import.
Unlike the product details CSV, for the stock levels import, you only need three mandatory columns:
- Product name
- Location
- Quantity
You also have the option to add the following columns:
- Sublocation
- Serial number
If you have a file with the above columns, then you can proceed to the section called Importing stock levels to inFlow. If you don't have a file, this next section will guide you on how to create a stock levels template.
Creating the Stock levels CSV template
If you don't already have a spreadsheet with your stock levels, inFlow can create one.
- Click on the Main Menu > Export.
- From the Data type drop-down menu, select Stock levels.
- Click Export.
From here, you can input the quantities from the exported CSV file. Since inFlow generated this file, importing it into inFlow won't require field mapping.
Importing stock levels to inFlow
If you have your import file ready, read on how to import it to inFlow.
- Click on Main Menu > Settings > Import.
- In the Data type drop-down menu, Stock levels.
- Select the CSV file from your computer that you'd like to import, then click Next.
- A preview of your import file will appear, letting you know how many products will be imported.
- Match the inFlow fields on the left to the fields in your CSV file that are in the drop-down menus.
- Once you're satisfied that all the fields you need match, click Import.
- A confirmation message will appear to let you know your import is in progress. Once the import is complete, the team member who started the import will get an email with the results.


Now that you have your products and starting inventory levels in inFlow, it's time to set your prices. In this section, we'll go over how to add them to inFlow.
Pricing schemes (special pricing)
Pricing schemes are options you have when selling to your customers. These can be different currencies or prices. Examples of pricing schemes are retail price, wholesale price, sale price, etc.
You might have noticed there's a "Normal price" in inFlow by default. This is the price you regularly sell your products for. You can rename this to a term your company uses more often.
We don't recommend adding more than 50 pricing schemes to inFlow. Since this can impact the speed and performance of inFlow.
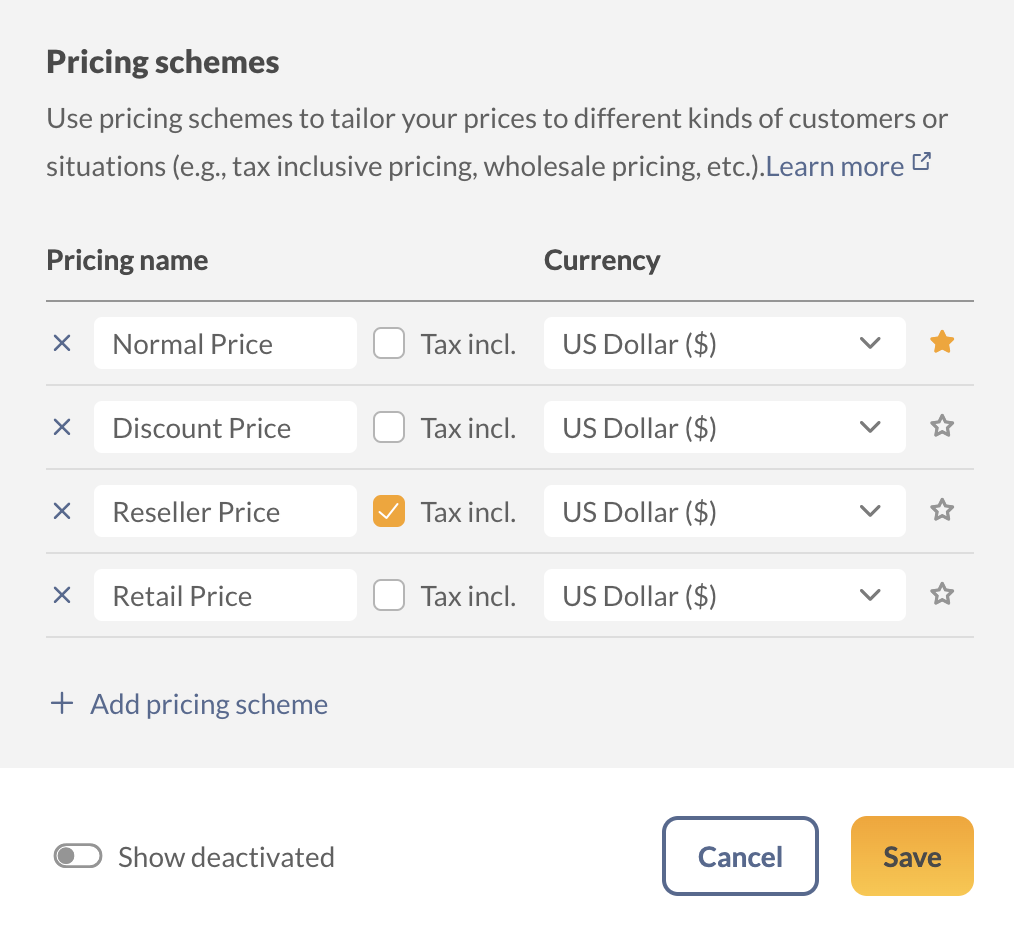
Adding new pricing schemes
- Go to the Order settings in inFlow (Main Menu>Settings>Orders.)
- Click on Pricing schemes.
- If you want, rename Normal Price to what your team usually calls your regular price.
- To add additional prices, click on Add pricing scheme and enter the name of the pricing scheme.
- If needed, add a checkmark in the Tax incl field. This means the prices on orders include the tax.
- Next, select the currency of the pricing scheme.
- Select the star icon next to the pricing scheme that should be the default in inFlow.
- Click Save when done.
Updating pricing for multiple pricing schemes
Once you've created pricing schemes, you can add different prices to your products with a CSV import.
Here are the complete steps to import multiple pricing schemes.
Taxes
Taxes are required to be paid in most countries. You'll want to make sure you've added the correct taxes to charge your customers. And for you to pay those taxes when you buy from vendors.
Adding taxes into inFlow before getting started is a good way to ensure your team is organized and ready for potential audits.
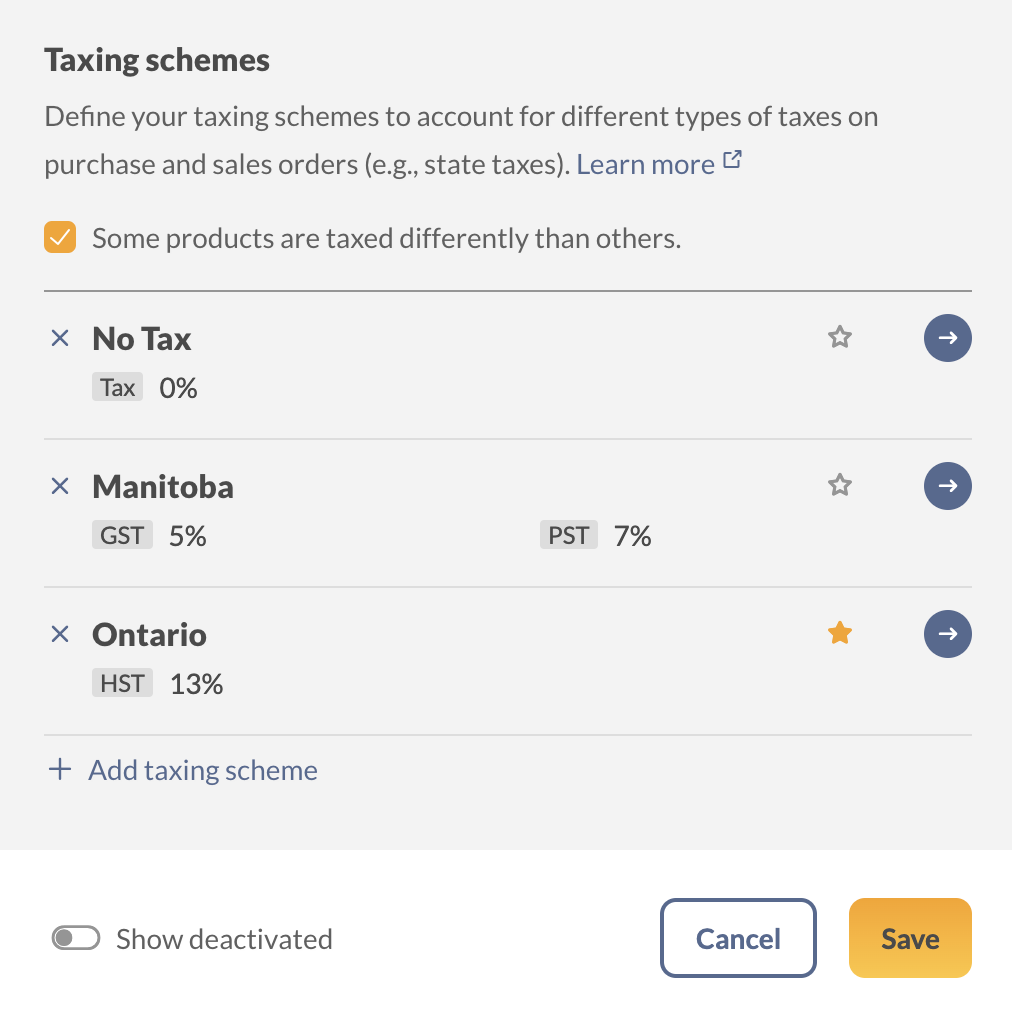
Adding taxes to inFlow
- Go to the Order settings in inFlow (Main Menu>Settings > Orders.)
- Click on Taxing schemes.
- By default, "No tax" will be set. Click on the blue arrow next to this tax to edit it.
- You can change the name in the Taxing scheme name field, along with the rest of the information on the screen.
- If you don't have more taxes to add, click on the Save button. If you have more taxes to add, click on the blue button arrow at the top left of the tax screen.
- You can add more taxes by clicking on the Add taxing scheme button at the lower left-hand corner of the tax screen.
- Click Save when done.
If some products have special rates or are tax-exempt, you can set that up, too. You'll need access to inFlow Inventory for Windows to set this up. Here's how to tax some products differently on one order.

0 Comments