inFlow Pay: Accepting payments in inFlow
Along with selling on your online stores, inFlow can also receive payments from your customers through the Online Showroom and emailing/sharing invoices.
Please note: This feature is only available for businesses located in the USA and Canada.
Setup
Here’s a one-minute overview of how inFlow Pay could help your business.
We’ve partnered up with Worldline (previously Bambora) payment processing to make things easy for you. Take a look below for all the details.
At the moment, this feature is only available for inFlow accounts that have their businesses legally registered in the United States and Canada.
We do apologize for the inconvenience. If you use another currency, please let us know. We’ll be sure to record that feedback for future consideration.
Creating your Worldline account
As mentioned, this feature is only available in USD and CAD for businesses registered physically in the United States or Canada. For this feature, the currency your bank account typically uses should be what you select when you’re setting up inFlow Pay. From these two currencies, inFlow Pay will accept payments from Visa, Mastercard, and American Express (AMEX)*.
*If you’re a Canadian based company that uses USD, only Visa and Mastercard is available.
This doesn’t mean customers outside of the United States and Canada aren’t able to purchase from you. If a customer in another region pays you with inFlow Pay, then their credit card will be charged in the currency you’ve set your Worldline account to, and their credit card company will calculate the exchange rate.
Worldline account setup
- Go to app.inflowinventory.com/options/orders.
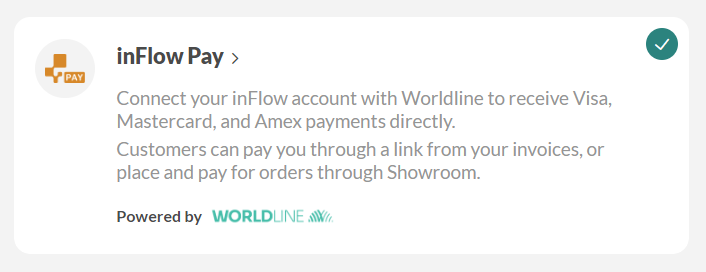
- Click on inFlow Pay.
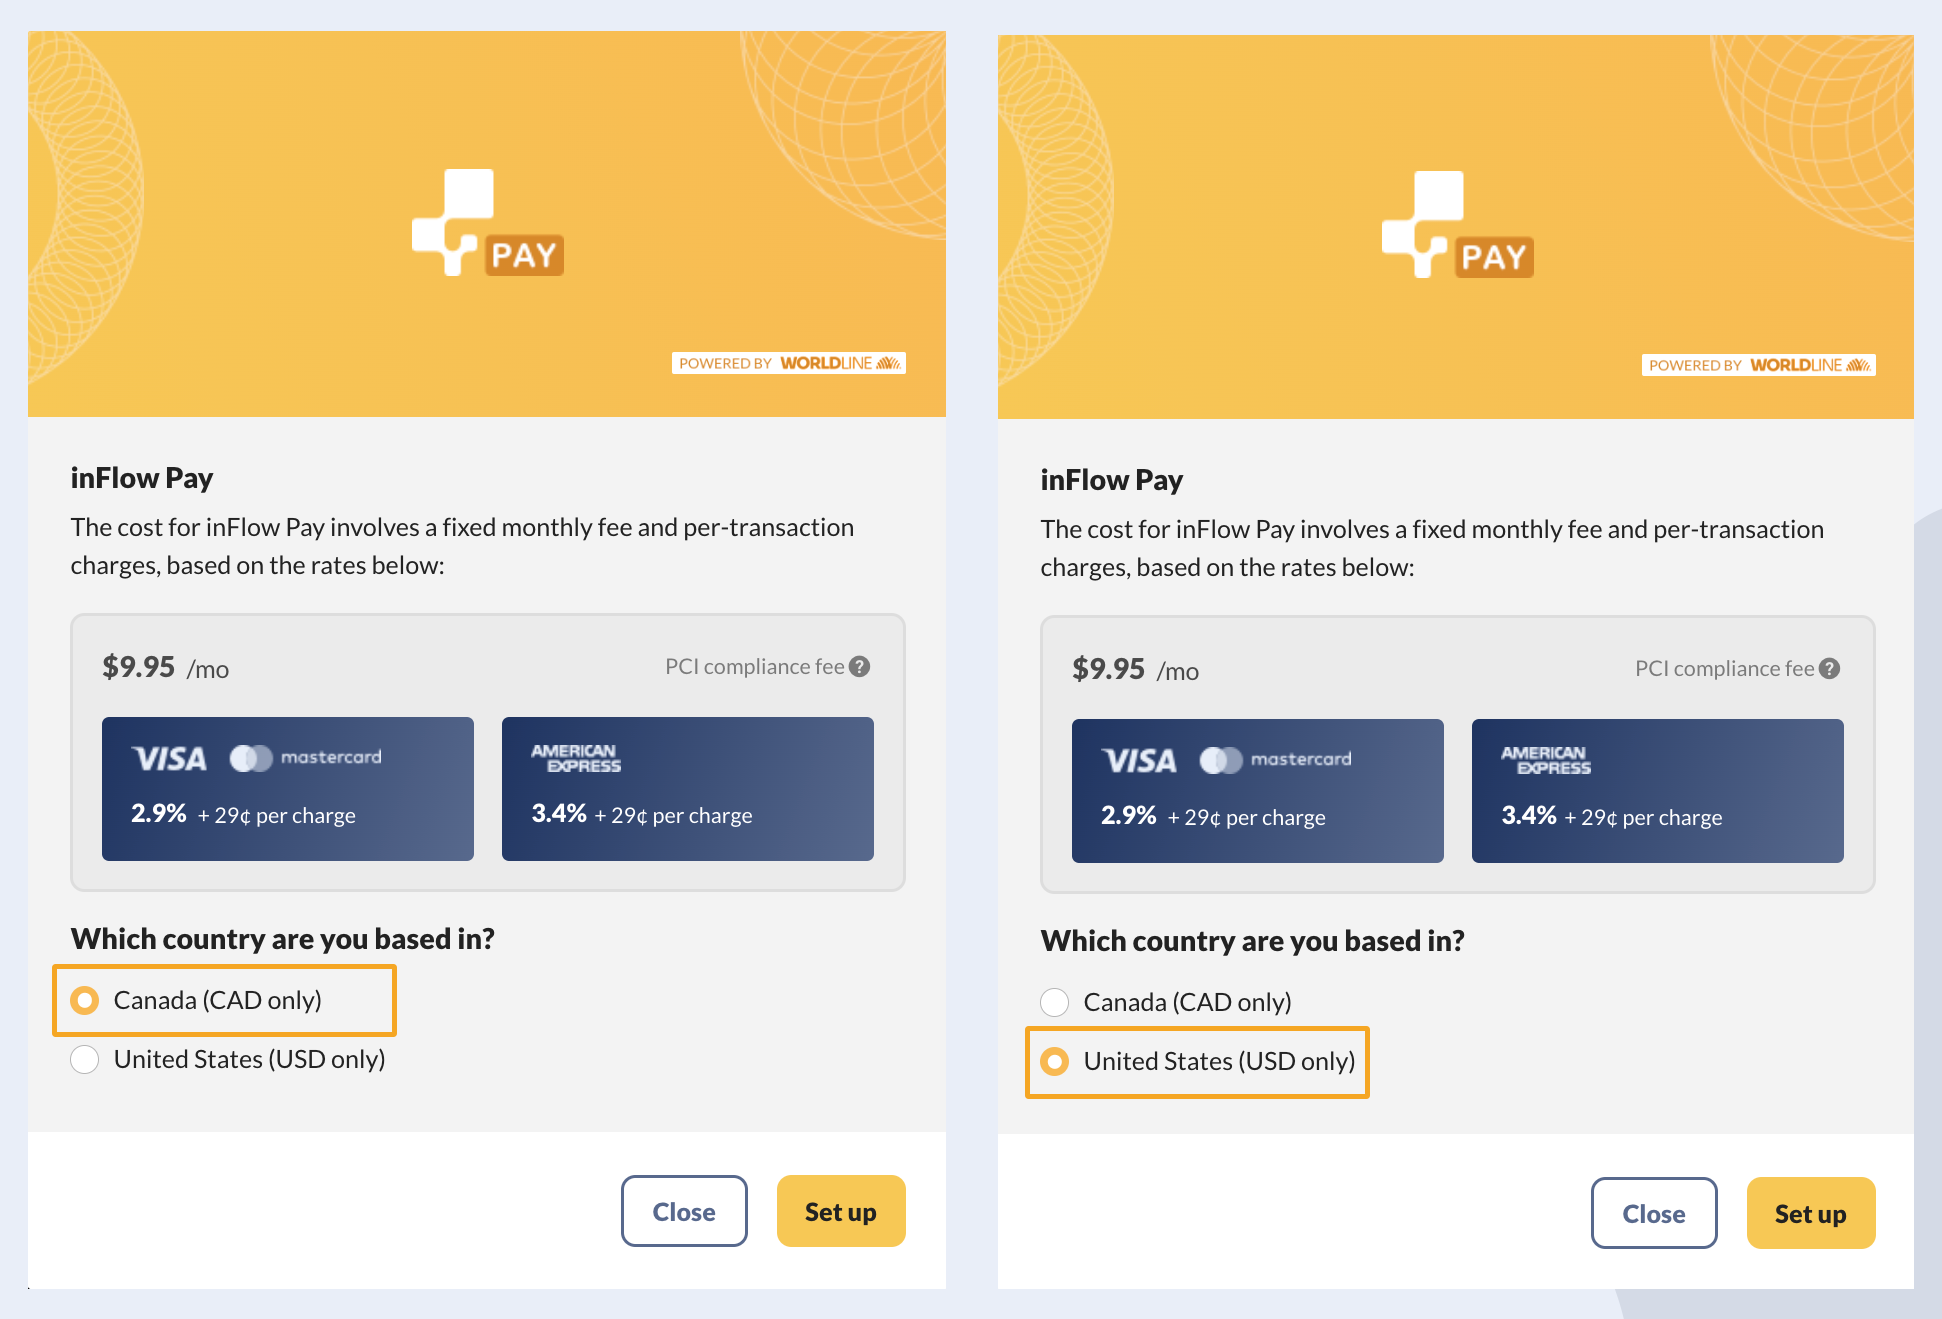
- Select the country you’re based in, then click Set up.
- You’ll be redirected to Worldline’s website for you to create your Worldline account based on the country that you’re located in. If you’ve selected the wrong country by accident, please start again from Step 1
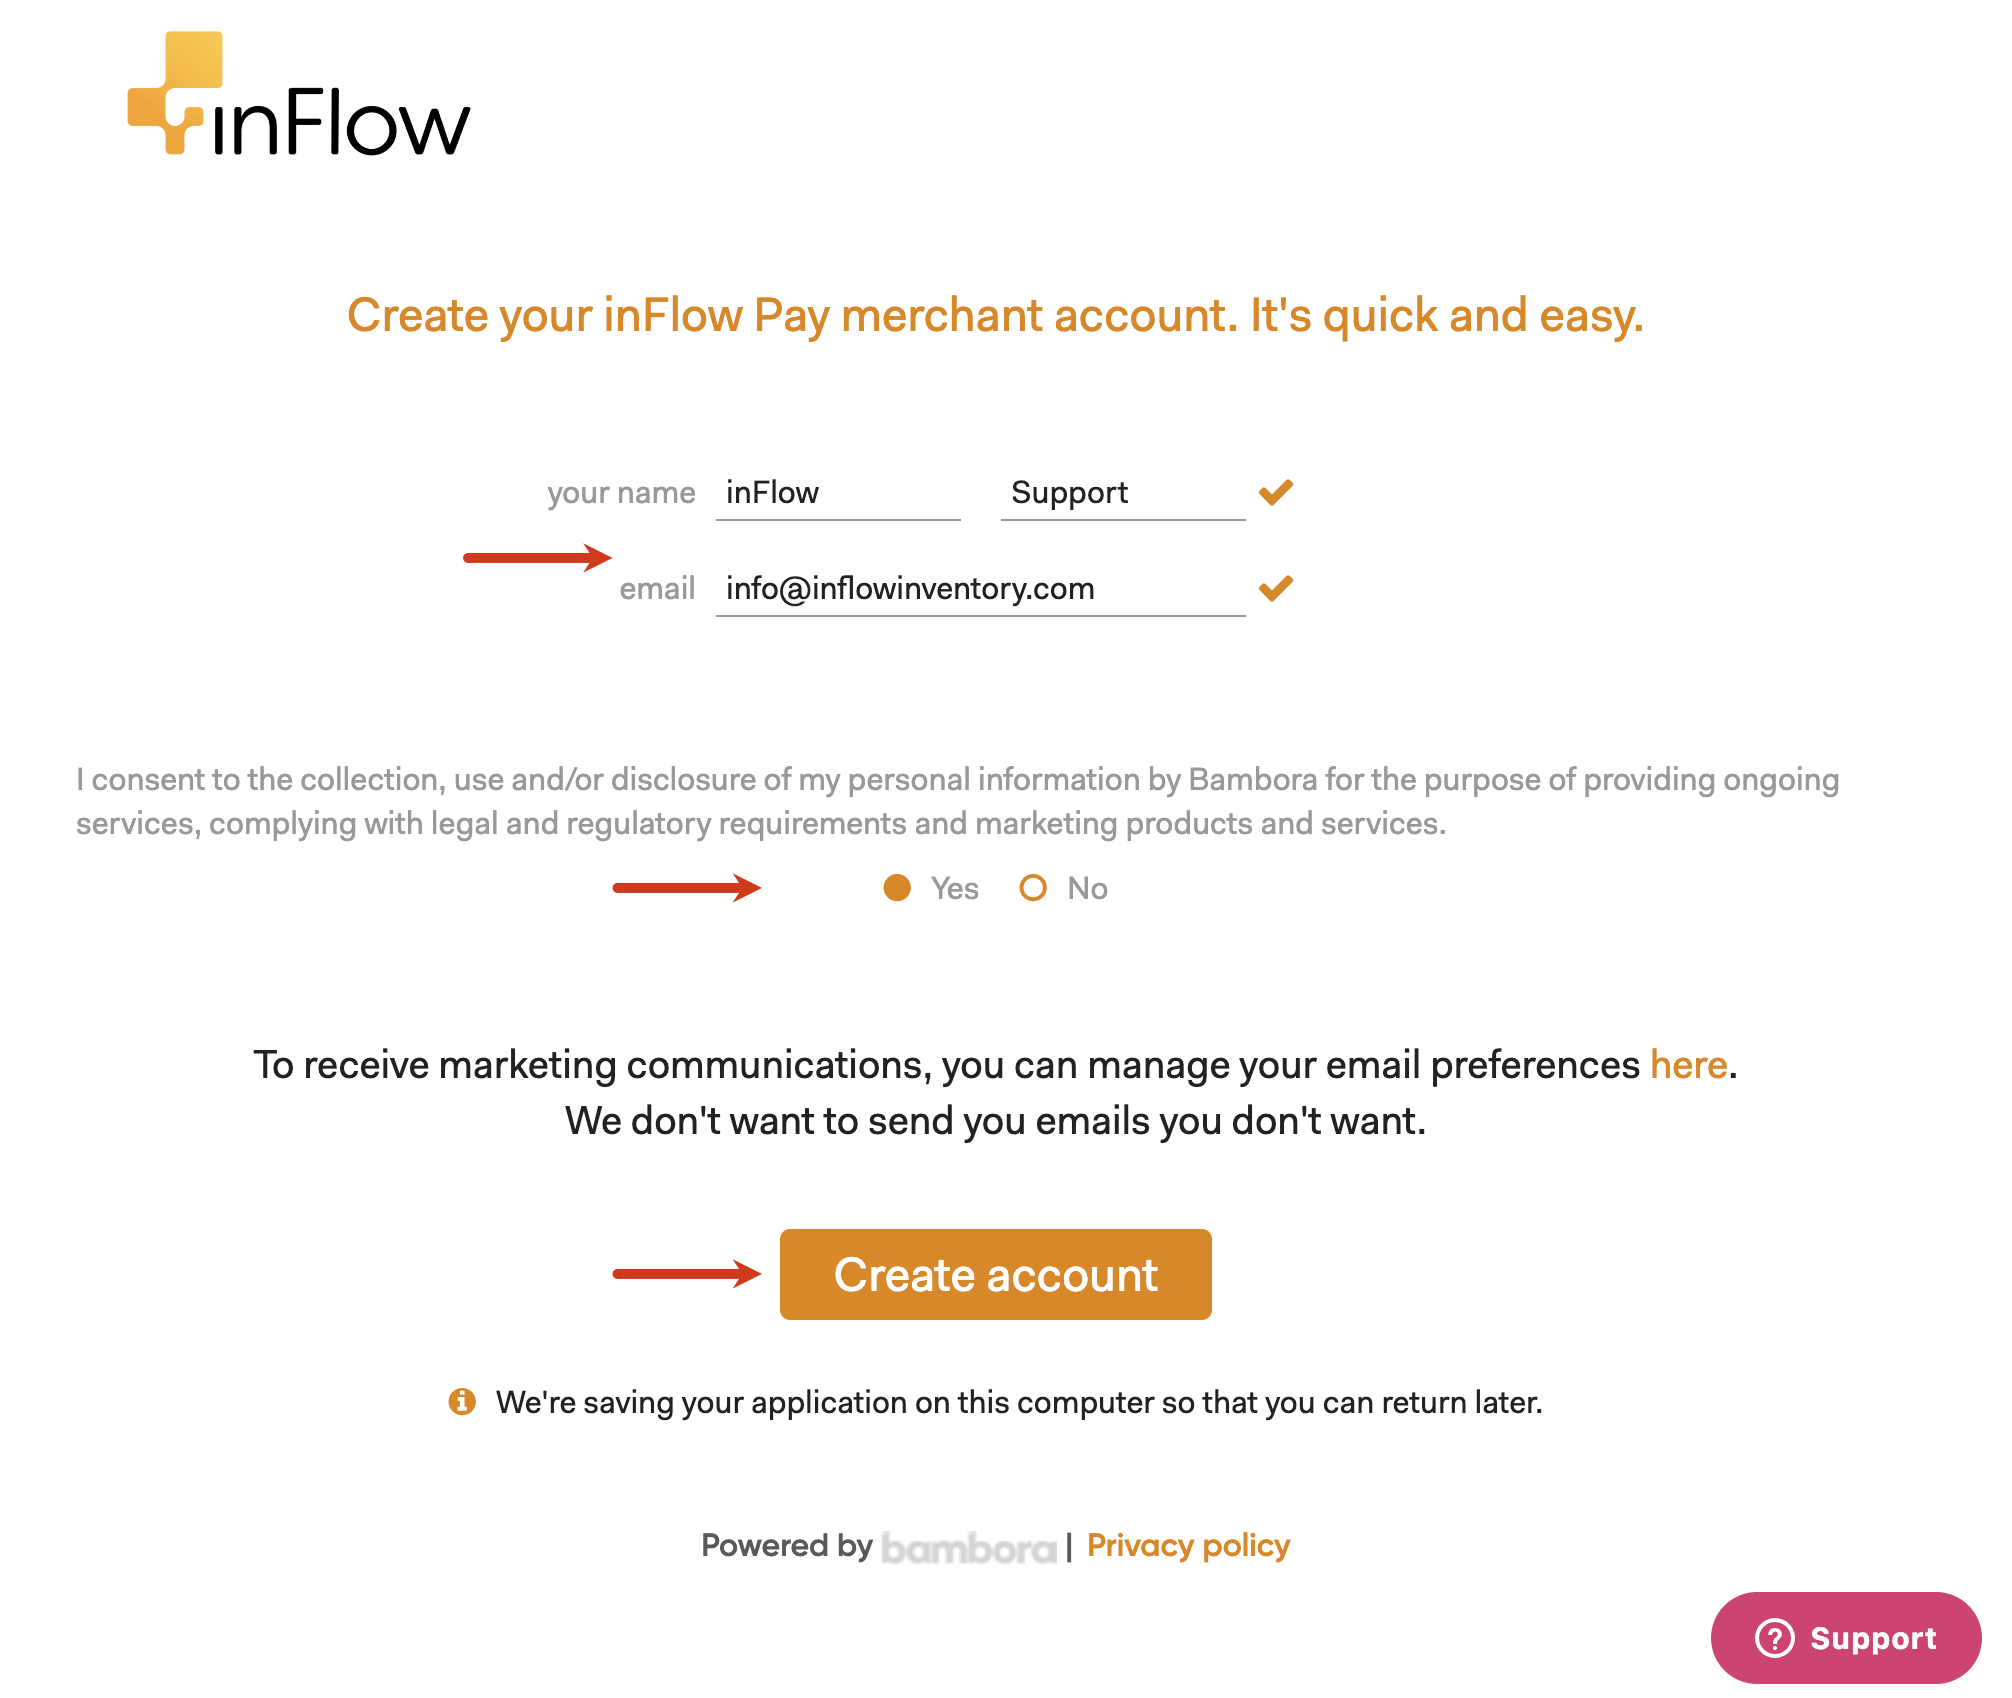
- On the account creation page, simply fill out your full name and your email address. Then click Create account.
Once you’ve finished registering for a Worldline account, your Worldline rep will email you within 1-2 business days. They’ll also email the inFlow Community and Support team so that we know you’ve set up payment processing on your inFlow account.
If there is any trouble creating your account, Worldline will email you and CC the inFlow team so we can work together to get your account active.
During the signup process, you’ll need to fill out personal information such as a social security number / social insurance number. This is part of Worldline’s “Know your customer” policy (KYC) to help fight against fraud and money laundering. For more on this take a look here.
- Once your account has been set up, go back to inFlow.
- You’ll now see an Edit settings button instead of the previous Set up button. This is where you can turn off the inFlow Pay option on your emailed orders in inFlow.
This setting won’t turn off inFlow Pay for the Online Showroom. You can learn how to change the Showroom inFlow pay settings from here.
Going live with Worldline (US customers only)
For US customers, Worldline connects new accounts to a test mode where credit cards cannot be processed. To proceed, check your emails and inform Worldline when you are ready to go live.
Accept payments from emailed invoices
Once inFlow Pay is set up, you can email your customers invoices, which will include a payment option so they can pay you immediately!
The option to allow customers to pay through your emailed invoices will be automatically enabled as soon as your account has inFlow Pay.
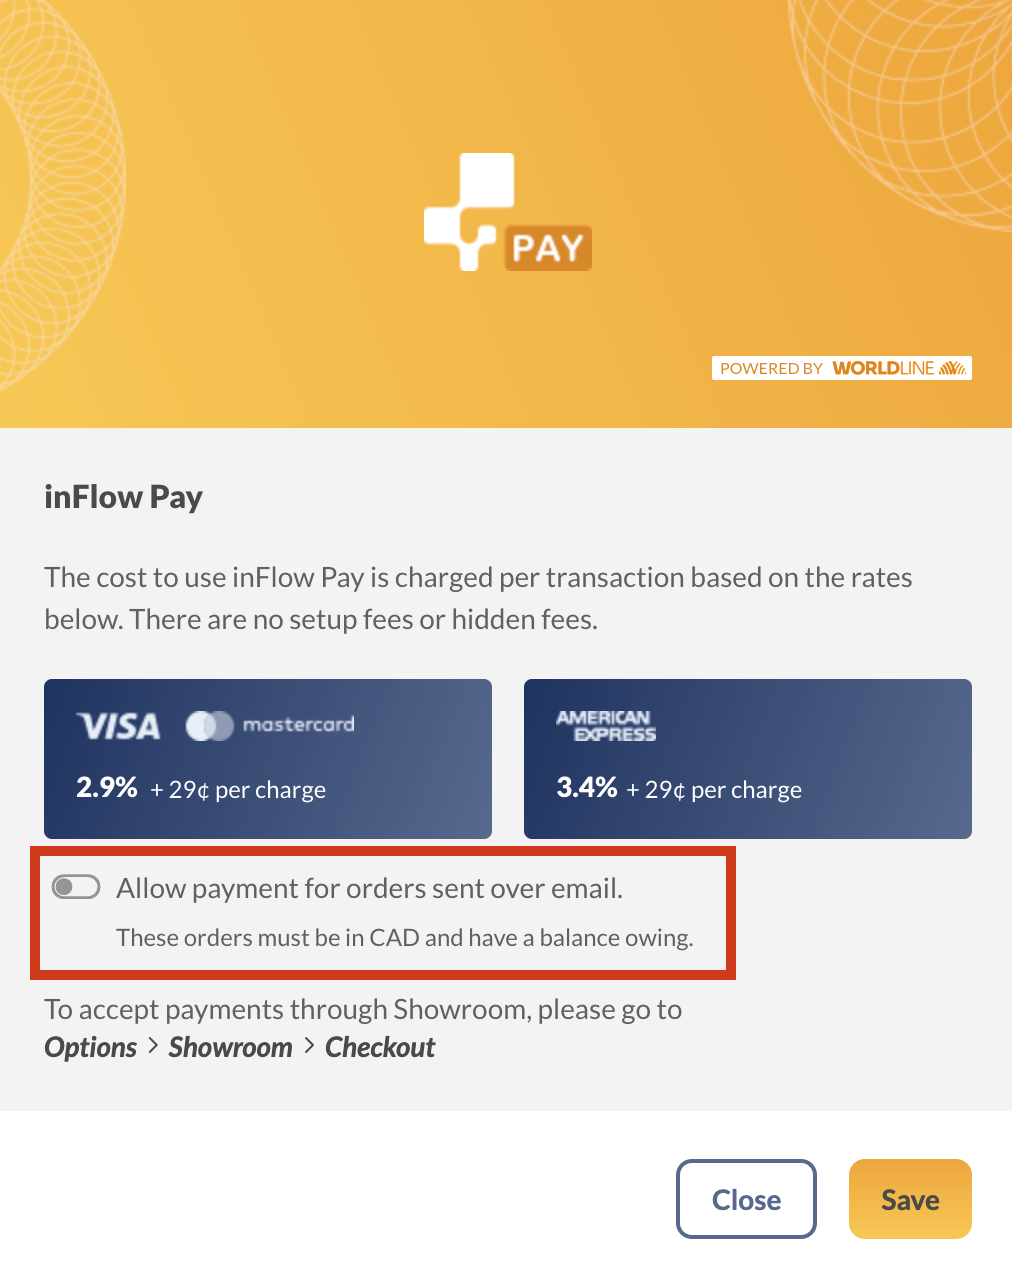
If at any time you wish to disable inFlow Pay from your invoices:
- Got to https://app.inflowinventory.com/options/orders.
- Click the Edit settings button.
- Toggle the Allow payment for orders sent over email setting.
Emailing invoices from inFlow Inventory for Windows
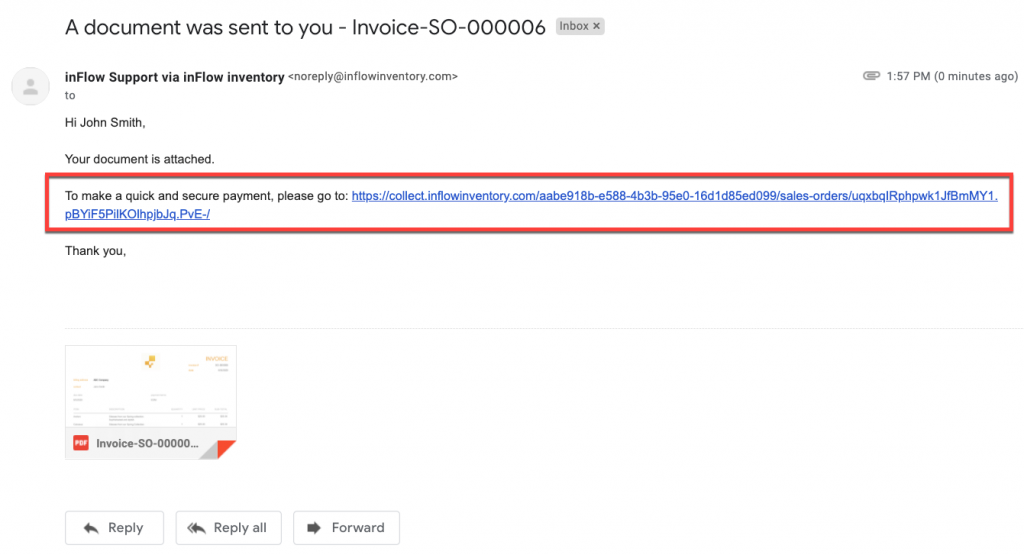
When you send an invoice from inFlow Inventory for Windows, a link will be included in your email (along with the invoice attachment) for your customers to pay for the order.
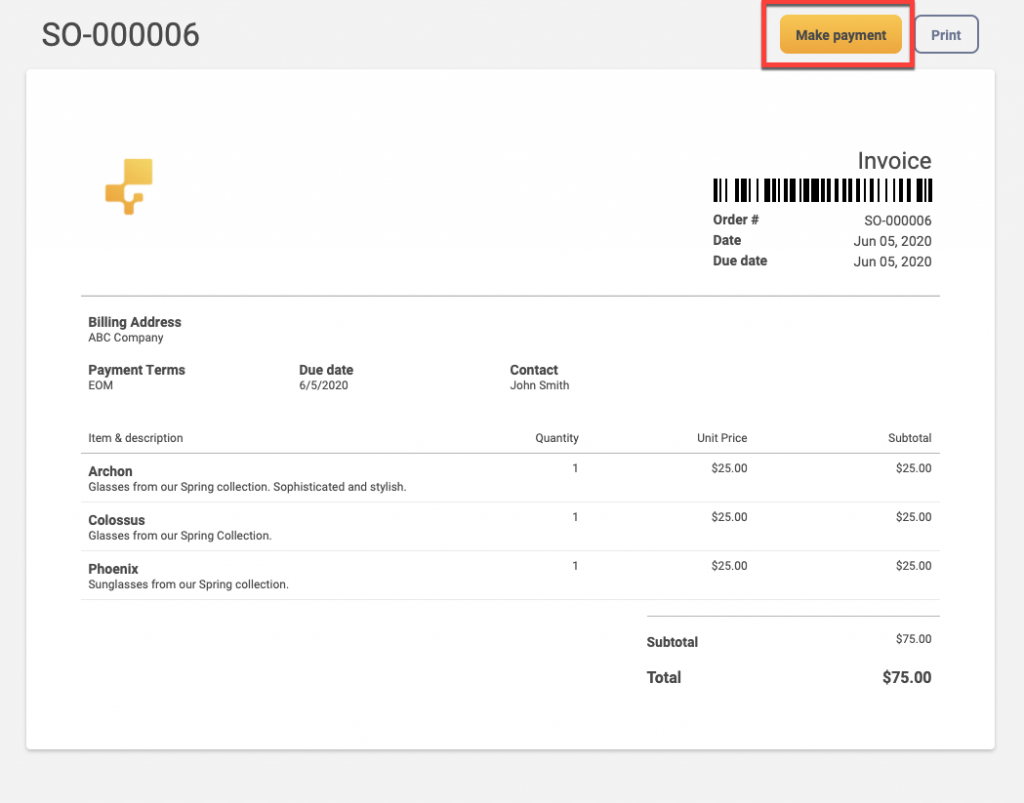
Invoices sent from inFlow Inventory for Web and Mobile will include a Make Payment button at the top right-hand corner of the invoice. Only invoices with an outstanding balance will have the Make Payments button available.
How to accept payments with the Online Showroom
Customers who order from your Online Showroom can now make payments as soon as they place an order. To accept payments from Showroom orders:
- Log in to the Showroom settings (Main menu> Options > Showroom).
- Under “Checkout,” click the “Edit checkout settings” button.
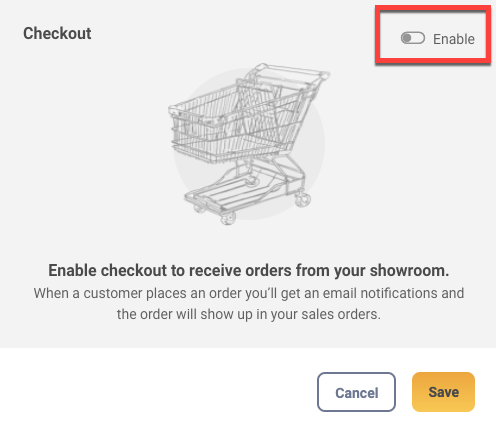
- For customers to place orders from your showroom, toggle on ‘Enable’ if it is not already activated.
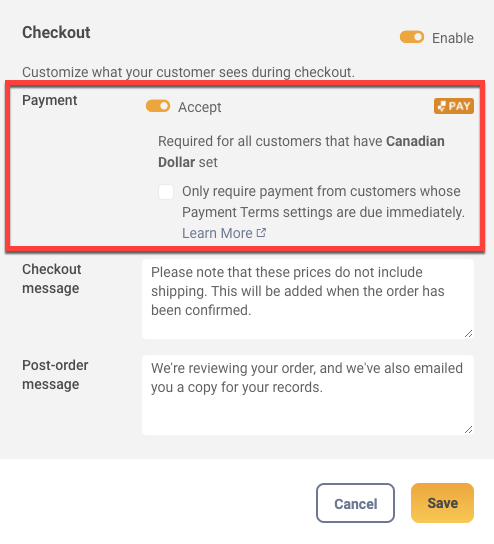
- Next to Payments, toggle on Accept to enable inFlow Pay for the Online Showroom.
- The “Only require payment from customers whose Payment Terms settings are due immediately” is an option you can turn on to exclude any customer that has a payment term set on their inFlow customer record (for example, paying net 30/30 days due). With this setting active, only customers who have the ‘0 Days due’ setting have the option to make an immediate payment. For more information on payment terms, please refer to this link.
- Edit and review the Checkout message and Post-order message, then click Save when done.
If checkout is enabled, but you’ve toggled off Accept to use inFlow Pay to receive payments, your customers can place an order without seeing the payment options. This will allow your orders to be sent to inFlow for you to fulfill and accept payment outside of inFlow Inventory.
Viewing orders paid with inFlow Pay
When orders have been paid with inFlow Pay, you can view the payment details by looking at the Payment Methods screen of your sales orders.
inFlow for Web & Windows
- Open an order paid via inFlow Pay.
- Click on the Paid link at the bottom right side of the order.
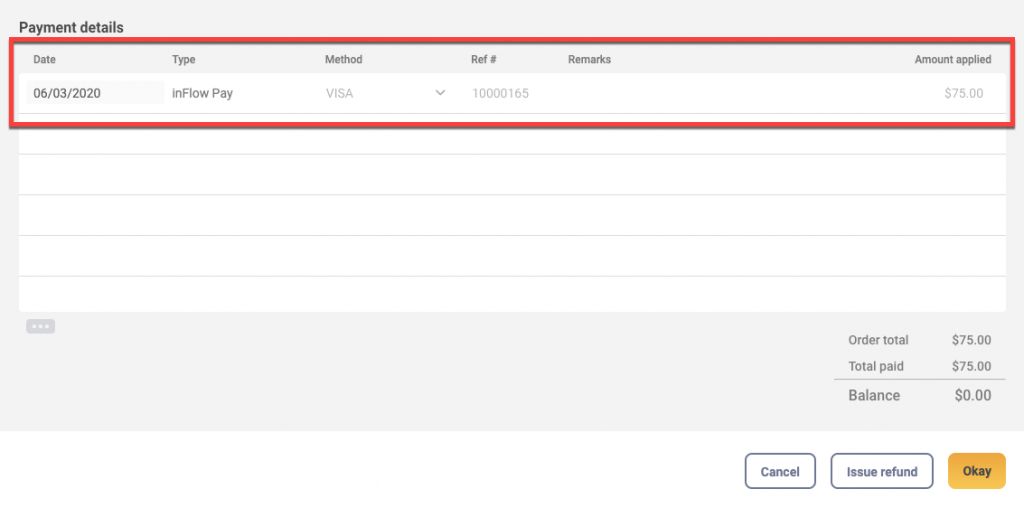
- You will notice that the payment from your customer is listed.
inFlow Inventory for Mobile
- Open a sales order.
- Scroll down to Total. Then tap on History.
- You will now see the payment.
When viewing the payment made with inFlow Pay, you’ll notice that most of the details are greyed out and unavailable for editing. This is not a mistake – transactions shouldn’t be modified since funds have already been processed for your sales orders. If you’d like to make any changes to the payment, such as requesting a refund, you’ll first need to log in to your Worldline account to make the changes there. Once done, record the changes you made in Worldline onto the related inFlow order.
Using Worldline
How to find inFlow orders in Worldline
If you’d like to review your orders in Worldline, please see the steps below.
- Go to the Worldline online portal.
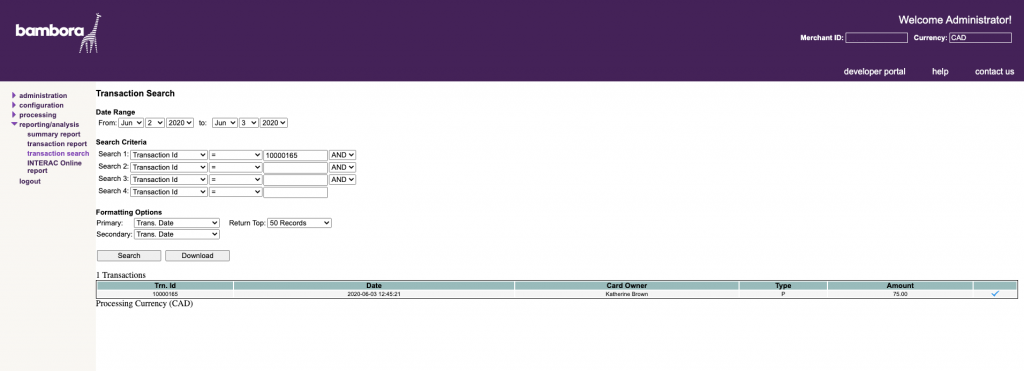
- Click on Reporting/analysis > Transaction search.
- You can search for orders within a specific date range or find specific orders using the Search Criteria.
- To locate a specific order from inFlow, use the Ref# from the Order Payment Methods screen. Use that number in the Transaction ID field.
- Next, click Search.
- Your results will show in the Transactions table, which loads below the search criteria fields.
I want to process a refund or make changes to an inFlow Pay payment
Sales orders that require changes, such as refunds, must be made directly on the Worldline and payment processing website. Unfortunately, changes made in Worldline don’t sync back to inFlow. Therefore, please ensure that you edit the sales order in inFlow immediately after making changes in Worldline.
- Go to your Worldline account.
- Click on Reporting/analysis > Transaction search.
- Enter the Ref# from the Sales Order Payment Method screen into the Transaction ID search fields to find a specific order.
- Click Search.
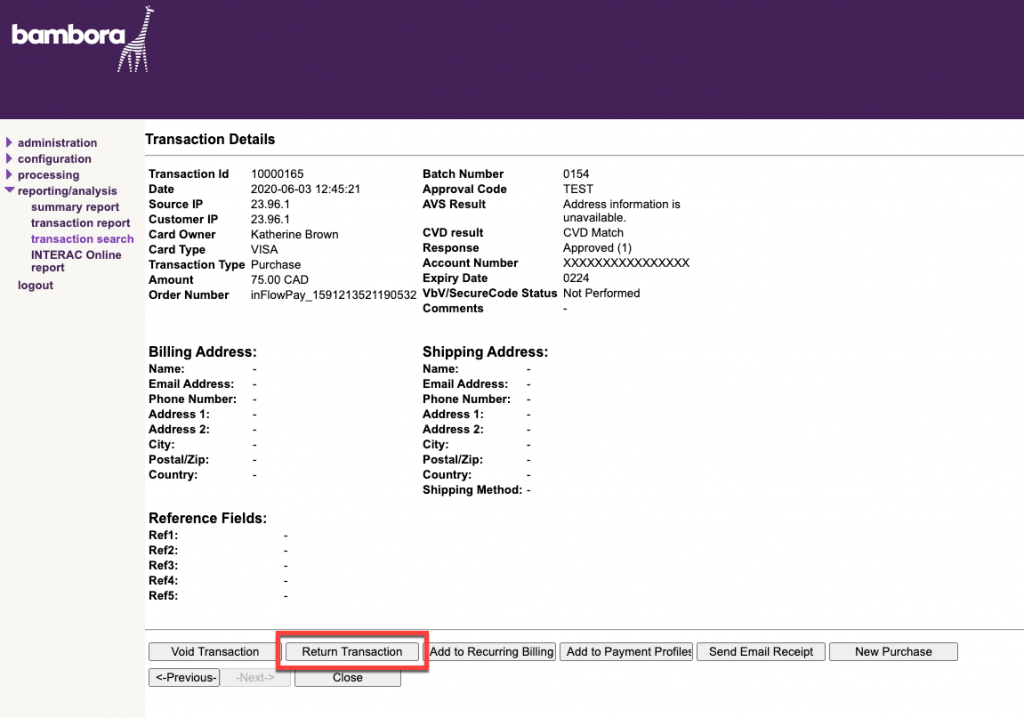
- When the order you’re looking for is listed, click on it from the table below.
- Click the Return Transaction button, then enter the amount you’re returning to the customer, and then click Process.
- Once you’ve made your changes in Worldline, open inFlow and duplicate these changes to the related sales order.
When should I void a transaction?
When your customer pays an invoice with inFlow Pay, there is a 24-hour delay between when the credit card is charged and when the payment is processed. If your customer contacts you within 24 hours of making a payment, you can void the transaction, which will cancel this order in Worldline. Once that’s done, open inFlow and cancel that order to match inFlow with your Worldline changes.
FAQ
Who is Worldline?
Worldline is our payment processing partner, which will handle the funds between your customers and make the deposits to your company’s bank account.
Why do I have to go through Worldline to use inFlow Pay?
Unfortunately, inFlow is not legally permitted to accept funds and deposit payments directly into your company’s bank account. We use Worldline’s payment processing services to provide this feature.
What will this cost?
Monthly fees
| Location | Monthly fee |
|---|---|
| US-based companies | $9.95 USD monthly PCI compliance fee. |
| Canadian-based companies | $9.95 CAD monthly PCI compliance fee. |
What is PCI compliance?
PCI compliance occurs when merchants and payment processors meet the requirements of the Payment Card Industry Data Security Standard (PCI DSS).
This means higher security for processing and transmitting credit card data. To learn more, take a look at this guide from Worldline.
What are the Order Rates?
| Payment method / Credit card | Fee per transaction |
| USD – Visa or Mastercard | 2.90% + $0.29 |
| USD – American Express (AMEX) | 3.4% + $0.29 |
| CAD – Visa or Mastercard | 2.90% + $0.29 |
| CAD – American Express (AMEX) | 3.4% + $0.29 |
| Canadian company using USD – Visa or Mastercard only | 3.5% + $0.29 |
How long until I receive payments to my bank account?
Worldline will typically submit the payment within three business days. Deposits will be in lump sums and not paid out per individual transaction.
What happens to my personal information when I sign up with Worldline?
When signing up, Worldline will require you to fill out information that is legally required for them to offer their services. For full details on how your information is kept, refer to Worldline’s privacy policy.
When signing up for a Worldline account, you’ll be asked for personal information in order to register. This is part of their “Know your customer” policy to prevent money laundering. For more on this, please take a look here.
What does my customer see when I email an invoice?
inFlow Inventory for Web & Mobile
When your customer opens an email from inFlow Inventory for Web or Mobile, the email will have a View Invoice button for them to see the invoice details. When they click on that, they will see the invoice with a Make Payment button available.
inFlow Inventory for Windows
When you send an invoice from inFlow Inventory for Windows, your customer will see the inFlow Pay link, along with an attachment of their invoice.
Is there a transaction limit?
During the application process, Worldline will review your company information. In this review, a transaction limit for how much you can accept per transaction will be set from Worldline.
What if my customer has a different currency set on their inFlow customer record?
If the currency set on your customer record isn’t USD or CAD, the Make payment option won’t be available when they’re emailed invoices from inFlow.
Can my customer make a partial payment on their order through inFlow Pay?
No, at this time, we do not support partial payments. Your customer will be required to make a full payment on the order.
What if my international customer wants to pay with inFlow Pay?
If your customer would still like to pay you in either USD or CAD, as a workaround, you can set their customer record currency setting to match the funds that your Worldline account accepts. See below for how you can change the currency on your customer records
Changing customer currency
inFlow Inventory for Web
- Click on Main Menu > Customer list.
- Under Purchasing Info, change the currency setting in the Pricing / Currency drop-down menu.
If you’d like to add a new pricing scheme/currency to this list, go to:
- Go to inFlow’s Pricing schemes settings (Main Menu > Options > Orders.)
- Click on Pricing schemes.
- Click on the +Add new pricing scheme button to add a new entry.
- To add this new pricing scheme, follow the steps above.
inFlow Inventory for Windows
- Go to Main Menu > Sales > Customer List.
- Double-click on a customer from this list.
- Under Purchasing Info, change the currency setting in the Pricing / Currency drop-down menu.
- If needed, you can also add a new pricing scheme/currency by clicking Add New Pricing Scheme at the bottom of the drop-down menu.


0 Comments