Sale order pick, pack, and shipping
inFlow can help you track the progress of an order you’re fulfilling. It can even let you know what you’ve taken off the shelf and what still needs to be picked before it’s ready to pack and ship!
Web
Picking products
There are two main ways to track picking in inFlow:
- Physically picking your items and tracking in inFlow – Recommended approach for optimized warehouse/picking processes. Learn more about how optimized picking works in inFlow.
- Scanning your items into inFlow – Find out how to scan items into inFlow.
Picking the items and tracking in inFlow
- Go to your sales order via Main Menu > Sales Order List
- Once open, click the Pick tab
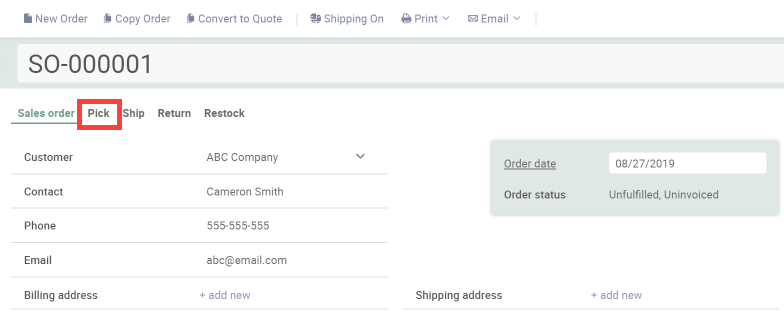
- Click the Autofill button – this will automatically add all items from the sales order into the Pick tab. Alternatively, you can pick these items manually by entering the quantity directly to the pick tab.
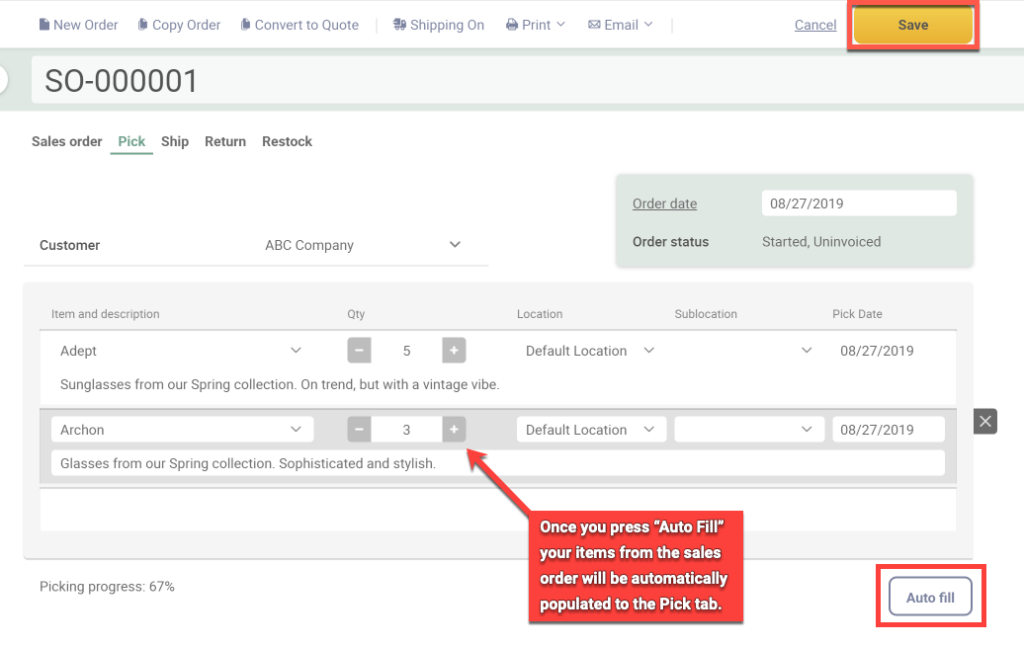
NOTE: If you’ve named your sublocations for optimized picking, your items will be listed in an optimized picking order when you use the Auto Fill button.
Packing and shipping items
Once the items on your order have been picked, you’re ready to ship them out! It’s a good idea to have a separate person pack the items since this allows you to easily double-check that the items picked are correct.
To ship the items on your order:
- In inFlow, open the Ship tab and place the cursor in the Item column on the first blank line.
- Begin packing the picked items. As you pack each item, scan its barcode into the Item column of the Ship tab. If you don’t have a scanner, you can manually enter the item’s name and quantity.
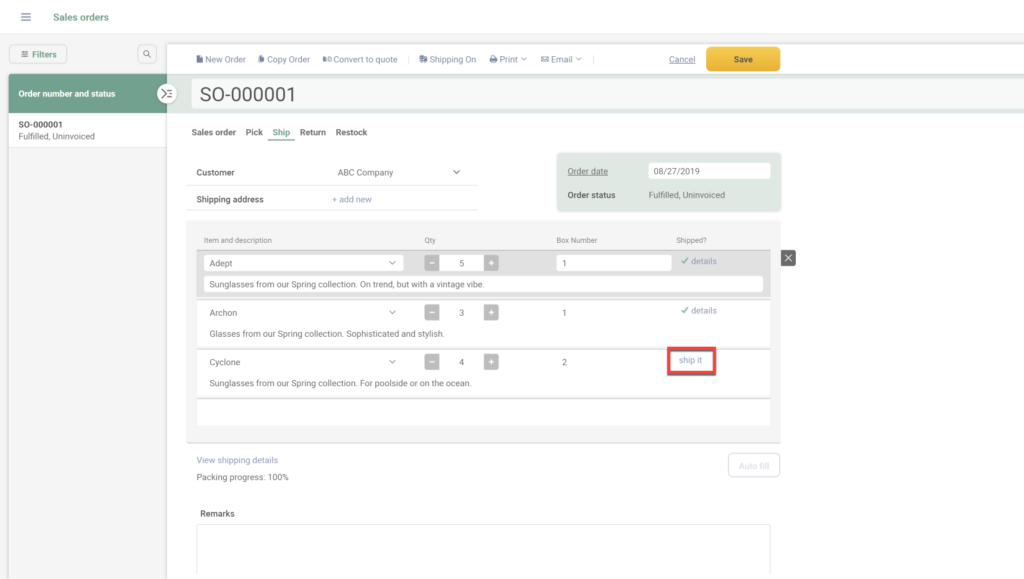
Pro tip: Do not seal the parcels yet, as you may need to check the order again before it’s labelled and shipped out!
Maintaining pick and ship accuracy
inFlow has some features that will help you ensure you’re picking and packing/shipping accurately.
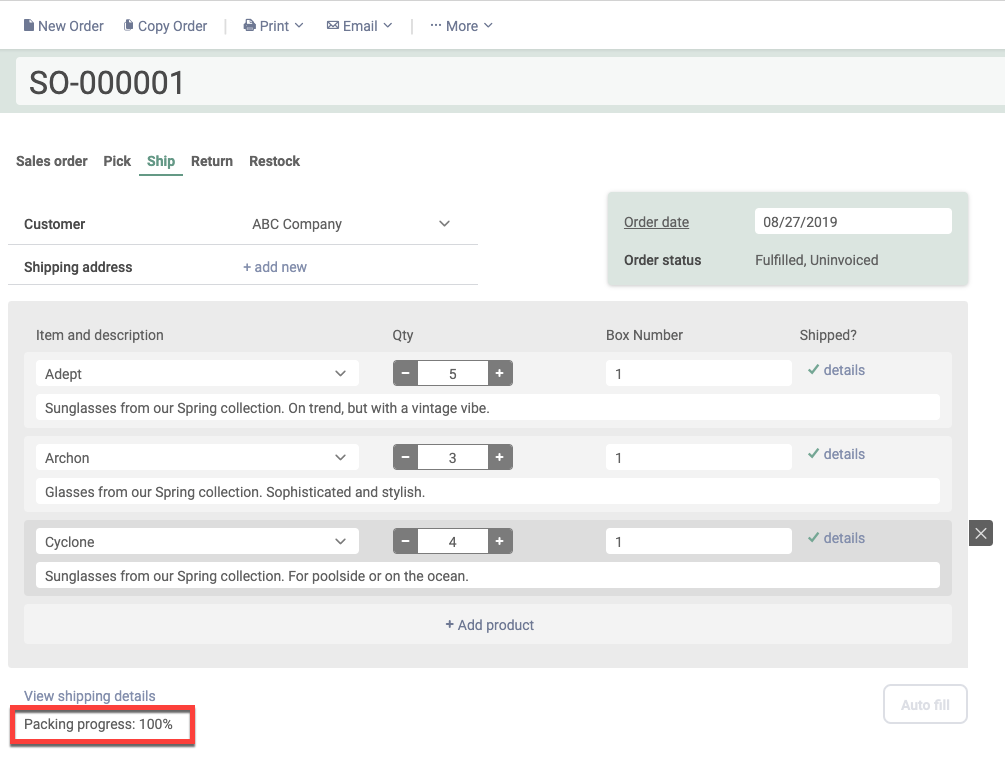
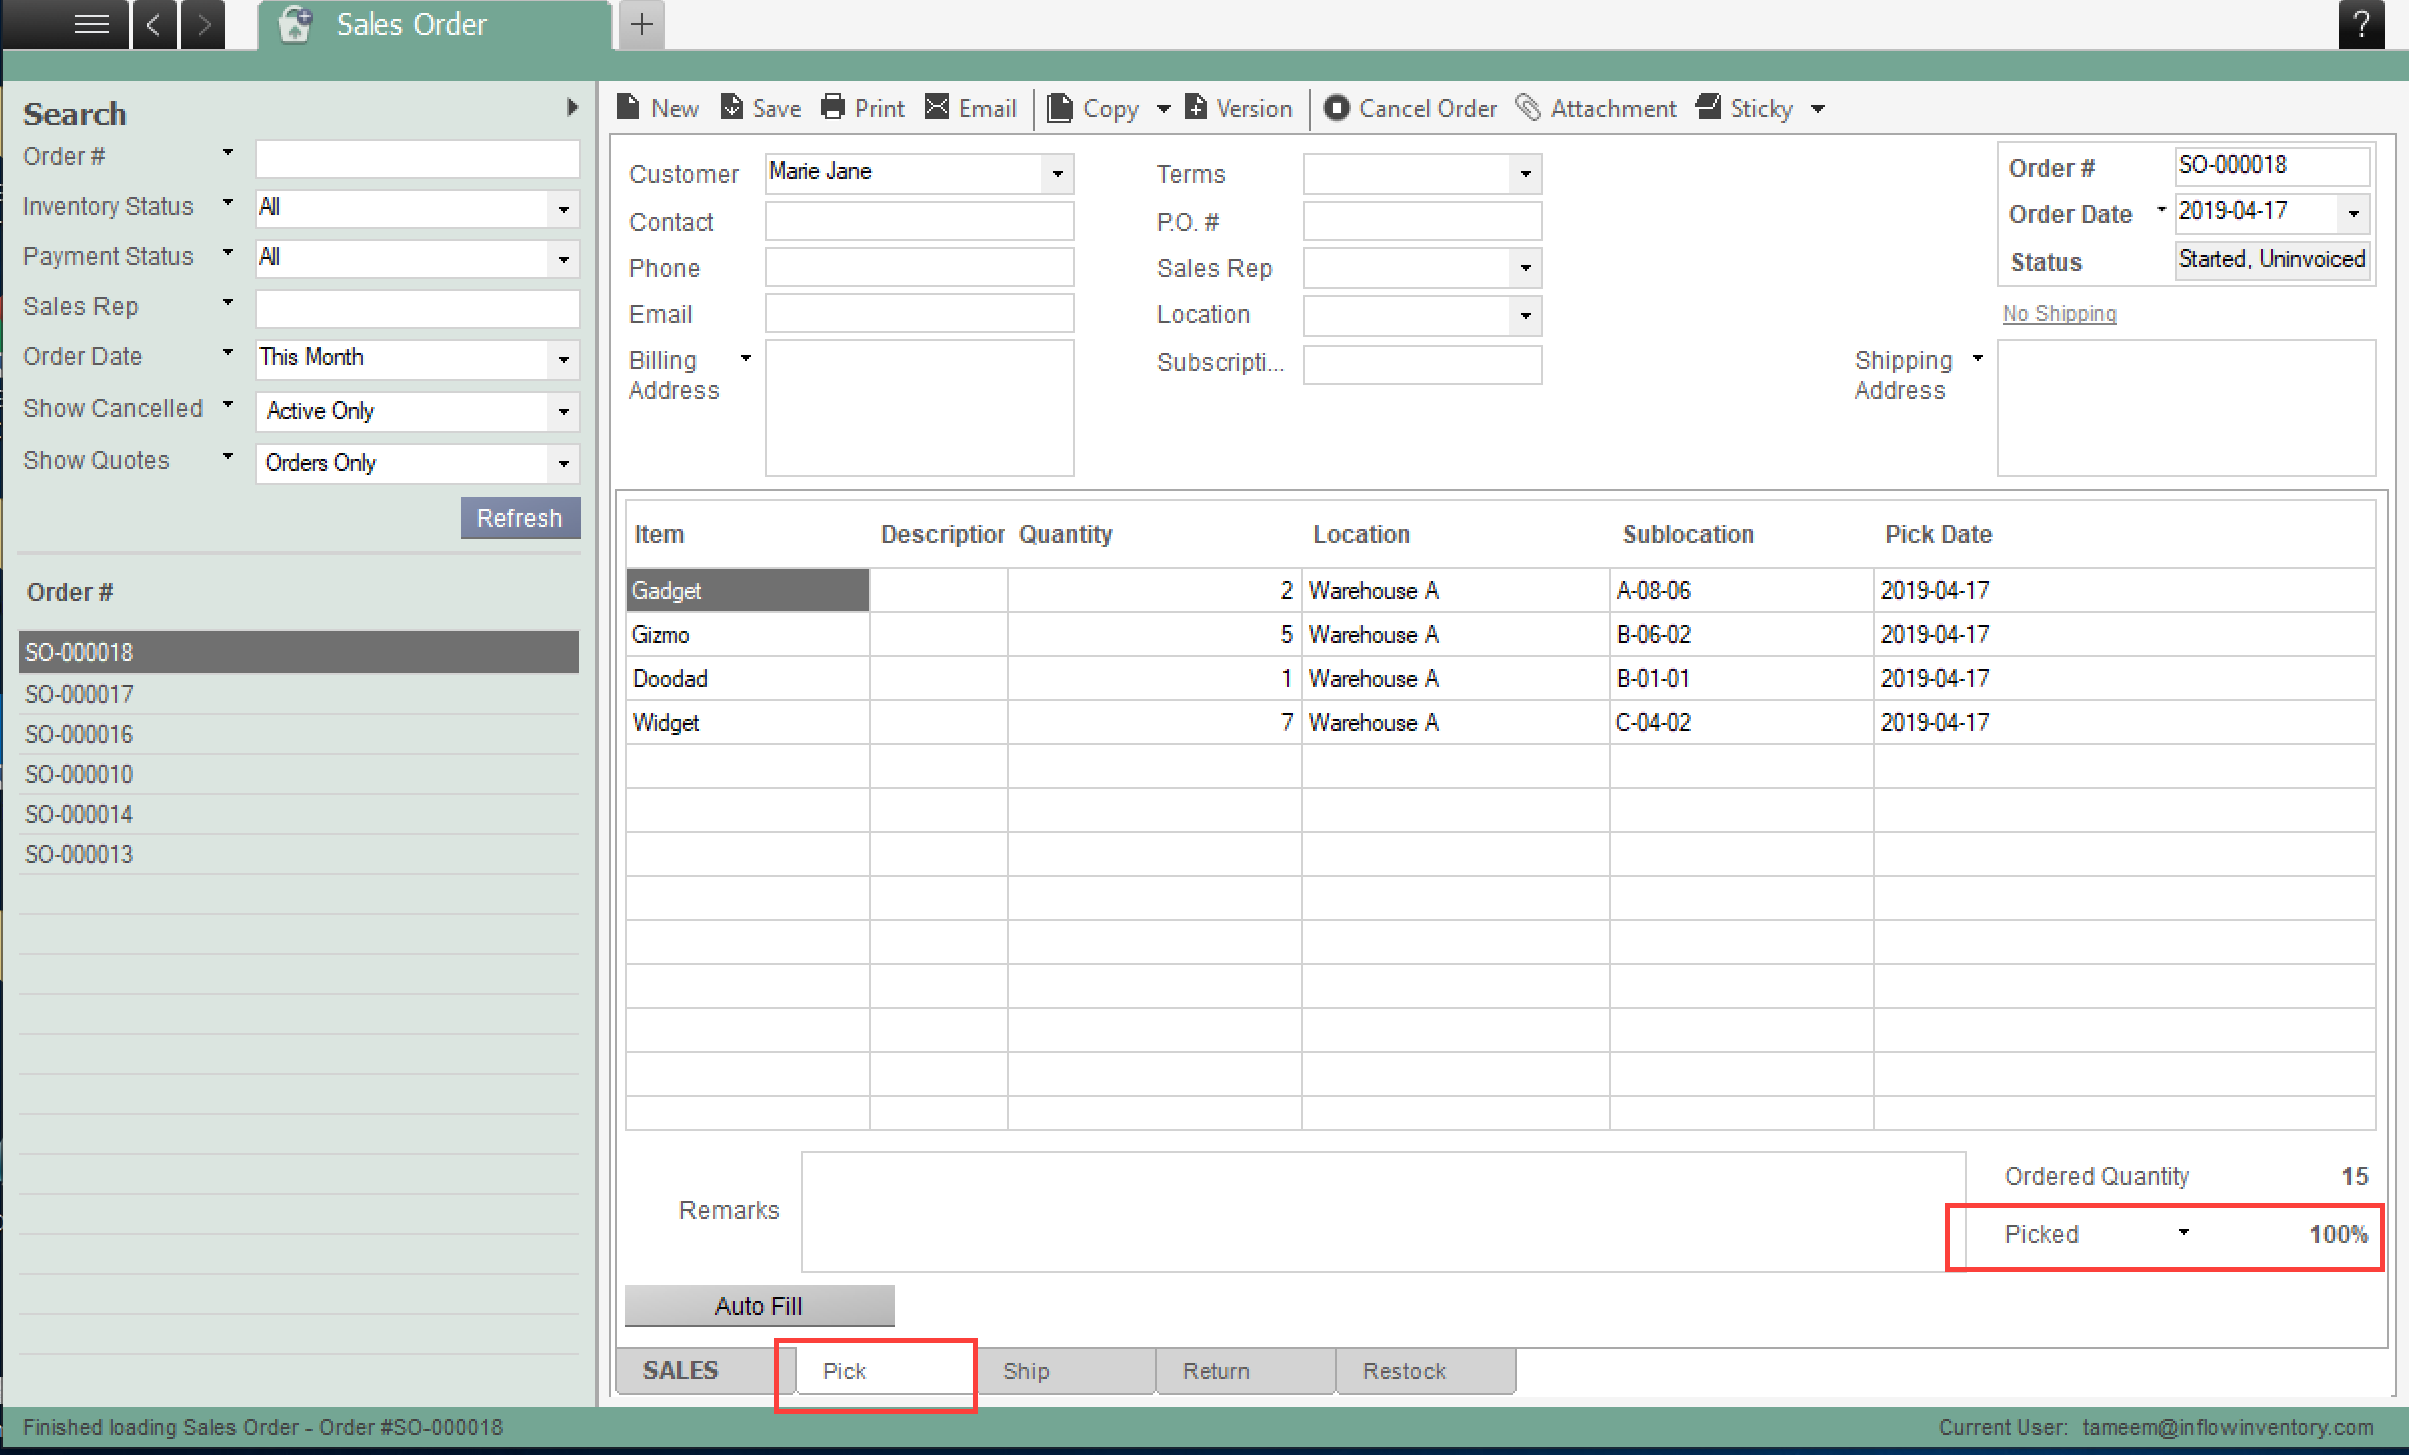
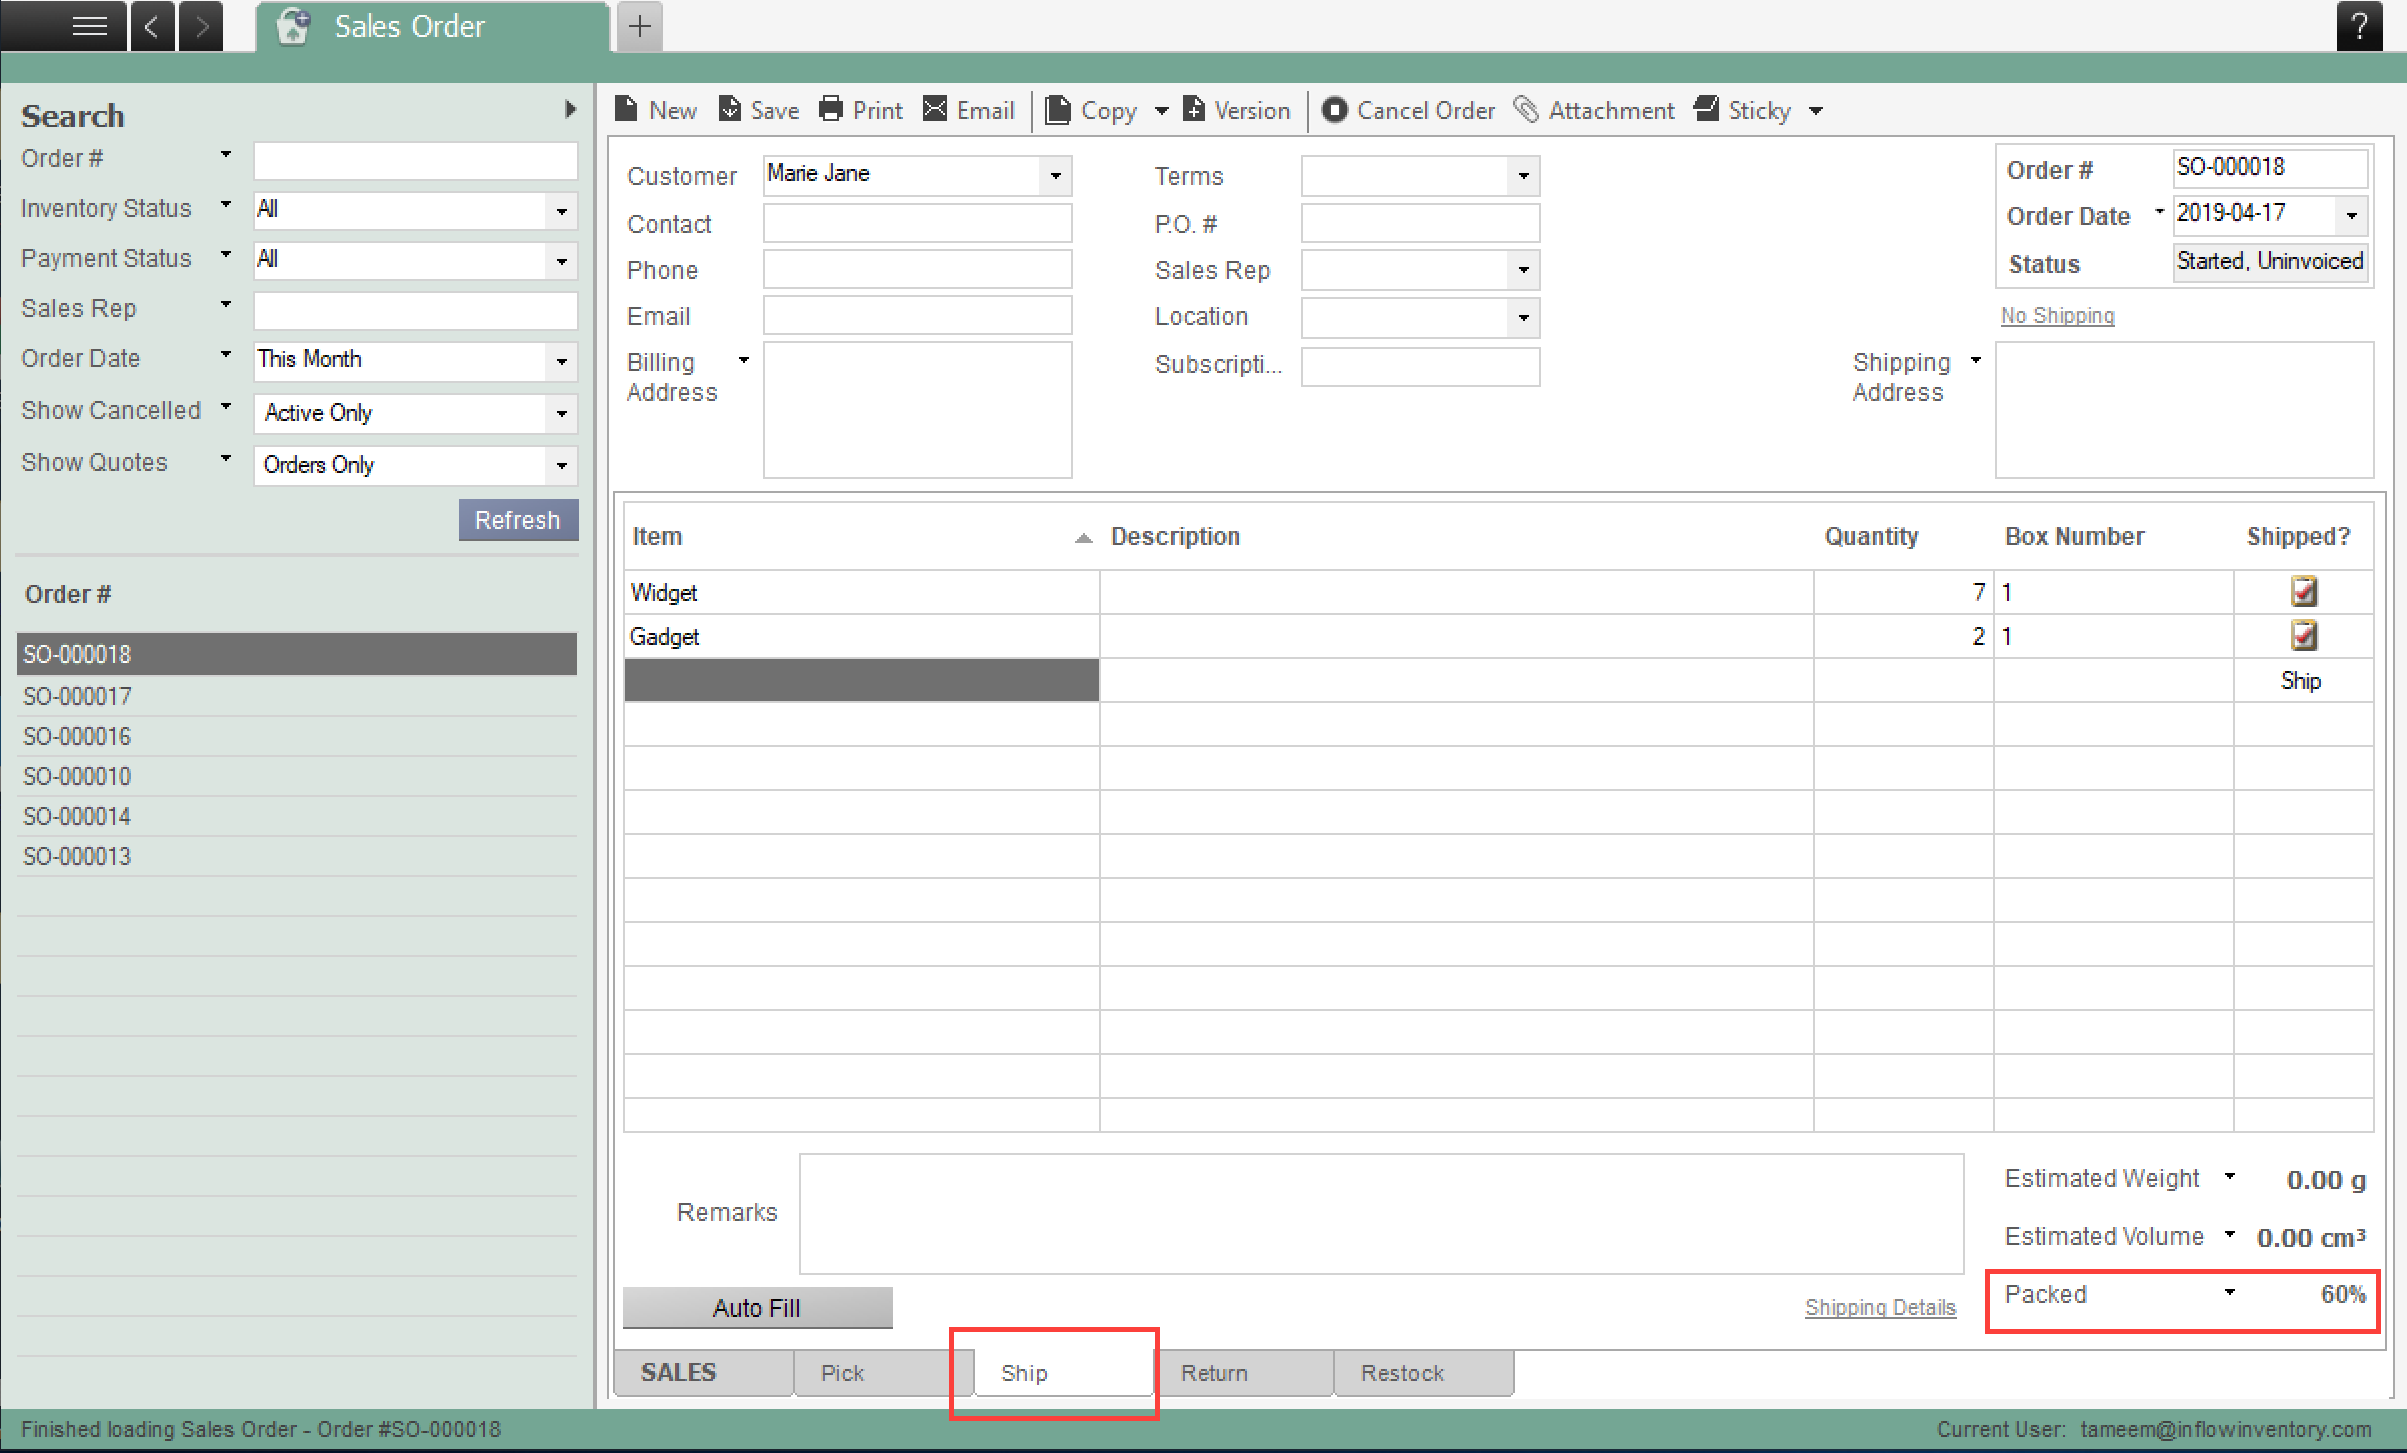
Progress Trackers: Progress trackers are built into both the Pick and Ship tabs, as seen below. This allows you to see how much of your order has been picked or packed and ready to ship. This is a particularly helpful feature on larger orders with lots of stock.
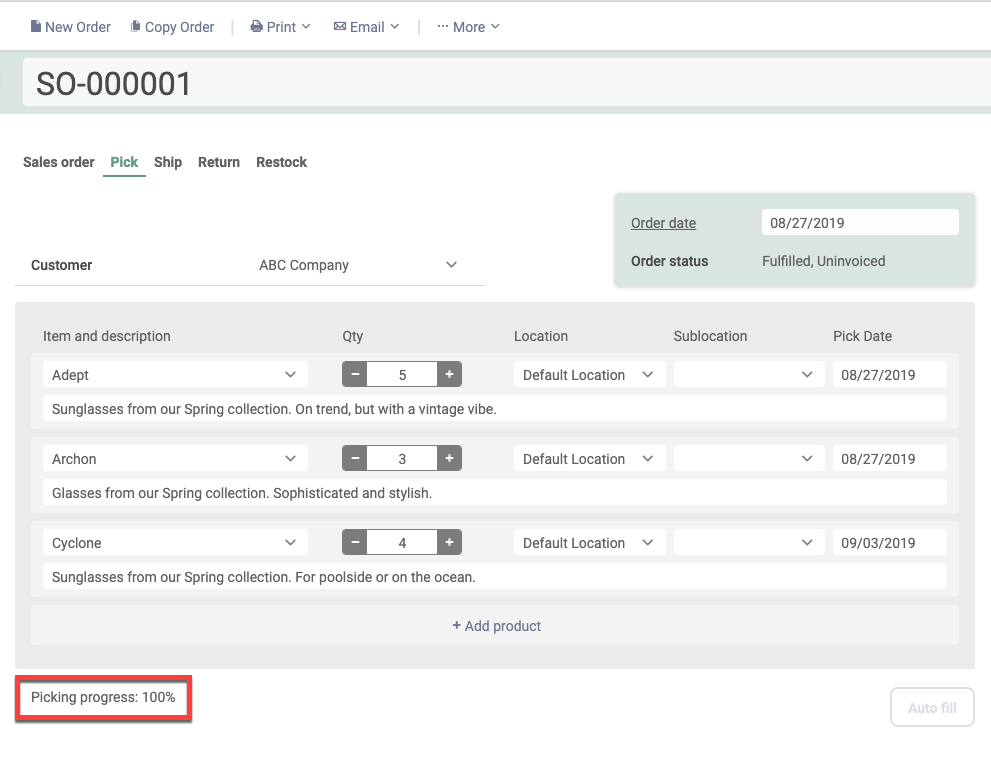
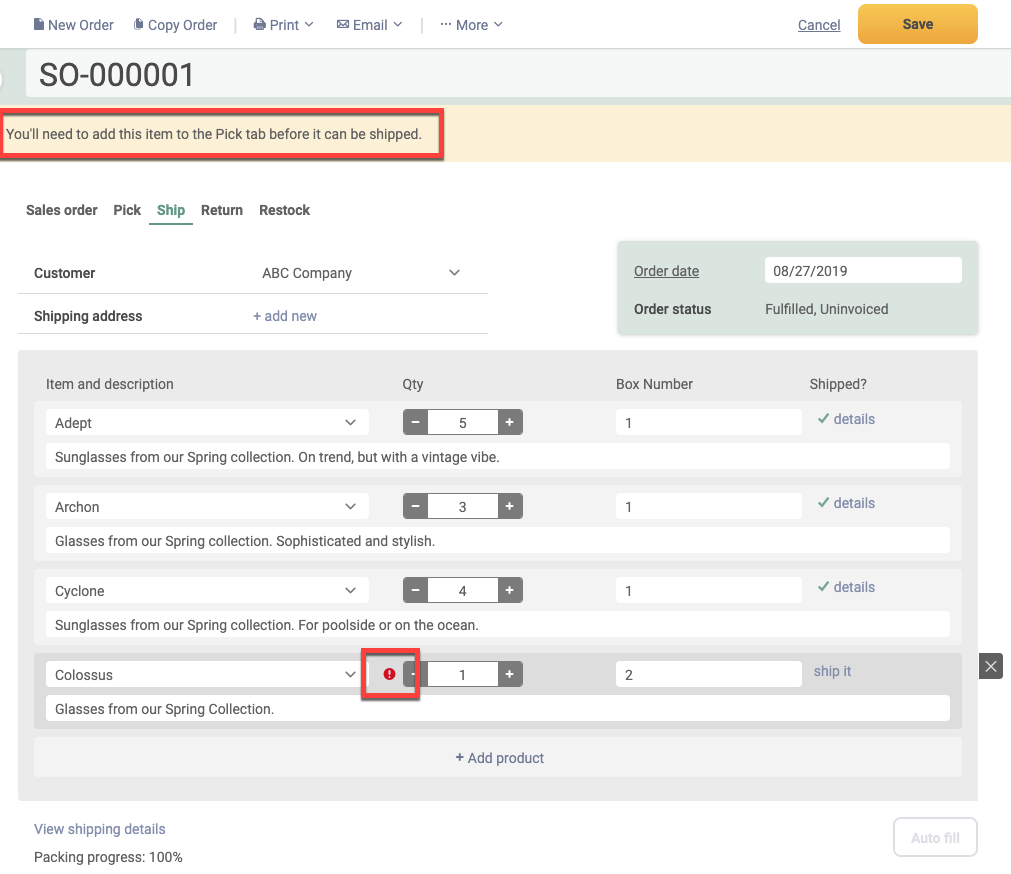
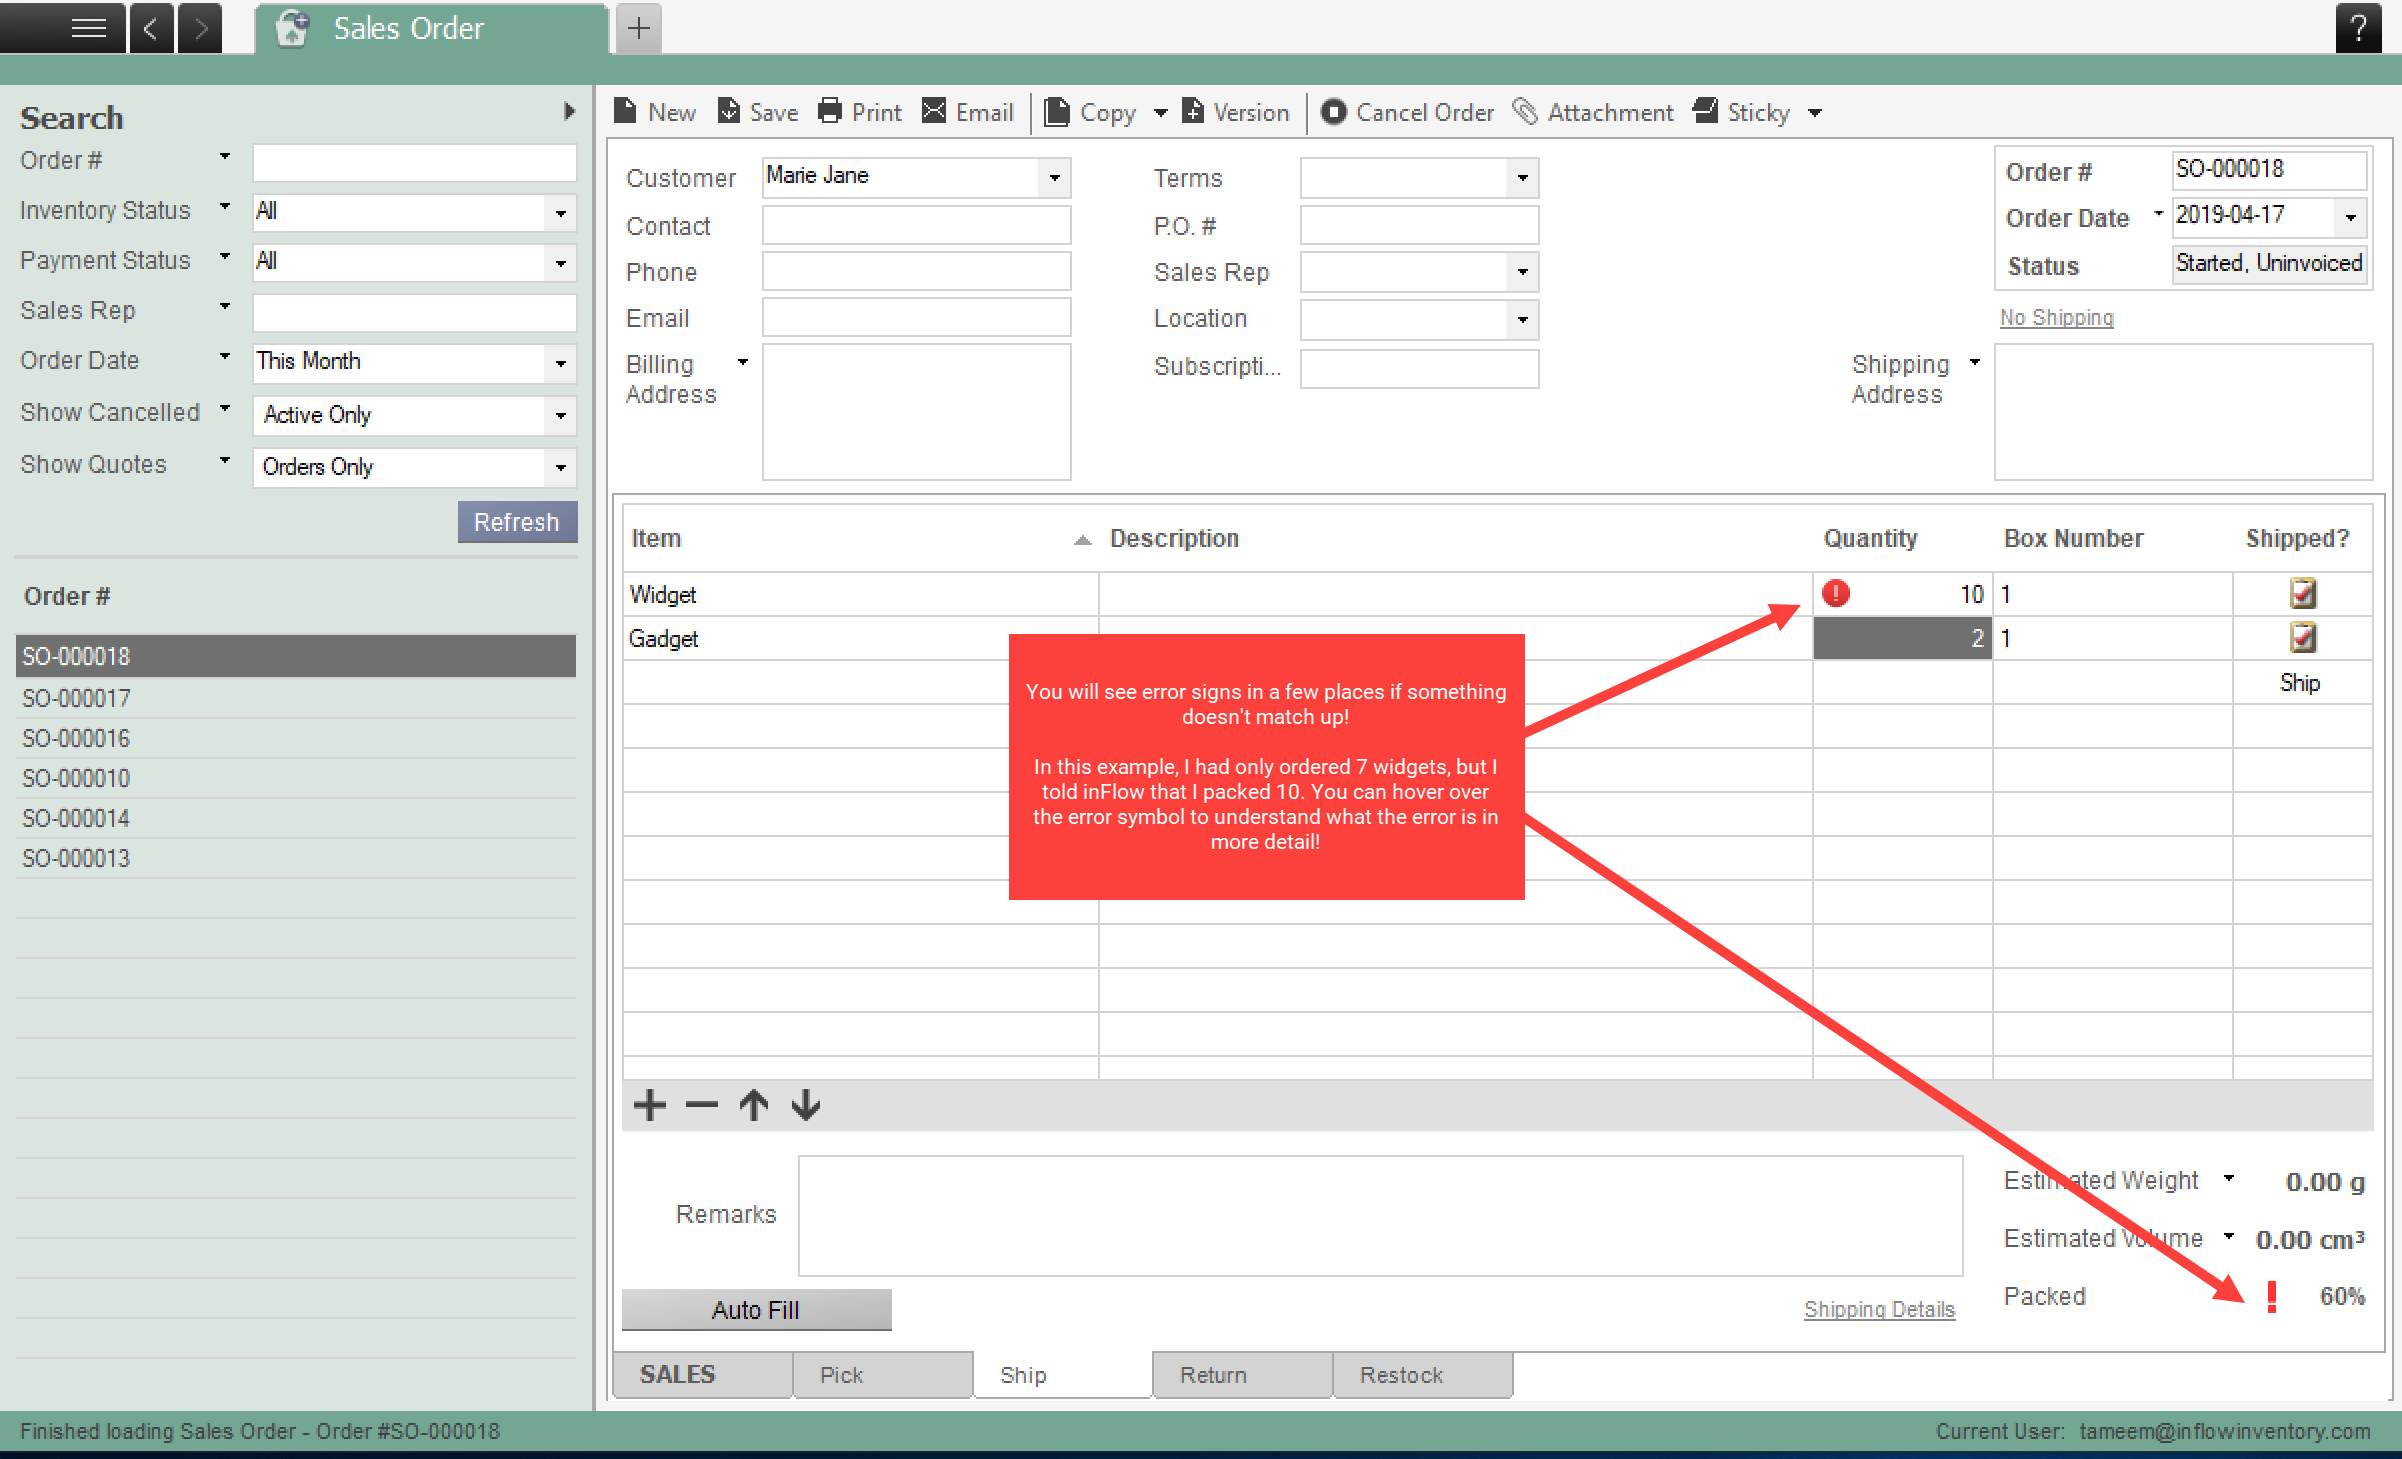
Warning symbols: If you select items that aren’t on your order tab (or you select too many), the program will flag them so you can see they should not have been picked or packed for shipping. Hover over the symbol to find out more about what the error is.
Do you still have questions about picking, packing, and shipping? Contact the inFlow team, and we’d be happy to help!
Windows
Picking products
There are two main ways to track picking in inFlow:
- Physically picking your items and tracking in inFlow – Recommended approach for optimized warehouse/picking processes. Learn more about how optimized picking works in inFlow.
- Scanning your items into inFlow – Find out how to scan items into inFlow.
Picking the items and tracking in inFlow
To pick the items your customer has ordered :
- Go to your sales order via Main Menu > Sales > Sales Order List
- Once open, click the Pick tab
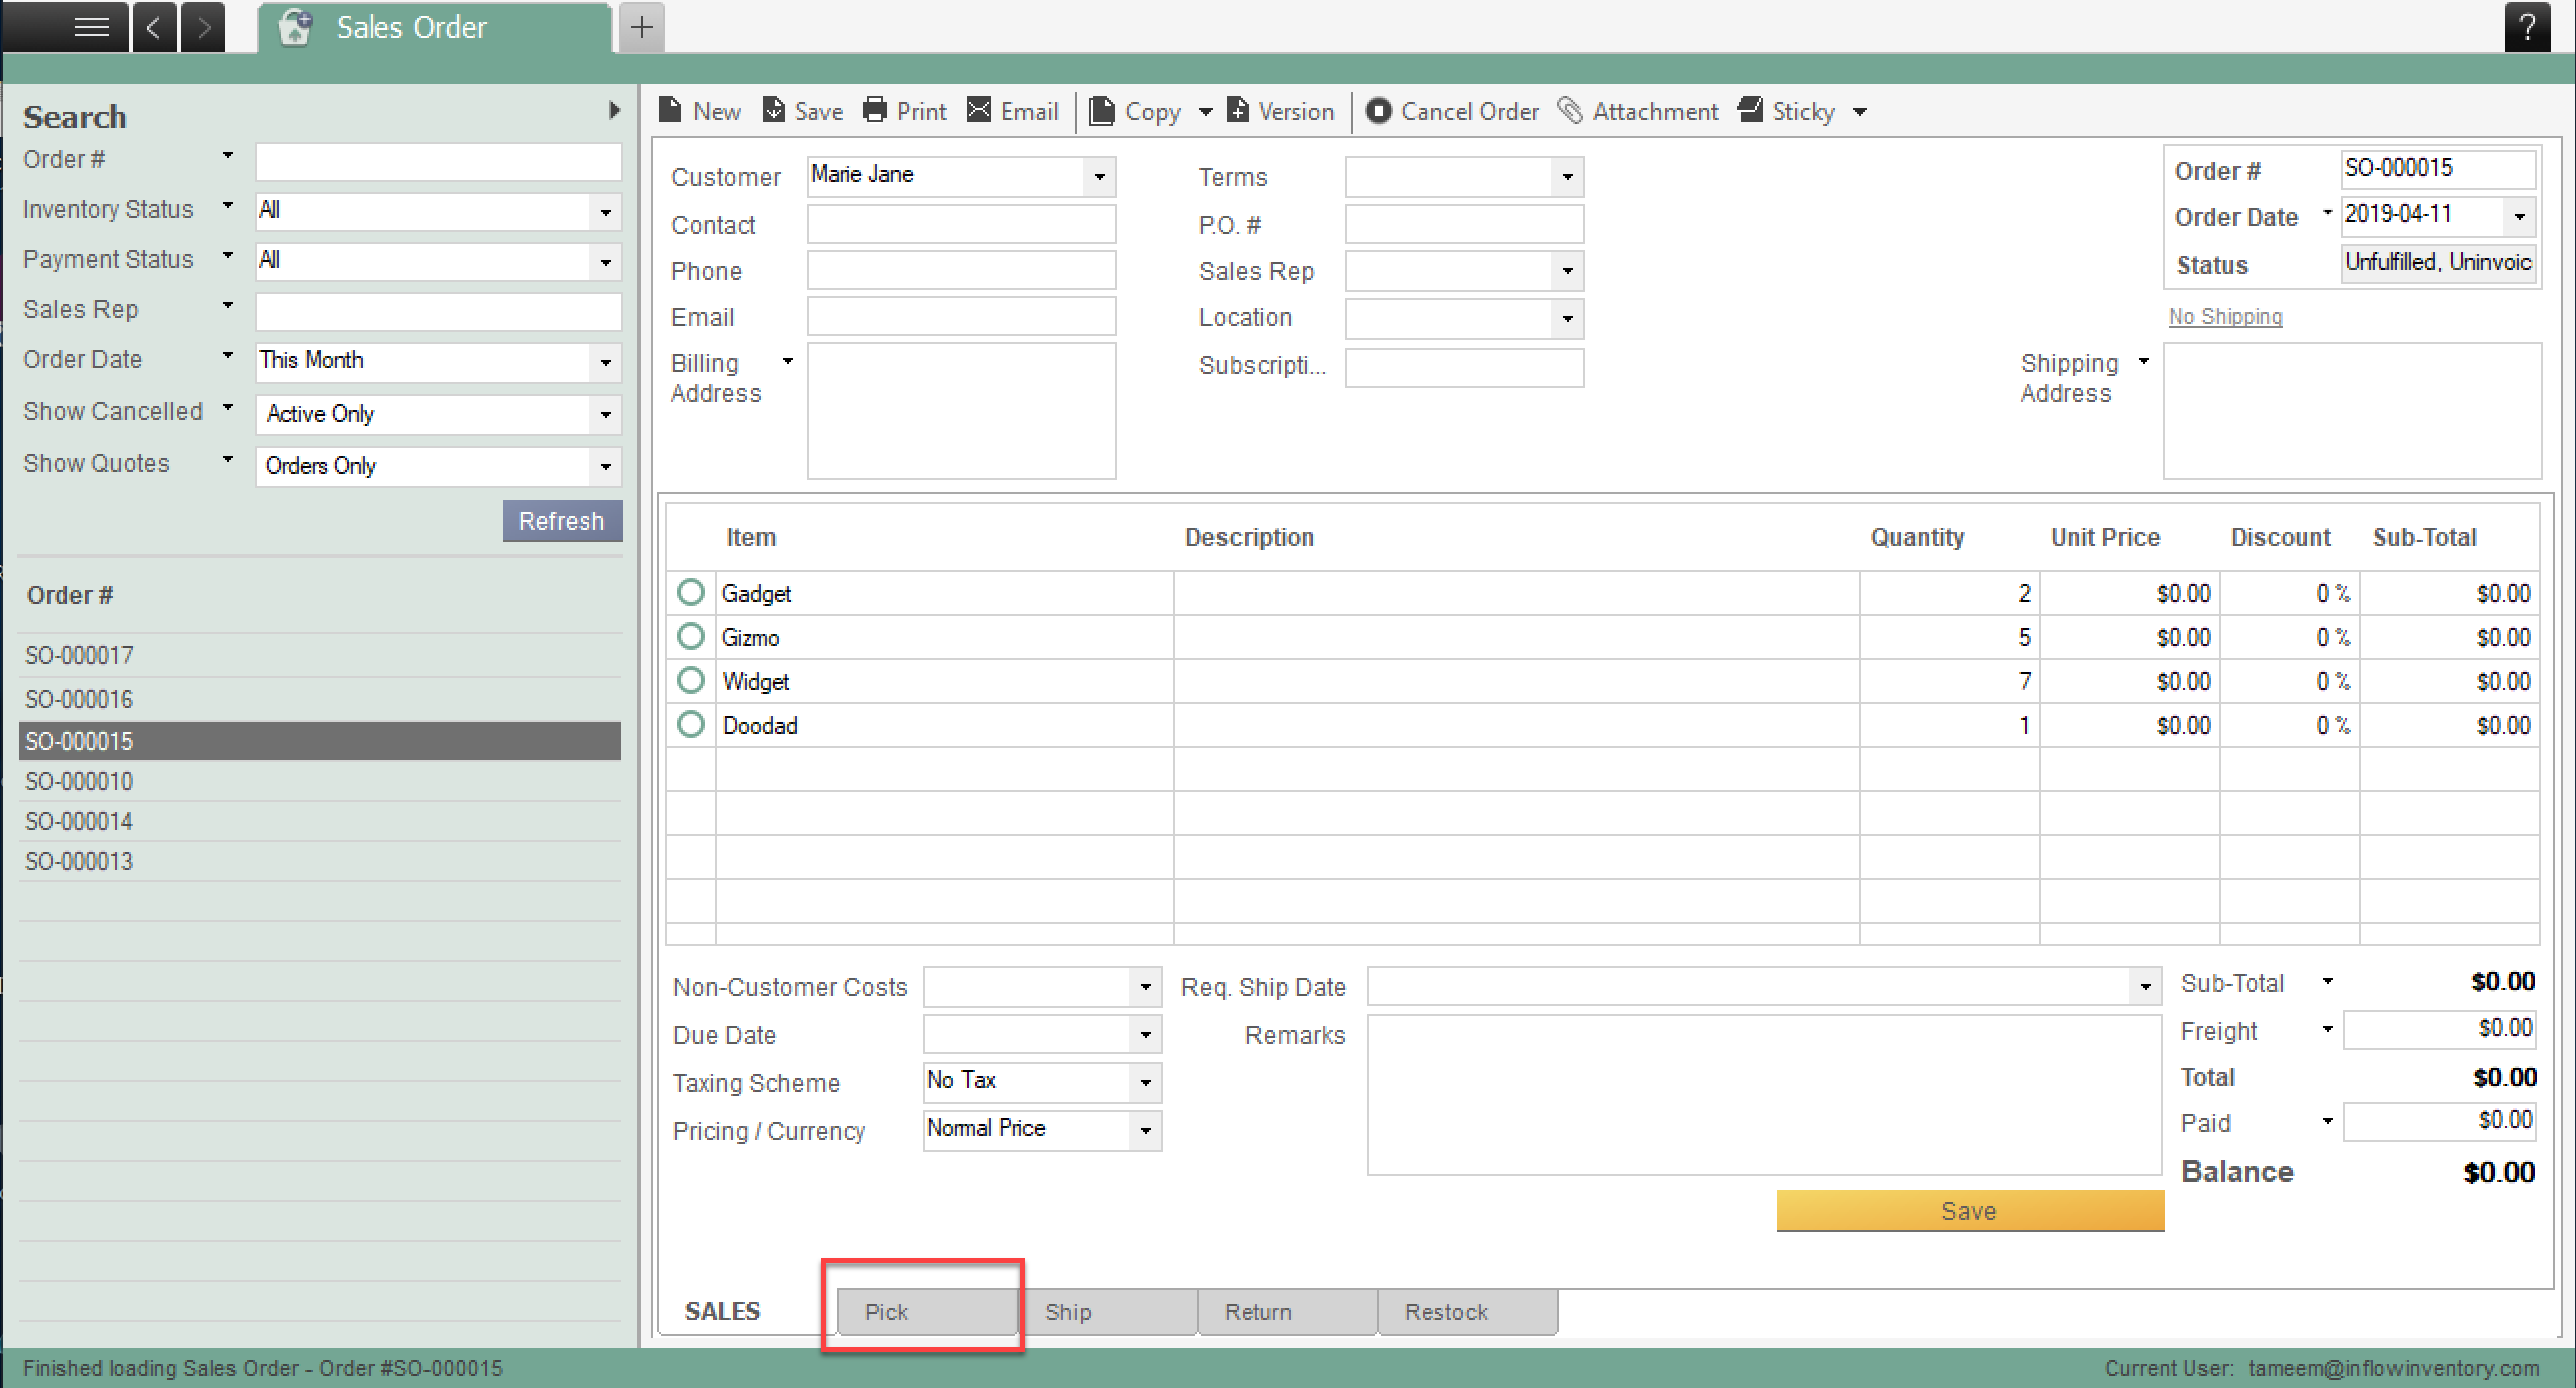
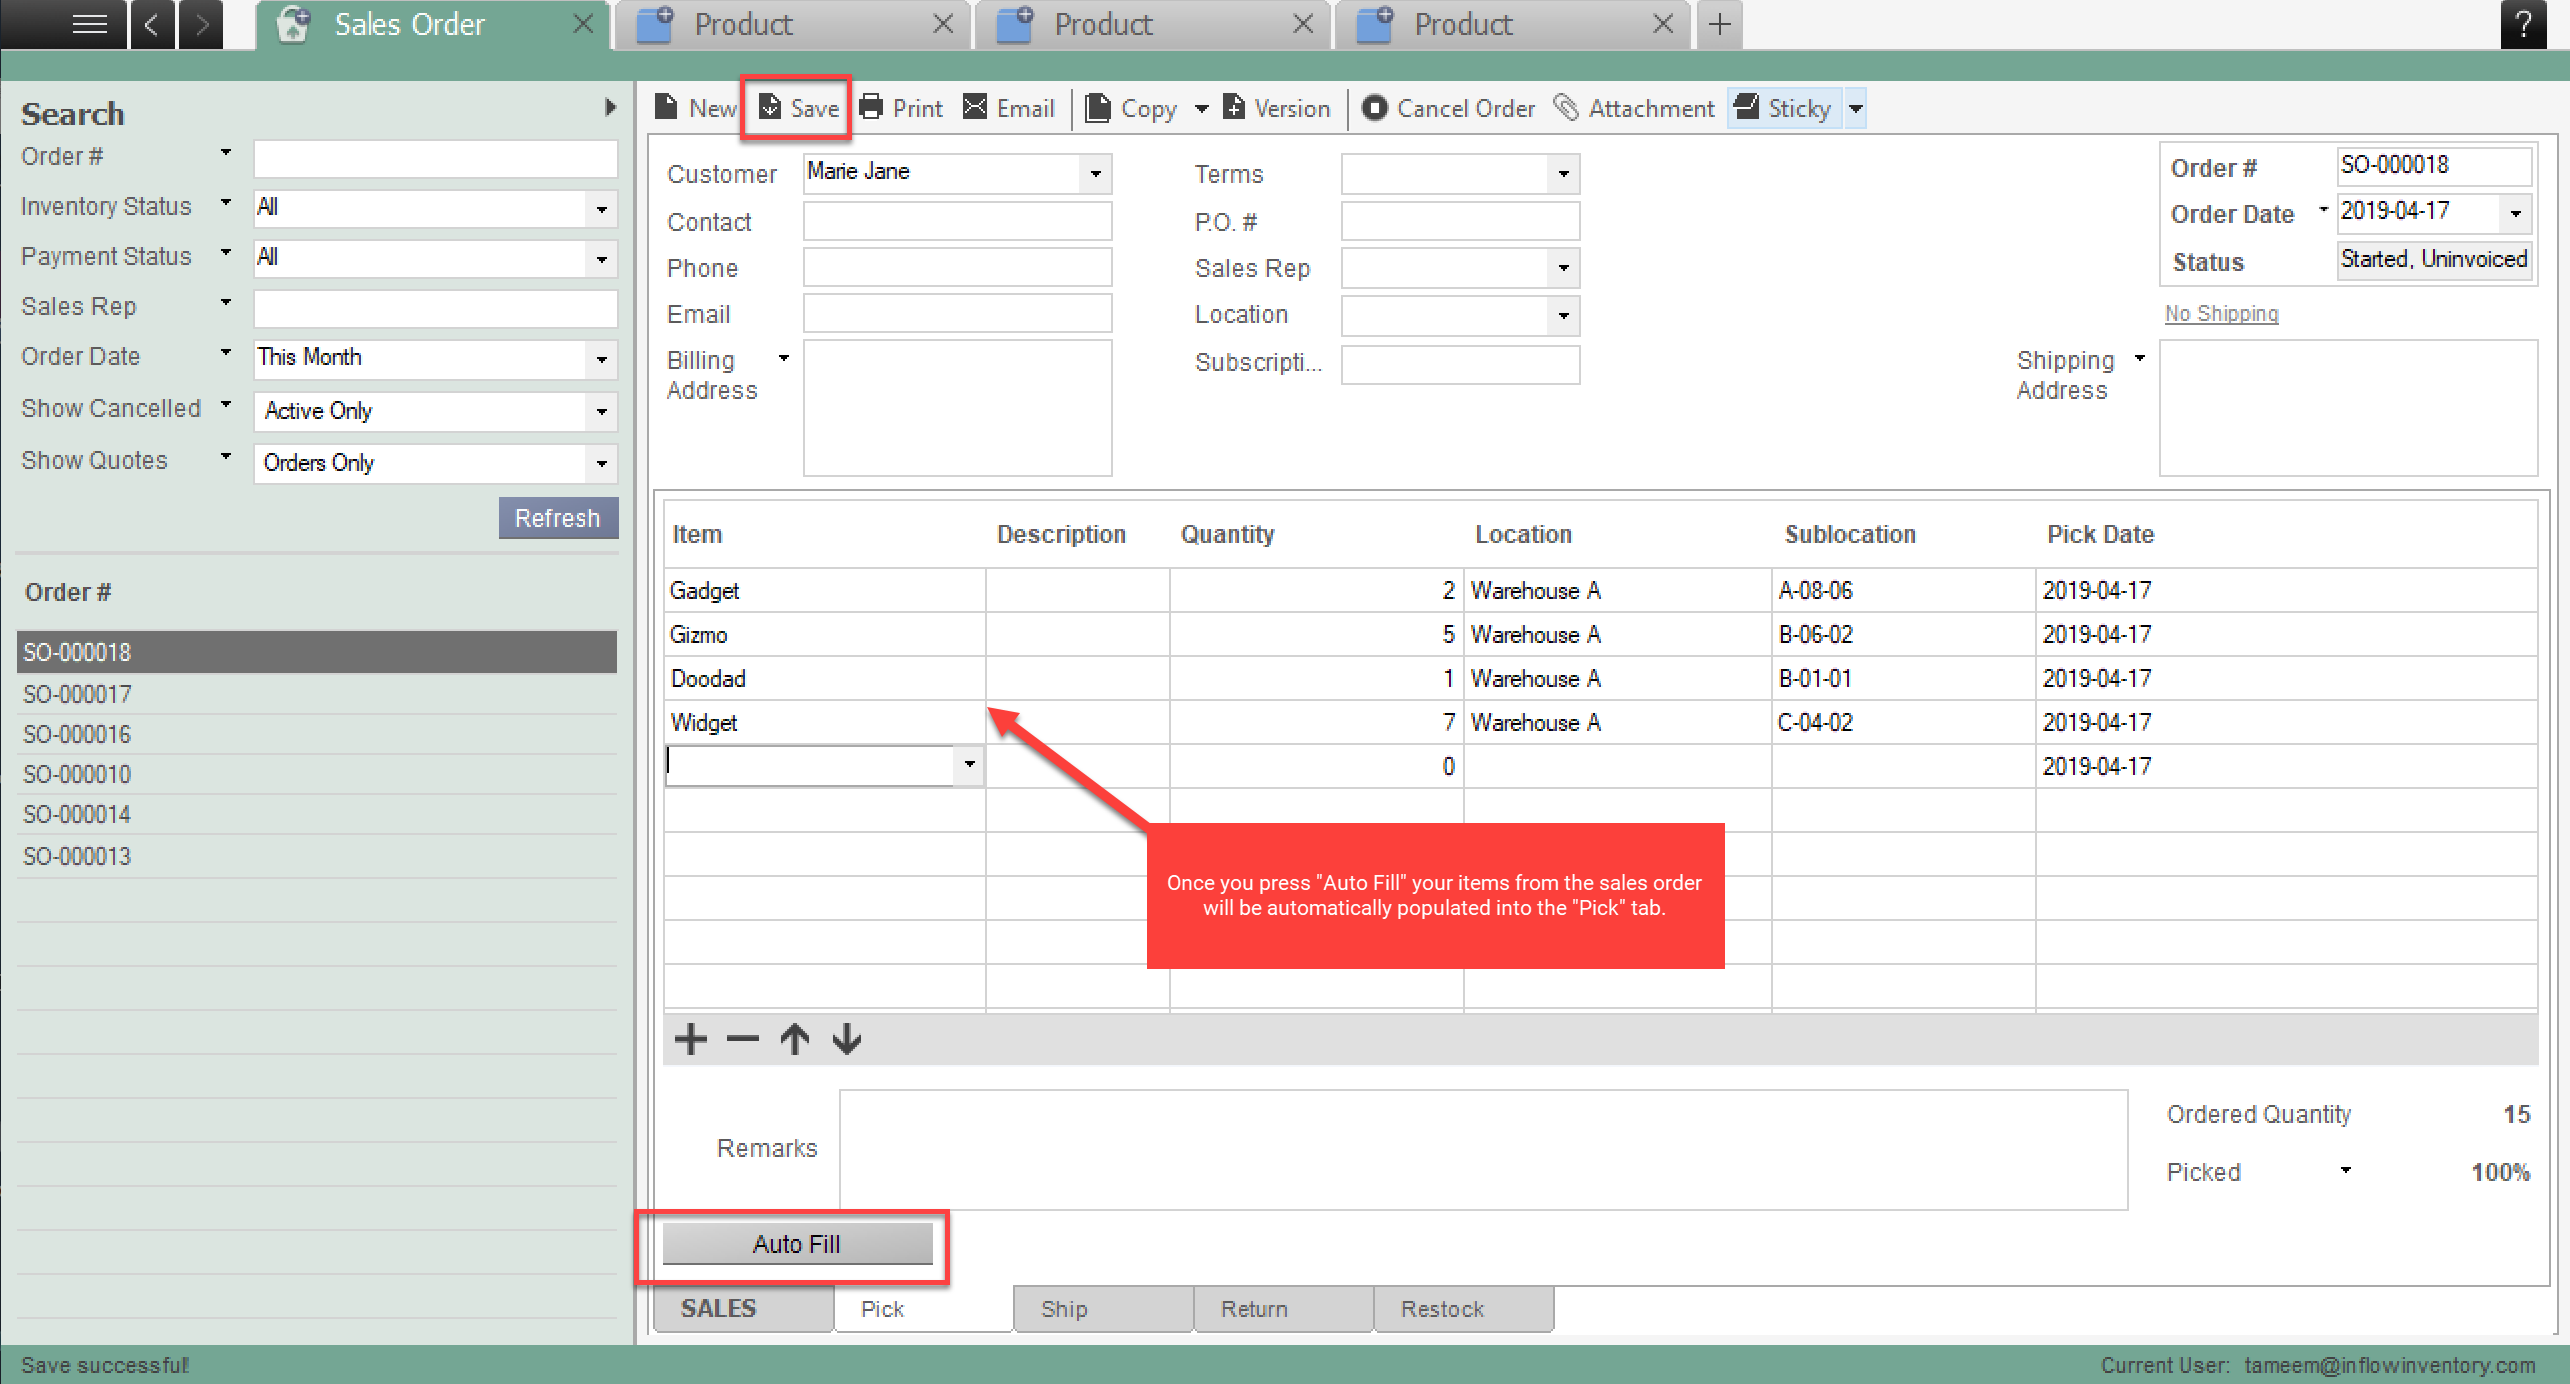
- Click the Auto Fill button – this will automatically add all items from the sales order to the Pick tab
- Click Save to reserve the items in the pick tab (preventing other pickers from trying to pick the same stock)
- Print a pick list by clicking the Print button in the top bar, then choosing the Pick List document from the list on the left
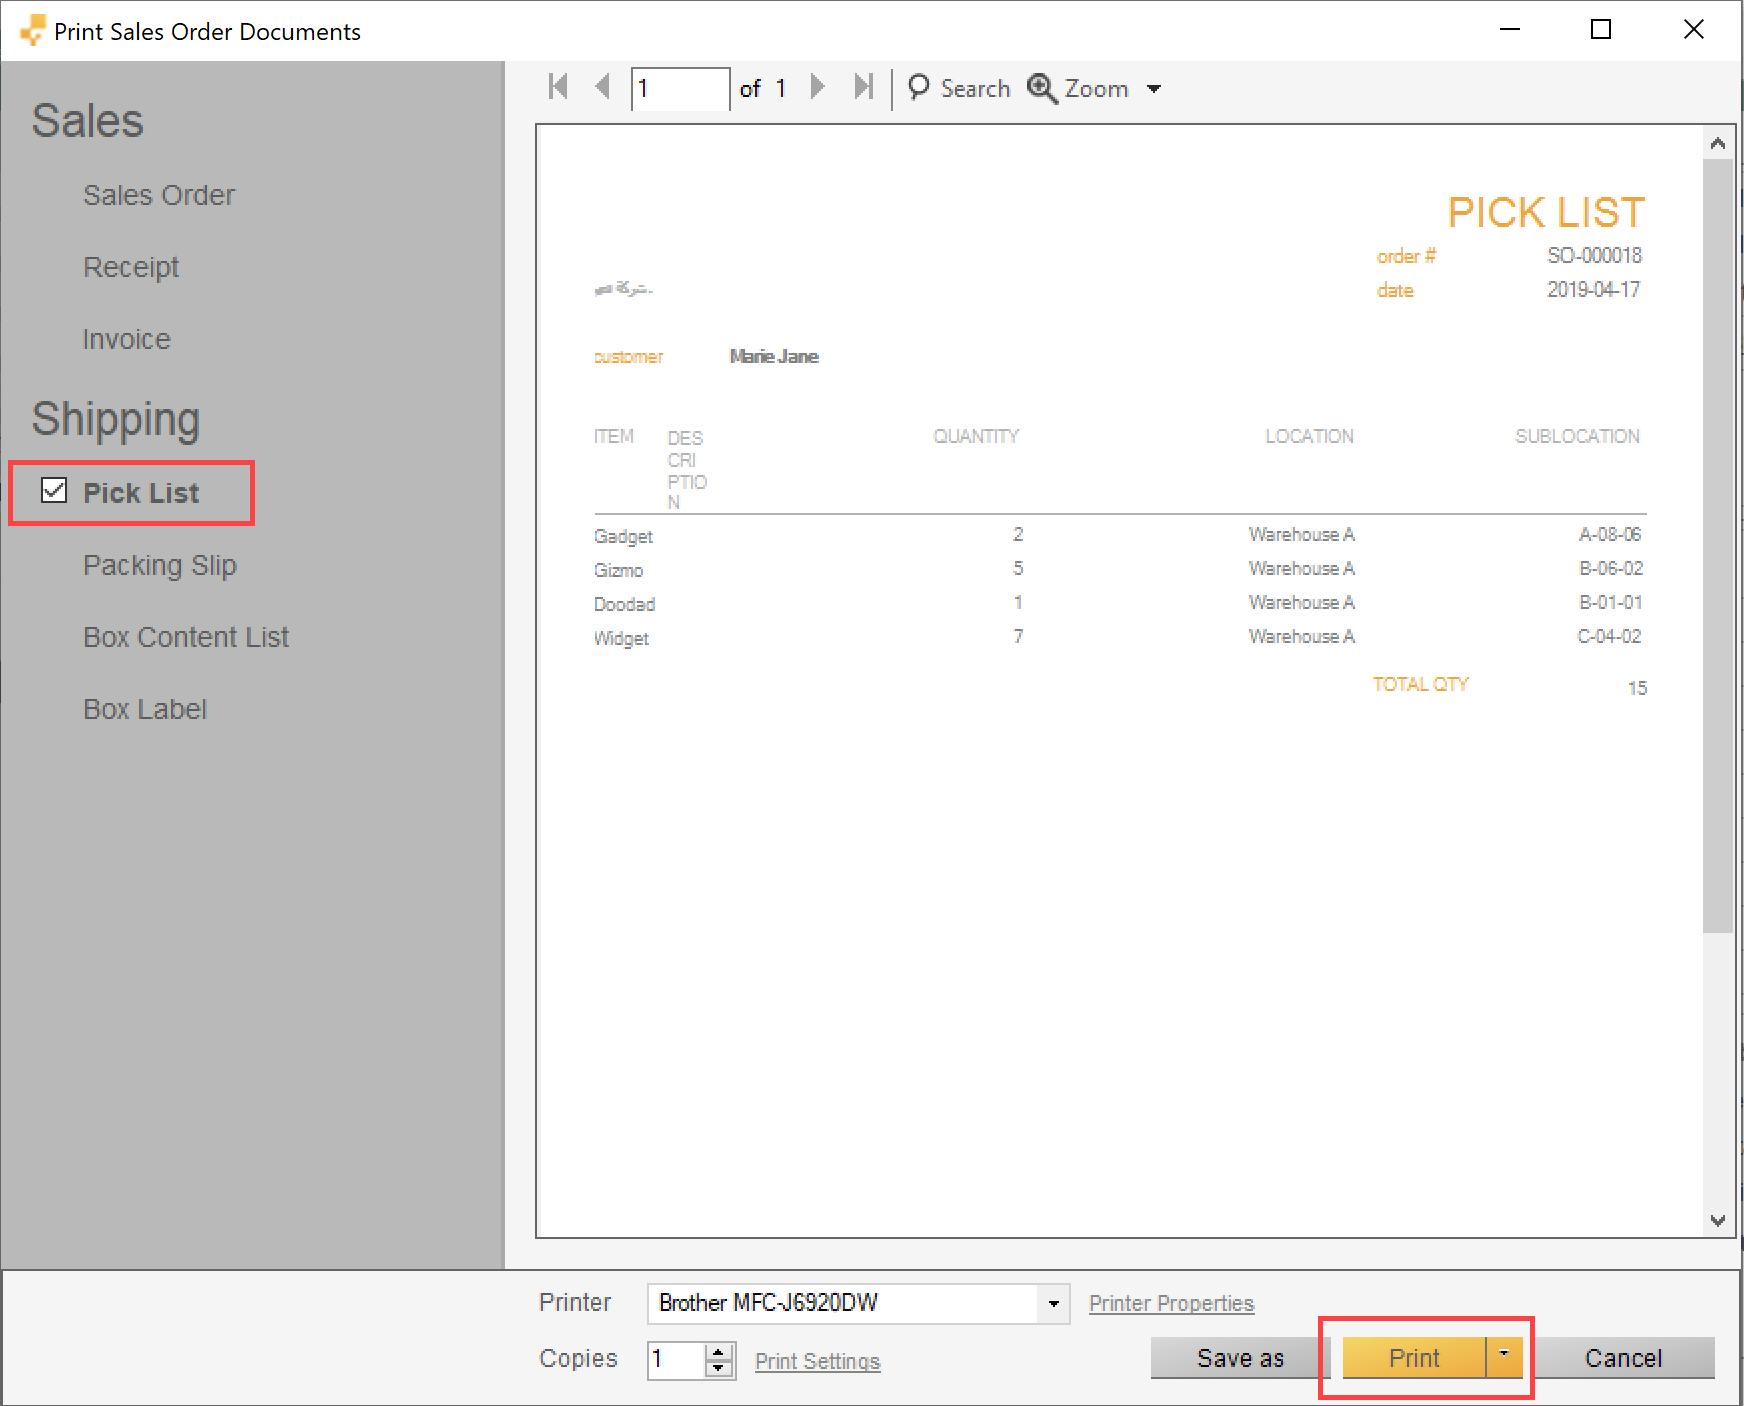
- Go to your storage/warehouse and physically pick all of the items on the Pick List
- If you weren’t able to pick all of the items on the pick list, go back to inFlow and correct the picked quantities in the Pick tab, and press Save
- Finally, give the picked items list to your shipping person
NOTE: If you’ve named your sublocations for optimized picking, your items will be listed in an optimized picking order when you use the Auto Fill button.
Picking your products manually
You are also able to enter your own items and quantities into the Pick tab by putting your cursor into the line item and entering the information manually.
Shipping products
NOTE: Shipping must be enabled to unlock this feature.To unlock shipping press the Add Shipping button at the top right hand corner of a sales order.
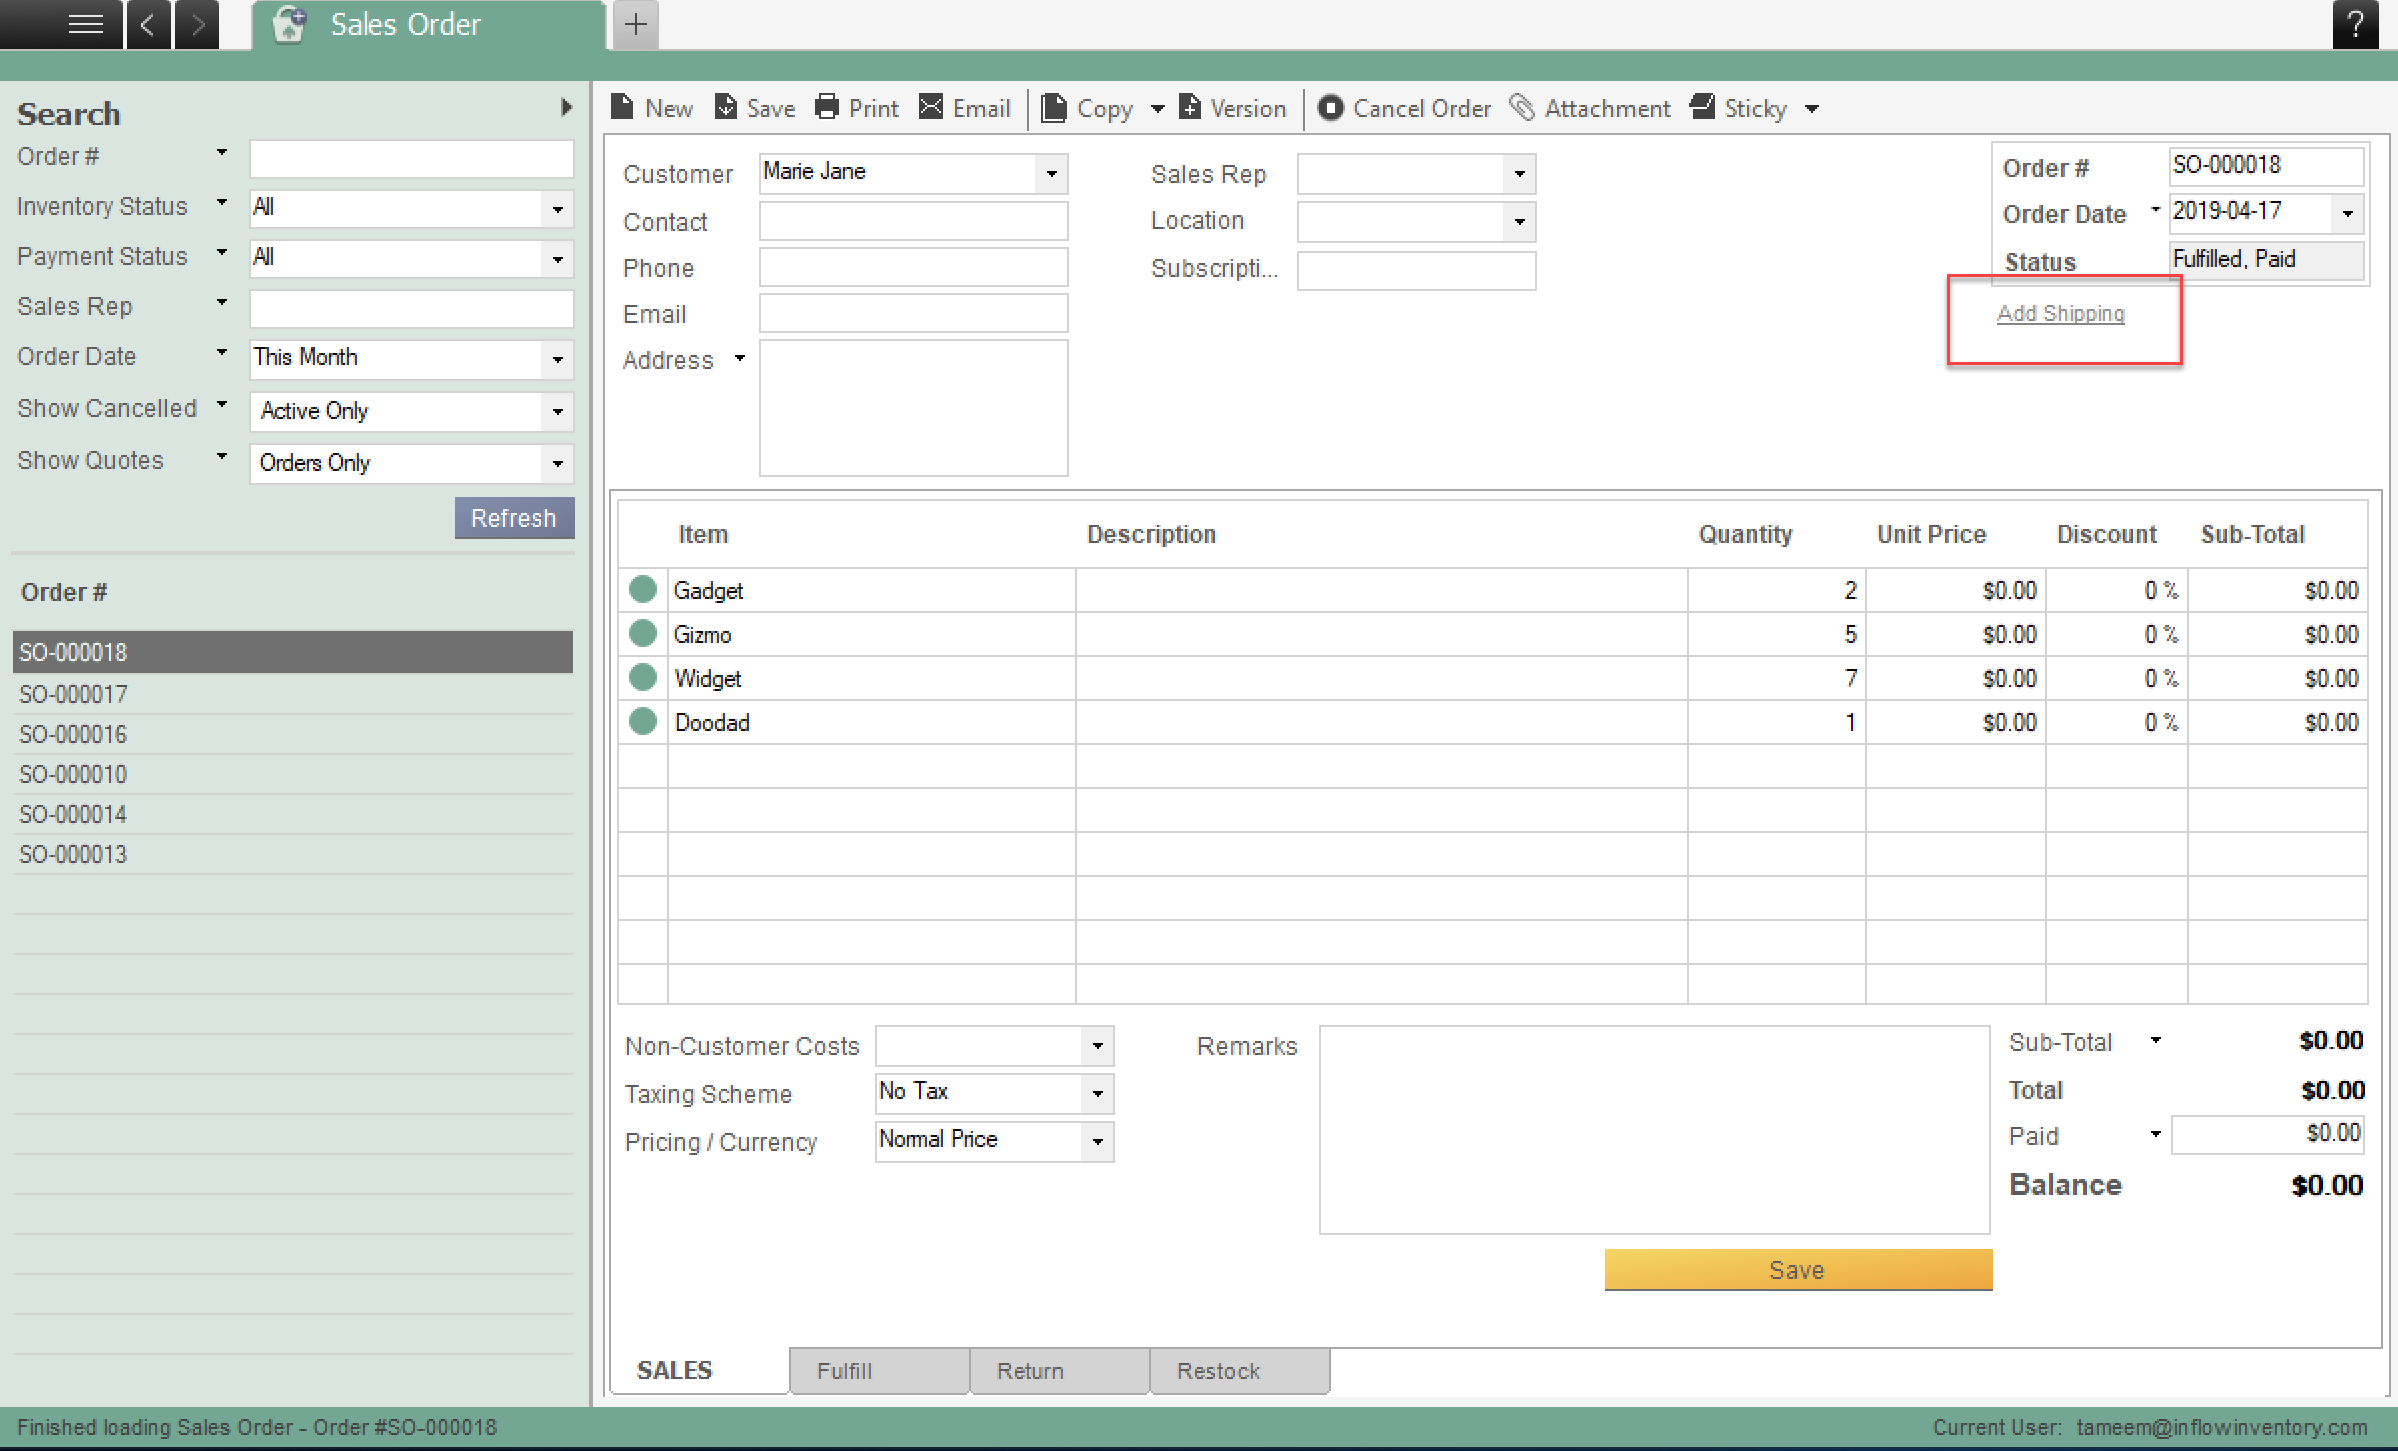
Once you’ve picked the items on your order, you’re ready to ship them out! It’s a good idea to have a separate person pack the items since this allows you to easily double-check that the items picked are correct.
To ship the items on your order:
- In inFlow, open the Ship tab and place the cursor in the Item column on the first blank line.
- Begin packing the picked items. As you pack each item, scan its barcode into the Item column of the Ship tab. If you don’t have a scanner, you can manually enter the item’s name and quantity.
Don’t seal the parcels yet, as you may need to check the order again before it’s labelled and shipped out!
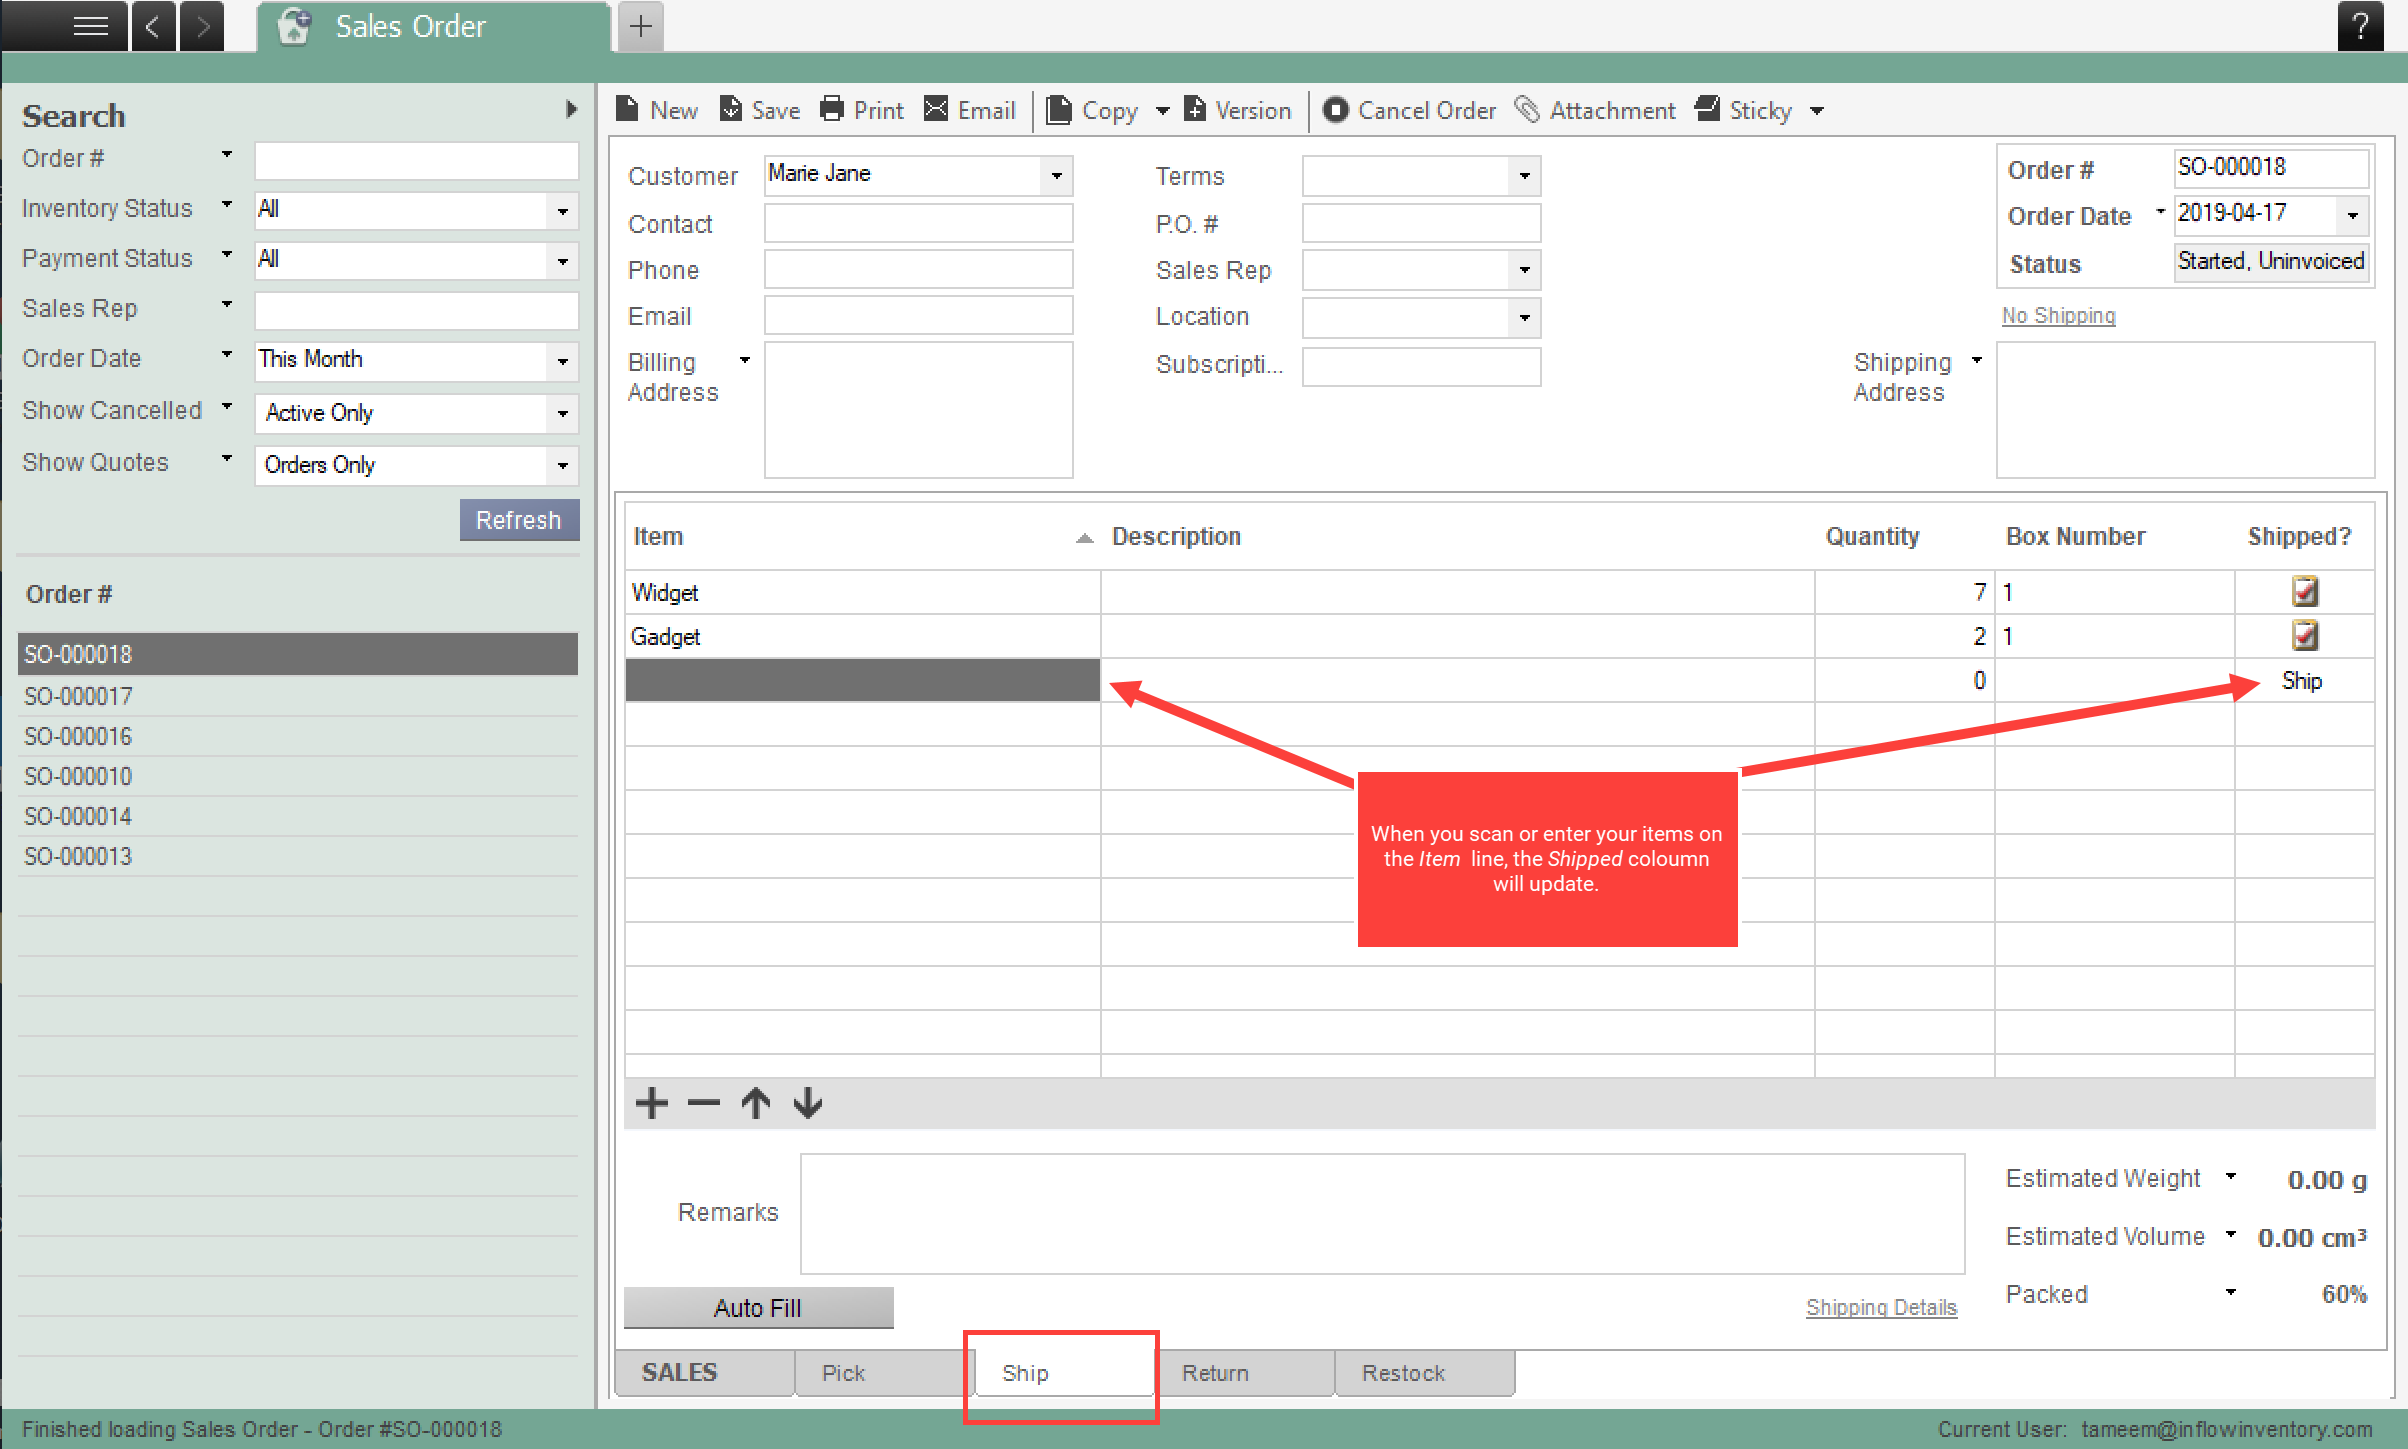
3. Once you’ve finished entering or scanning each item and packing it, check the packing progress indicator. This should show 100%, which means all picked items were scanned and packed. If it doesn’t show 100%, you can click on the progress indicator to show a list of discrepancies.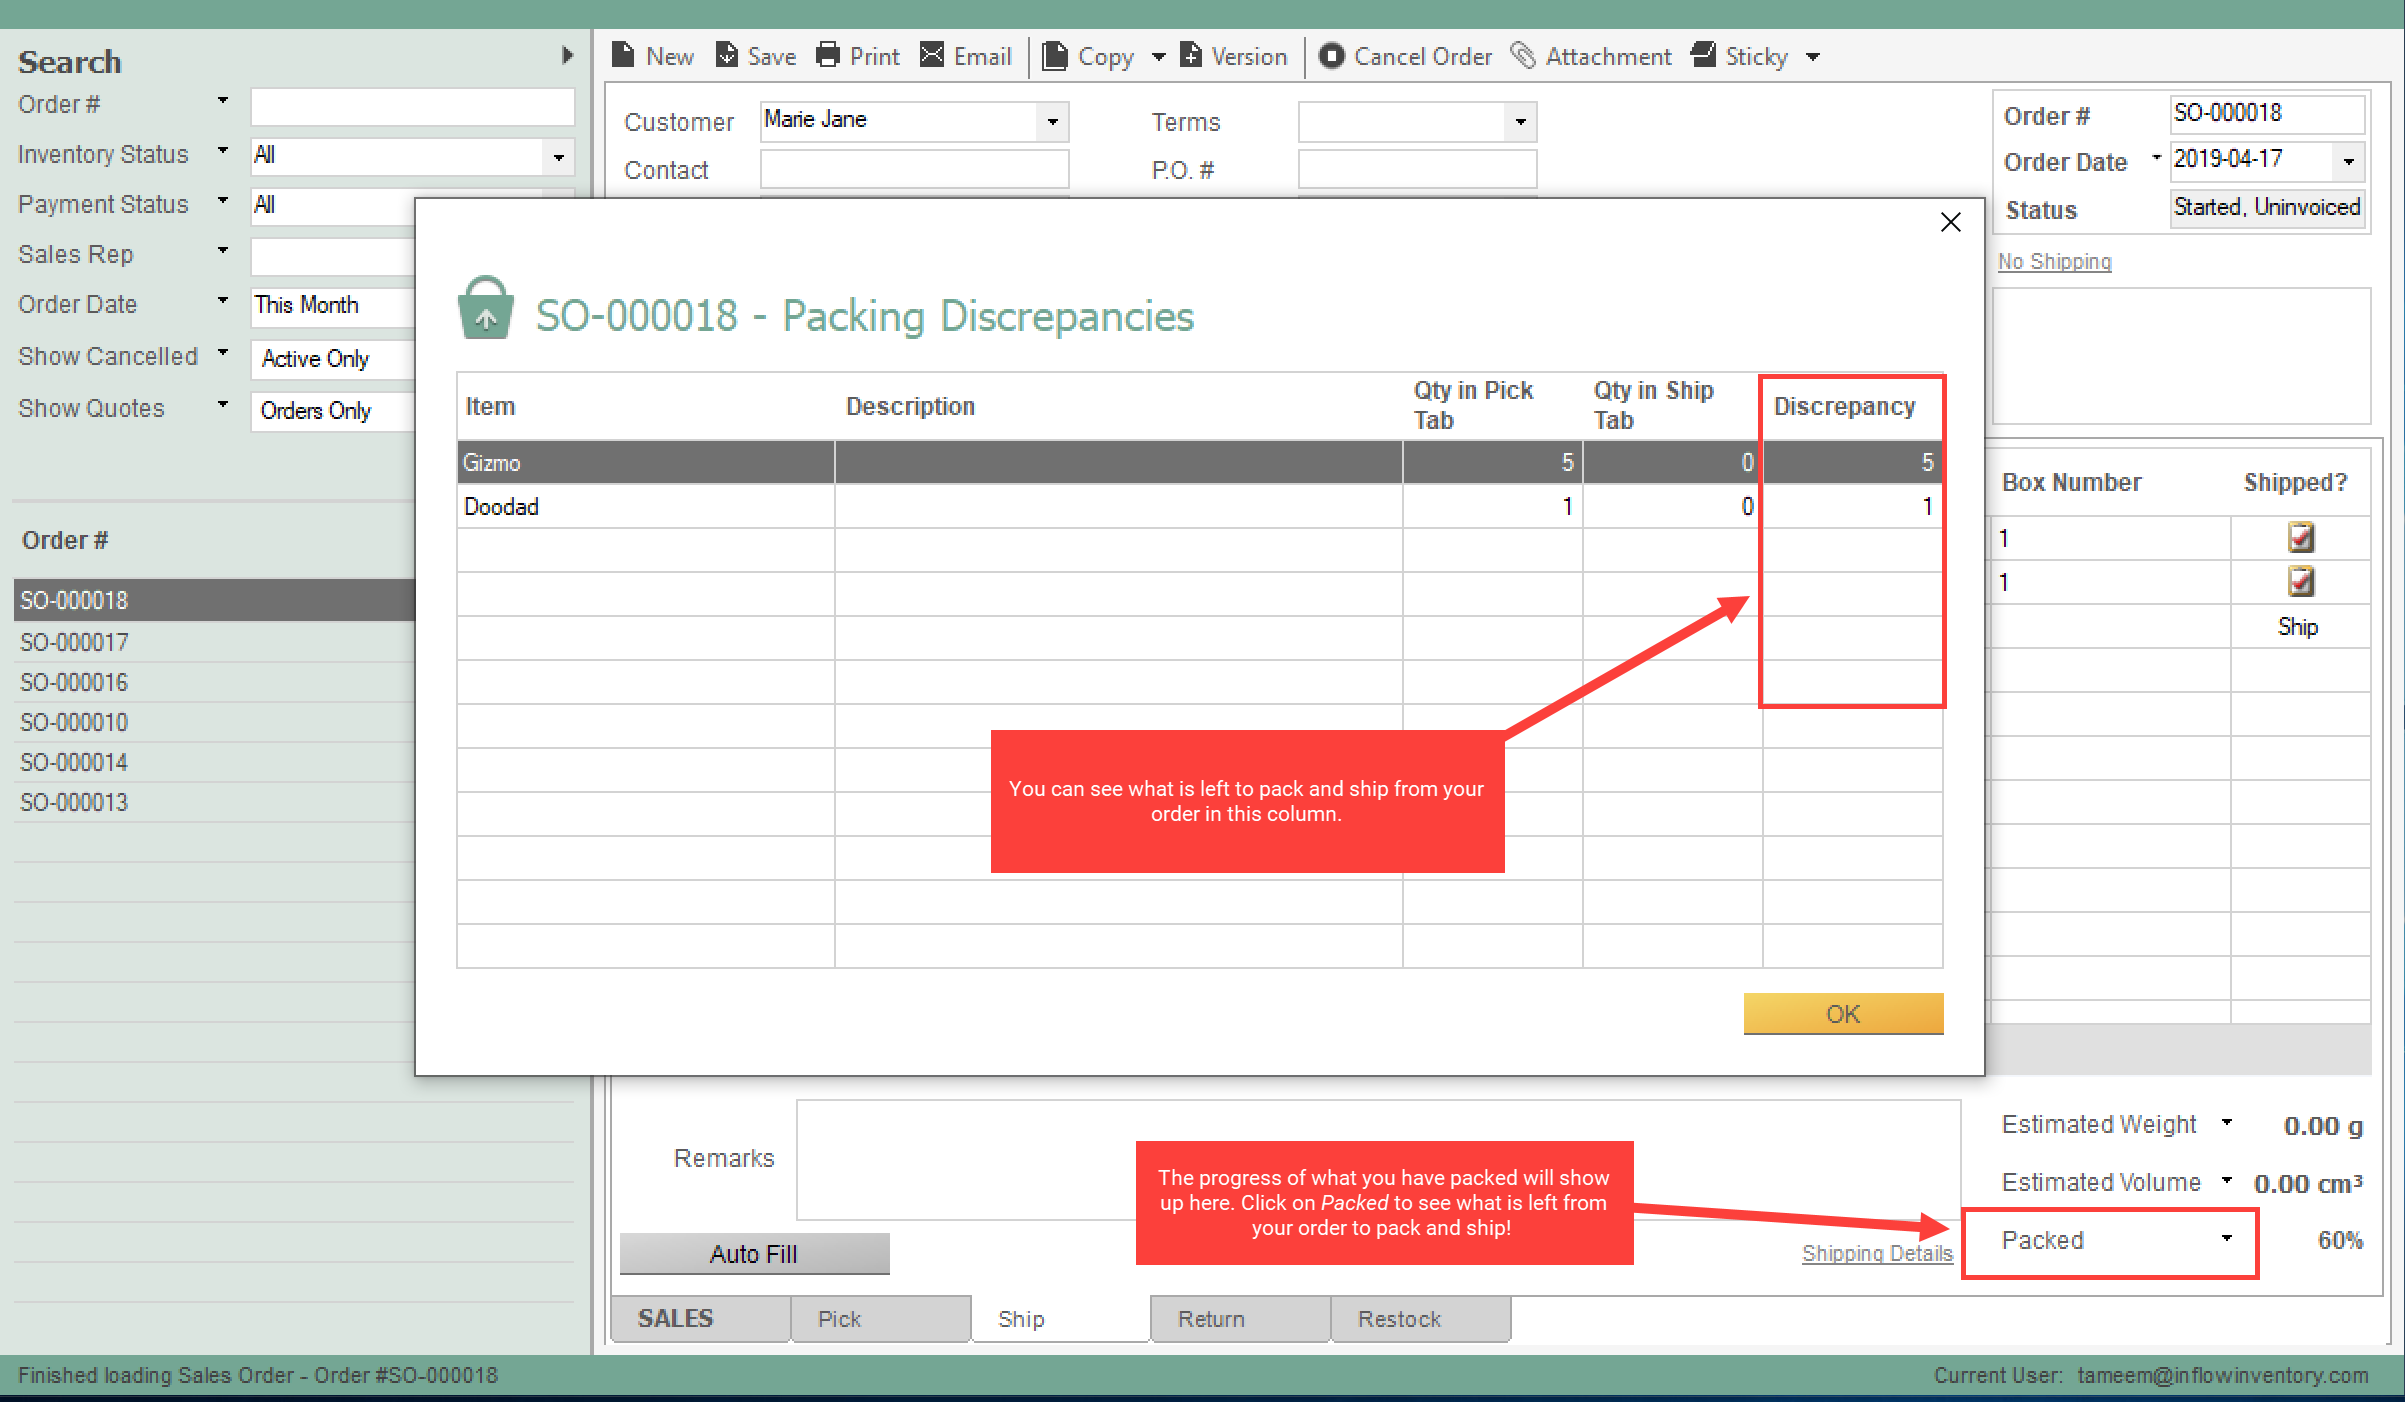
4. Once you’ve sorted out any discrepancies, you can save the order in inFlow, seal and label your parcels, and send them to your customer!
Maintaining pick and ship accuracy
inFlow has some features that will help you ensure you’re picking and packing/shipping accurately.
Progress Trackers: Progress trackers are built into both the Pick and Ship tabs, as seen below. This allows you to see how much of your order has been picked or packed and ready to ship. This is a particularly helpful feature on larger orders with lots of stock.
Warning symbols: If you select items that aren’t on your order tab (or you select too many), the program will flag them so you can see they should not have been picked or packed for shipping. Hover over the symbol to find out more about what the error is.
Do you still have questions about picking, packing, and shipping? Contact the inFlow team, and we’d be happy to help!
Mobile
Picking products
Once you’ve added your products to a sales order, you can start picking the order! Click the yellow Pick order button in the bottom right when the shipping is turned on.
There are several ways to pick products on your order:
- To auto pick all items on the order, tap on the picking progress button in the bottom right and select Autofill.
- To mark an entire item line as picked, tap on the empty checkbox on the left side.
- To partially pick an item line, click on the ellipsis (three dots) on the right side to open the more actions menu and select Partial pick.
- You can also pick your items by scanning them! Tap on the barcode icon in the top right to open the camera barcode scanner.
Unfulfill/unpick an item
- To auto-unfulfill/unpick all items on the order, tap on the picking progress button in the bottom right and select Unpick all.
- Tap on the gray check mark on the left side of the item line OR the ellipsis (three dots) on the right side to open the actions menu and select Unfulfill/Unpick or Partial fulfill/pick to adjust the number of fulfilled/picked items.
More actions menu
Next to each item line on the Fulfill/Picking screen, tapping the ellipsis (three dots) on the right side will open the More actions menu. Here you’ll be able to:
- Edit the location where the product will be fulfilled/picked from.
- Edit the fulfilled/picked date for products that have been fulfilled/picked.
- Partially fulfill/pick items.
- Unfulfill/unpick items.
Do you still have questions about picking, packing, and shipping? Contact the inFlow team, and we’d be happy to help!

0 Comments