How to create sales reps and set access rights
Boost your business performance with inFlow! Effortlessly track orders by individual sales representatives and say goodbye to the hassle of calculating commissions.
Experience the convenience and power of inFlow’s sales rep tracking today!
Setting up
You’ll need to set up your team members as sales reps before you can save them to an order or customer. Team members who do not have access to sales orders cannot be set as sales reps.
Setting up team members as a sales rep
- Go to inFlow’s Team settings (Main Menu> Options> Team.)
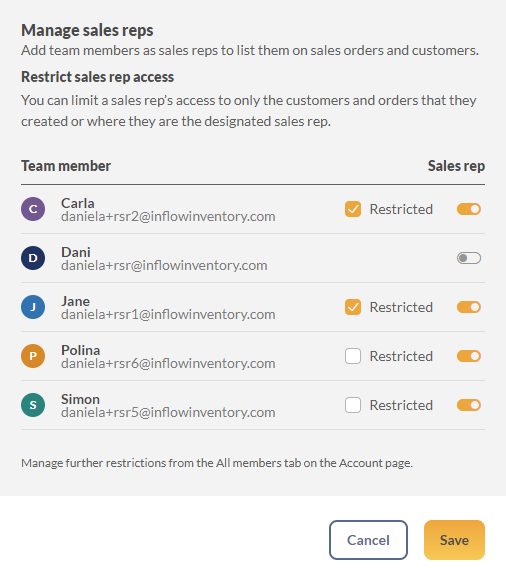
- Under Team members, select the Sales reps tab, then Manage sales reps.
- Toggle Sales rep ON for team members you want to set as sales reps.
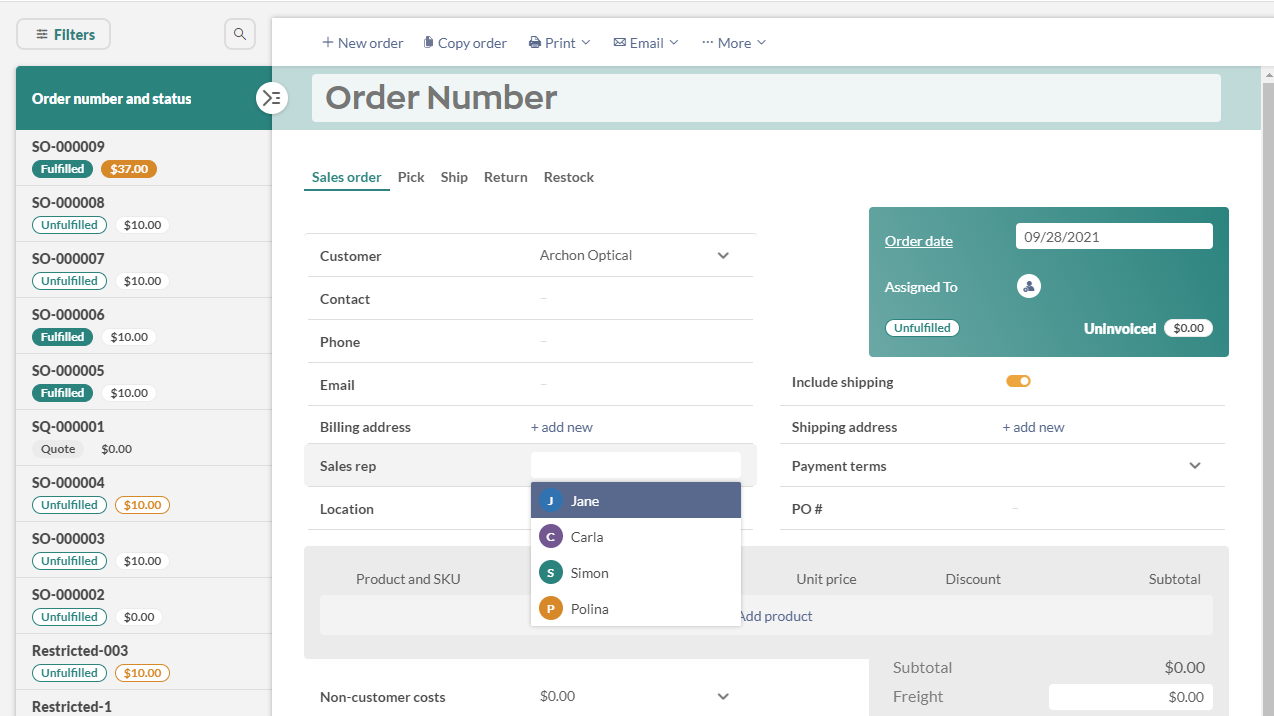
When a sales rep creates a new customer or order, they will automatically be set as the sales rep. You can also set the sales rep manually from the Sales Rep dropdown in the customer record or sales order.
Want to restrict sales reps to only their orders and customers? See the “Restrict sales rep” tab above for details.

Restricting sales rep access
Please note this feature is only available on select plans or add-ons.
This two-minute video shows you what sales rep restrictions look like in inFlow:
Once you have created team members as sales reps (see the “Setting up” tab above), you can restrict sales reps to viewing only orders and customers they own.
To restrict a sales rep
- Go to inFlow’s Team settings (Main Menu> Options> Team.)
- Under Team members, select the Sales reps tab, then Manage sales reps.
- Check off the Restricted box next to any sales rep who should only have access to customers and orders they own.

A restricted sales rep will not be able to:
- See orders and customers where they are not the sales rep
- Access the Dashboard (Windows app)
- View a product’s cost history
- View a product’s movement history
- Edit the sales rep field on orders and customers
Legacy sales rep settings
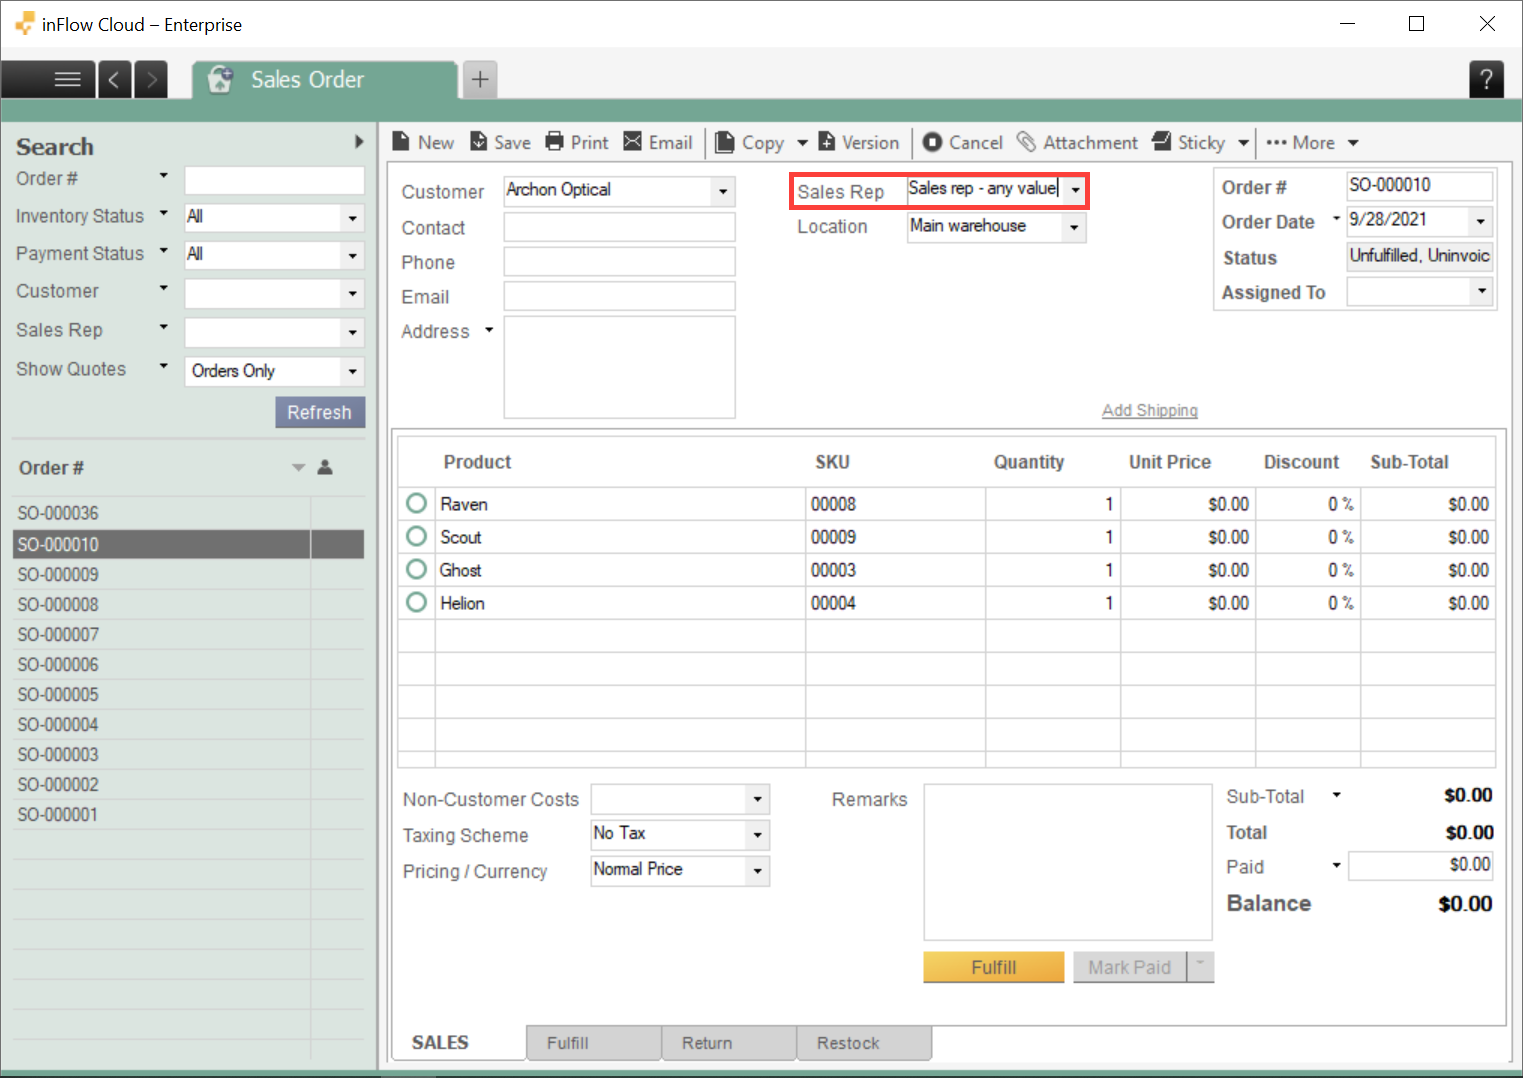
Before the Restrict by Sales Rep feature, you could not set team members as sales reps. Instead, you could type your team member’s name or any value into the Sales Rep field. If you have added sales reps in this way before, you may continue using the Sales Rep field as a free-form value.
To set your team members as sales reps instead, see the “Setting up” tab above for steps.
To add a sales rep to a sales order
- Click the Main Menu > Options > Settings.
- Choose References from the tabs on the left.
- Click the Sales Reps button. In this window you can add or remove Sales Reps if you want to.
- When you’re satisfied, click Save & Close.
In the sales order, choose your rep from the Sales Rep drop-down or add a new rep by typing into that field.
inFlow will save the new representative name and make it available when selecting a representative on your next order. You can also click the save icon beside it to set this sales rep as the default for this specific customer.

To edit/ delete Sales Reps already in the system
- From the inFlow Windows app, Click the Main Menu > Options > Settings.
- Choose References from the tabs on the left.
- Click the Sales Reps button. In this window you can add or remove Sales Reps if you want to.
- When you’re satisfied, click Save & Close.


0 Comments