How do I delete, rename, re-import, and export custom documents in inFlow?
Deleting your document
On occasion, you may need to remove custom documents that you have already imported into inFlow Inventory.
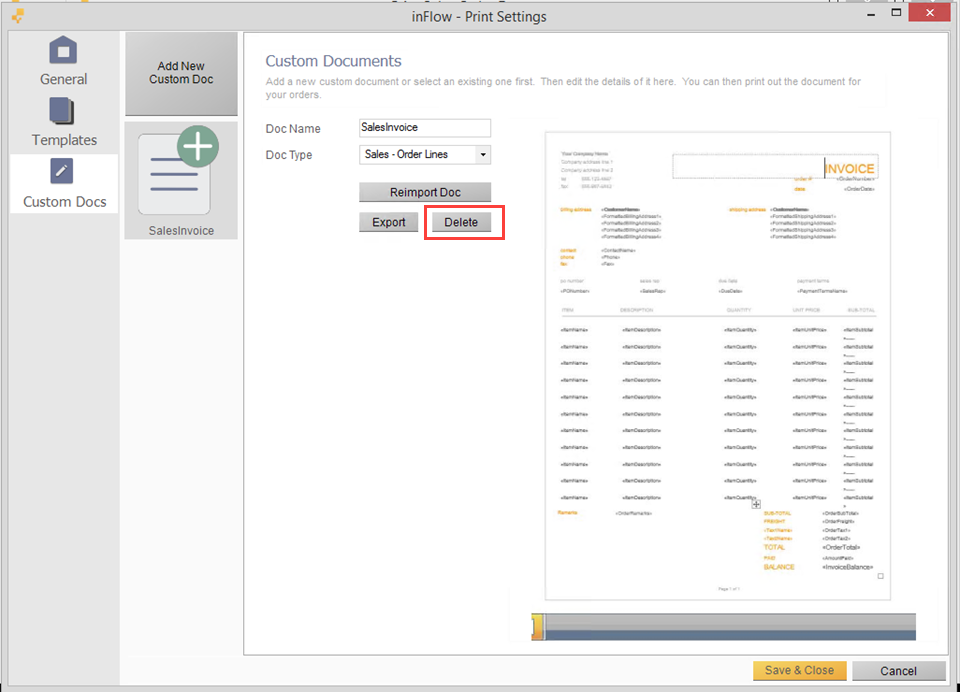
- Go to Main Menu > Options > Print Settings.
- Click the Custom Docs icon.
- Select the document you want to delete.
- Click the Delete button.

Renaming your document
You may want to rename your documents to make them easier to identify within the program.
To rename a custom document:
- Go to Main Menu > Options > Print Settings.
- Click the Custom Docs icon.
- Select the document you want to rename.
- Change the name in the Doc Name field.
- Click Save & Close.
Re-importing your document
inFlow allows you to quickly and easily re-import the document, so you don’t have to start from scratch if you need to make changes. In order to re-import a document, you must first make your changes to that document in Microsoft Word. Open the file in Microsoft Word, make the necessary changes, then re-save it.
To re-import a custom document:
- Go to Main Menu > Options > Print Settings.
- Click the Custom Docs icon.
- Select the document you want to rename.
- Click the Reimport Doc button and locate the document on your computer.
- Click Save & Close.
Exporting your document
inFlow allows you to quickly and easily grab a copy of a previously imported custom document for further editing.
- Go to Main Menu > Options > Print Settings.
- Click the Custom Docs Icon.
- Select the document you want to export.
- Click the Export button and choose where to save it.
- Click Save & Close.


0 Comments