Shipping orders: charging freight & printing packing slips
Learn how to add shipping-related fields, to your orders and easily print packing slips. Improve your order management process and optimize your shipping operations.
Web

Shipping fields
To access shipping documents and fields, toggle on Include shipping on your sales or purchase order.
This will change the order to include certain fields like Freight, Payment Terms, Shipping Address, and more. You can also print sales shipping documents: packing slip, box content list, etc.

Adding shipping also adds additional fields such as Payment Terms and P.O#. Once you’ve added shipping, you can control the shipping address as well.
You will also see fields such as Freight, Due Date, or Req. Ship Date appears at the bottom of the order. You can select the requested ship date from the drop-down or enter your freight charges into the freight field as indicated. You can add more shipping information on the Ship tab at the top of the screen. There, you can register the carrier and their tracking number if provided by clicking View shipping details under the product table.
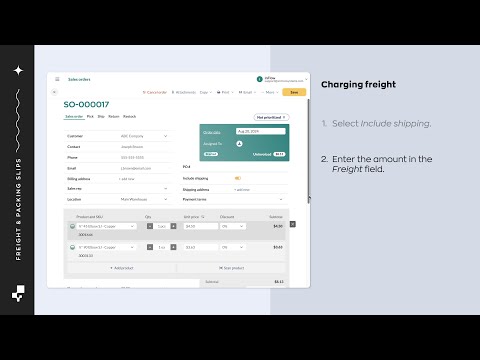
Charging freight
- Select Include shipping.
- Enter the amount in the Freight field.
Will freight affect sales order profit or product costs?
Freight on a sales order won’t affect the sales order’s profit (when added to the freight field). Freight added to non-customer costs or as a line item will affect sales order profit.
The freight paid when purchasing products is calculated into the product cost. Take a look at how inFlow calculates cost from this guide.
Printing packing slips
- Select Include shipping.
- Go to the Ship tab.
- To select the products you’re shipping, select Add Products or Auto Fill.
- Print or email the packing slip document.
Charging freight & print packing slips video
Windows
Shipping can be turned on by clicking the Add shipping link in the top right-hand corner of your order window (just below the order date and status).
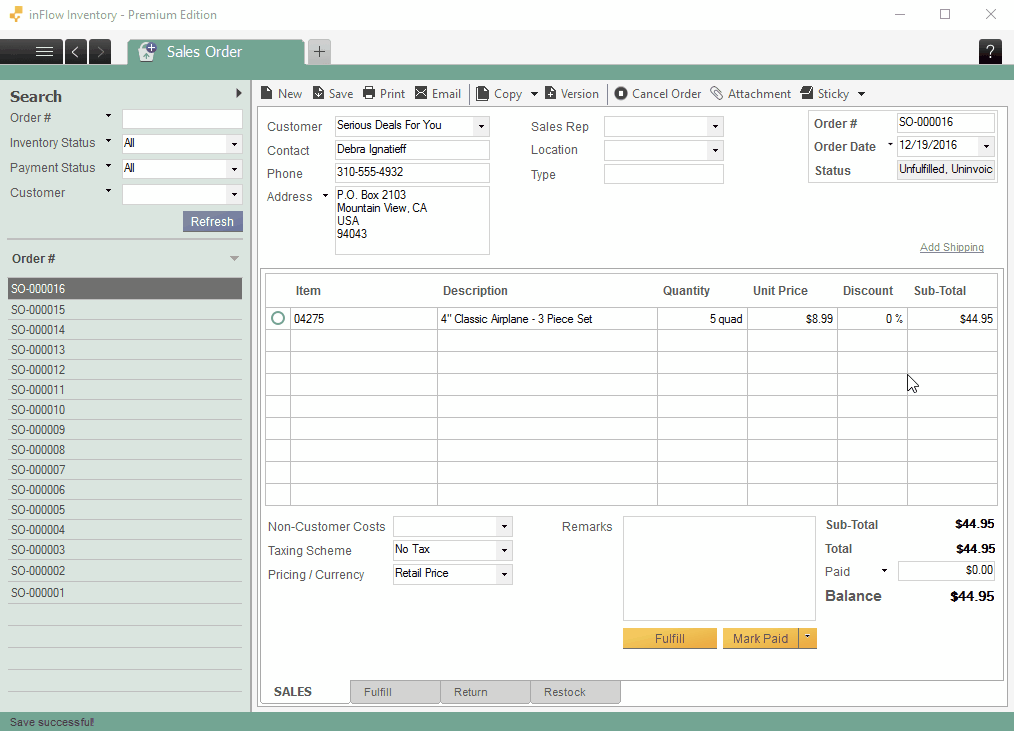
Adding shipping also adds additional fields such as Payment Terms and P.O#. Once you’ve added shipping, you can control the shipping address as well.
You will also see fields such as Freight, Due Date, or Requested Ship Date appear at the bottom of the order. You can select the requested ship date from the drop-down or enter your freight charges into the freight field as indicated. You can add more shipping information on the Ship tab at the bottom. There, you can register the carrier and their tracking number if provided.


0 Comments