How to track lot numbers/batch/expiration dates
In inFlow, tracking lot/batch numbers or expiry dates isn’t currently supported as a dedicated feature. However, there are workarounds available that allow you to effectively track this information within inFlow.
Please note: locations are only available on select plans or add-ons.
Web
There are currently two ways to handle lot numbers or expiration dates in inFlow:
- Using sublocations
This uses inFlow’s sublocations feature, which you rename to track the lot, batch, or expiry date information. - Setting up individual product records
This option allows you to create multiple product records of the same product with lot, batch, or expiration date information.
Setting up sublocation tracking
If you’re not already using sublocations in inFlow, you could try using them to keep track of these numbers. This isn’t exactly what it’s designed for, but it’s worked well for a number of people.
This same trick will work for lot numbers, batch numbers, expiry dates, and so on. We recommend you enter expiry dates in a YYYY-MM-DD format so that they can be sorted properly.
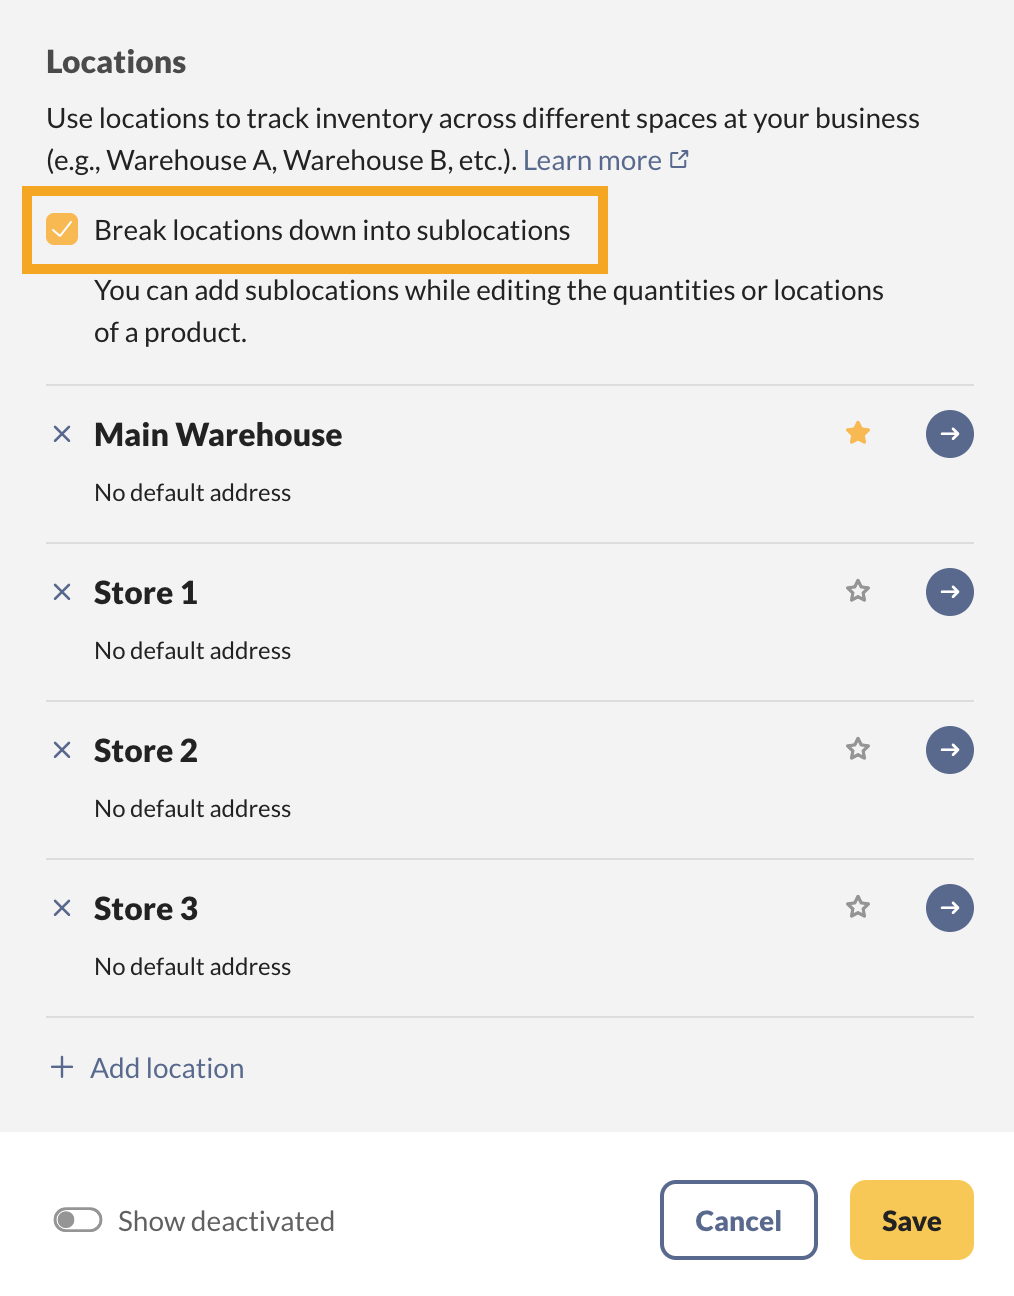
Enabling sublocations
- Go to inFlow’s Inventory settings or Main Menu>Options> Inventory if you’re already logged in.
- Click on Locations.
- Put a checkmark next to Break locations down into sublocations.
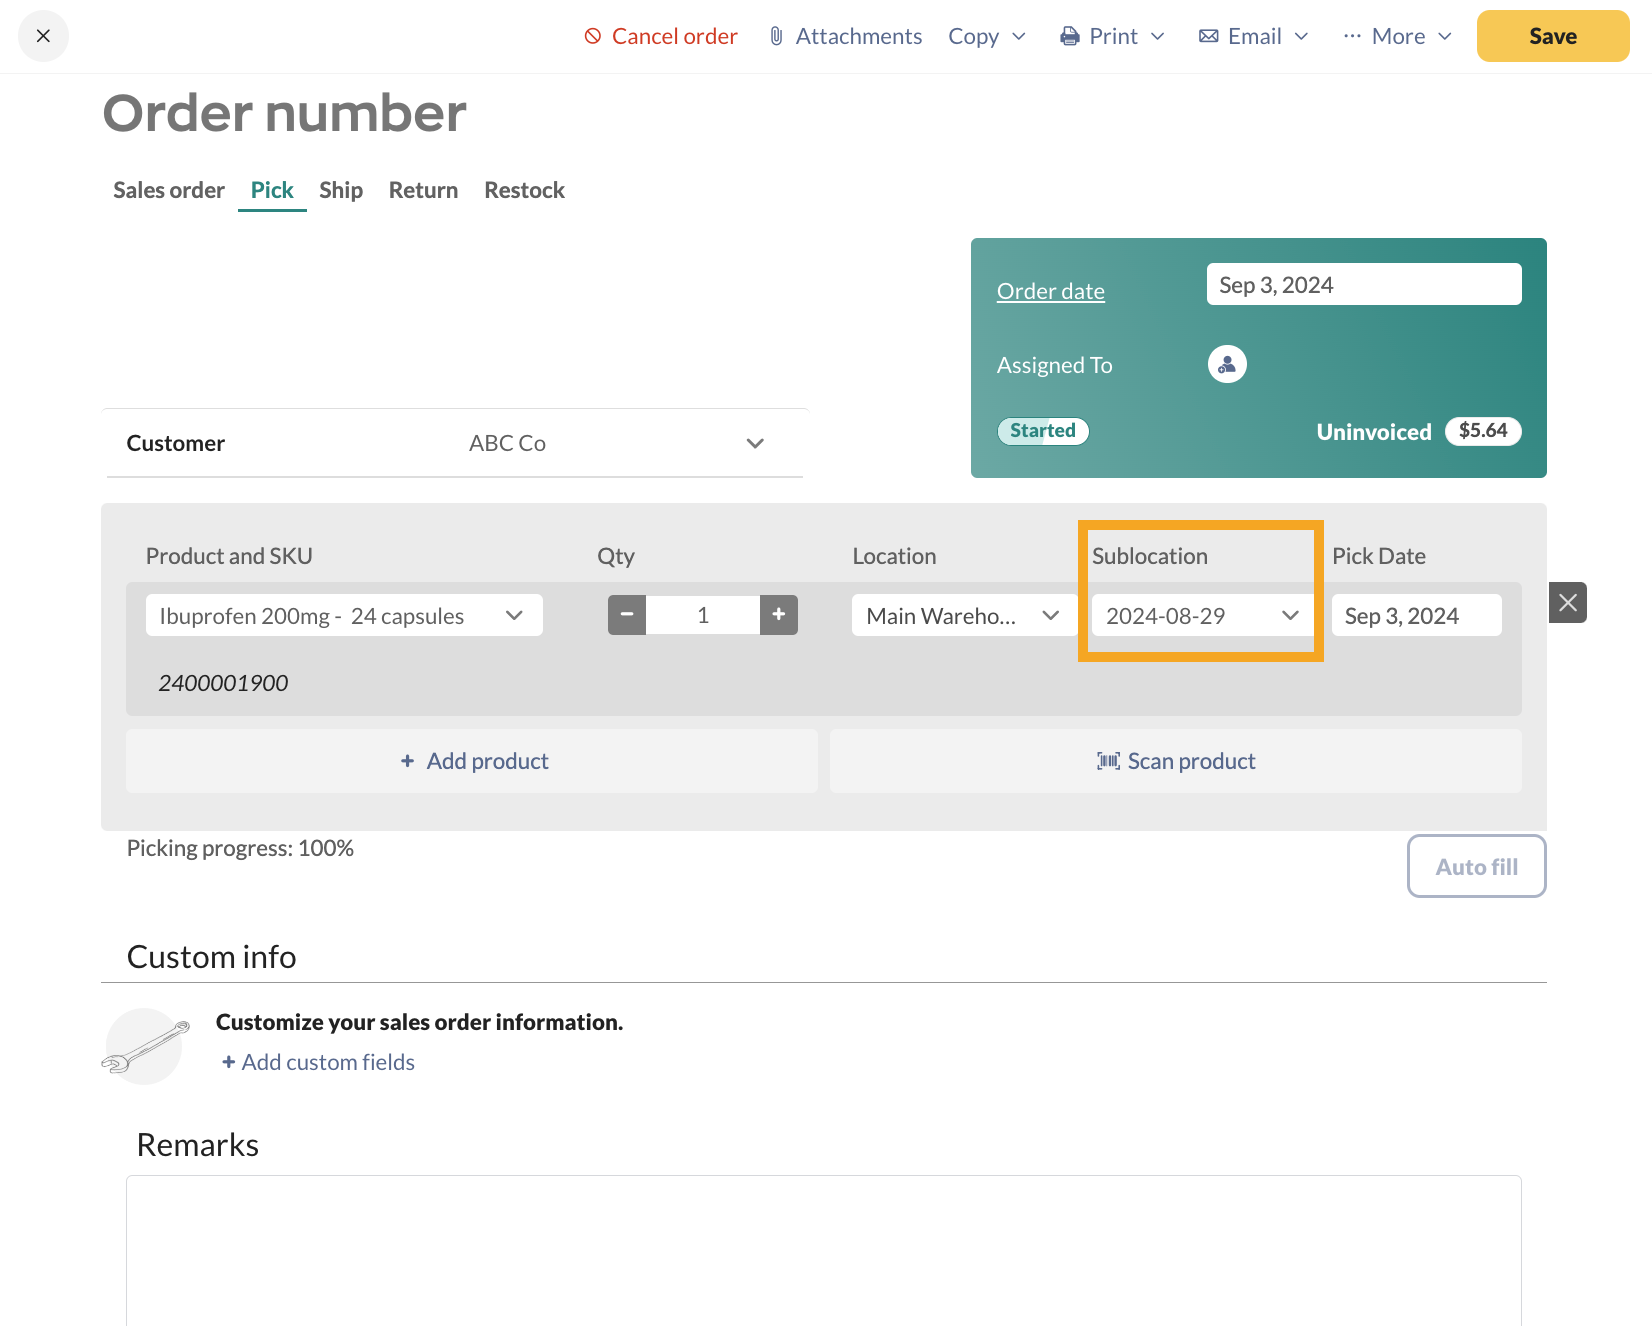
Purchasing/receiving lot/expiry products (using sublocations)
- Open your purchase order.
- Click the Receive tab and add the products, or select Auto fill to add all products. If needed, split the products out line by line. if you need to track multiple lot/expiration dates
- In the Sublocation field, add the lot/expiration/batch number for each unit.
- Save the purchase order.
To sell/ship the items (using sublocations)
- Open your sales order.
- Click the Fulfill tab (or Pick tab if you have shipping turned on) and select your products from the correct sublocation.
Manufacturing products (using sublocations)
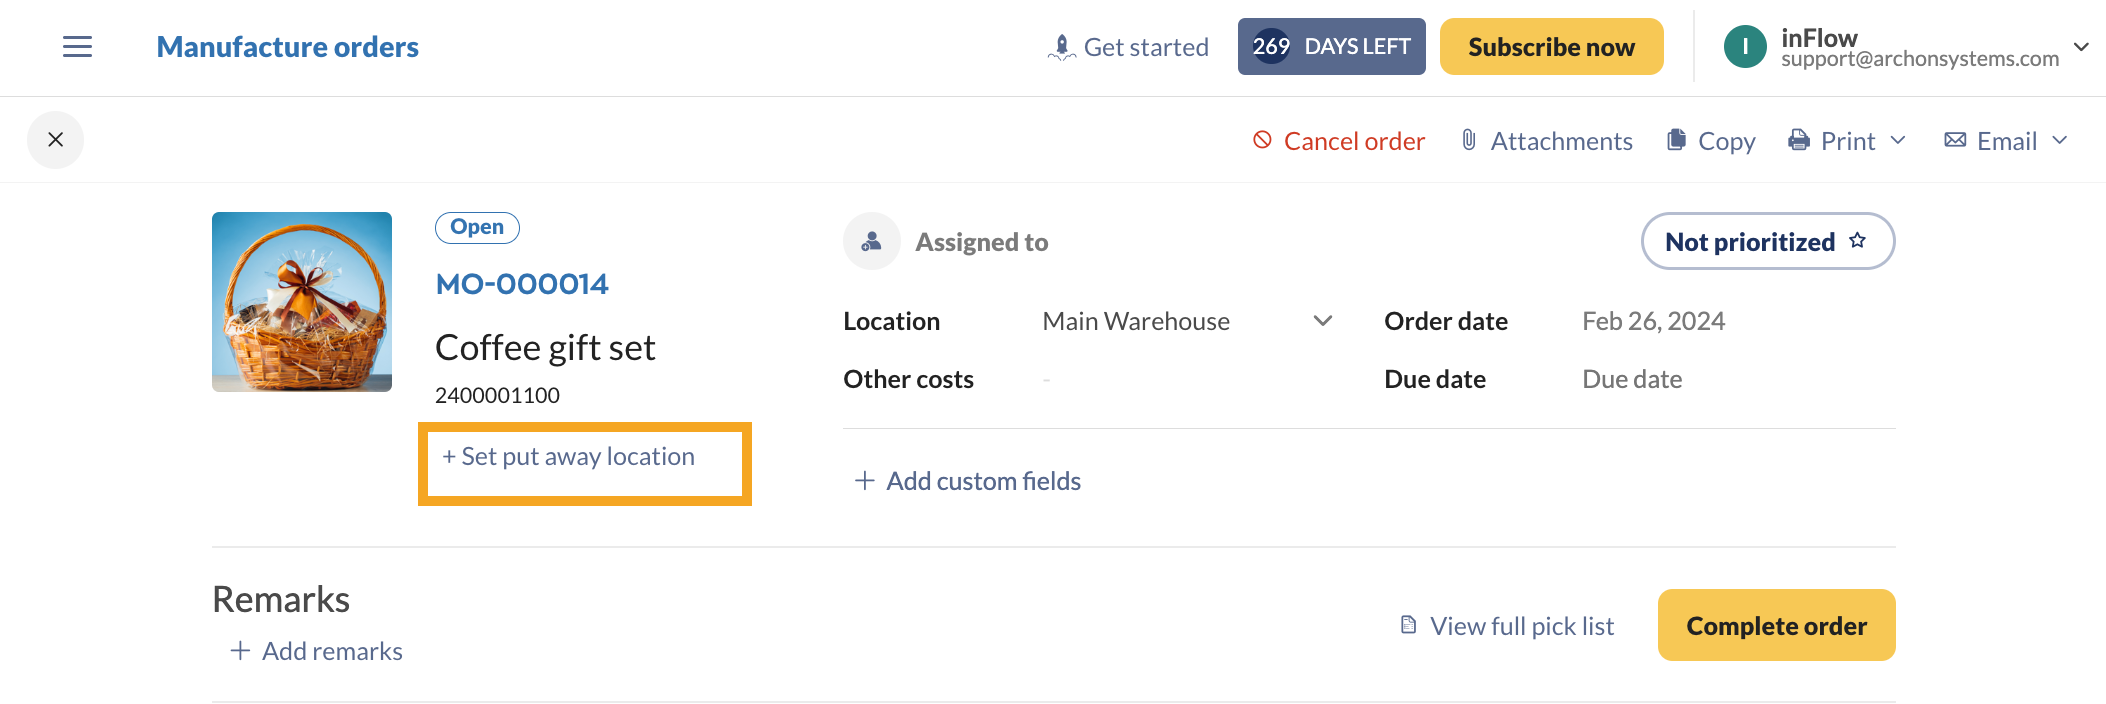
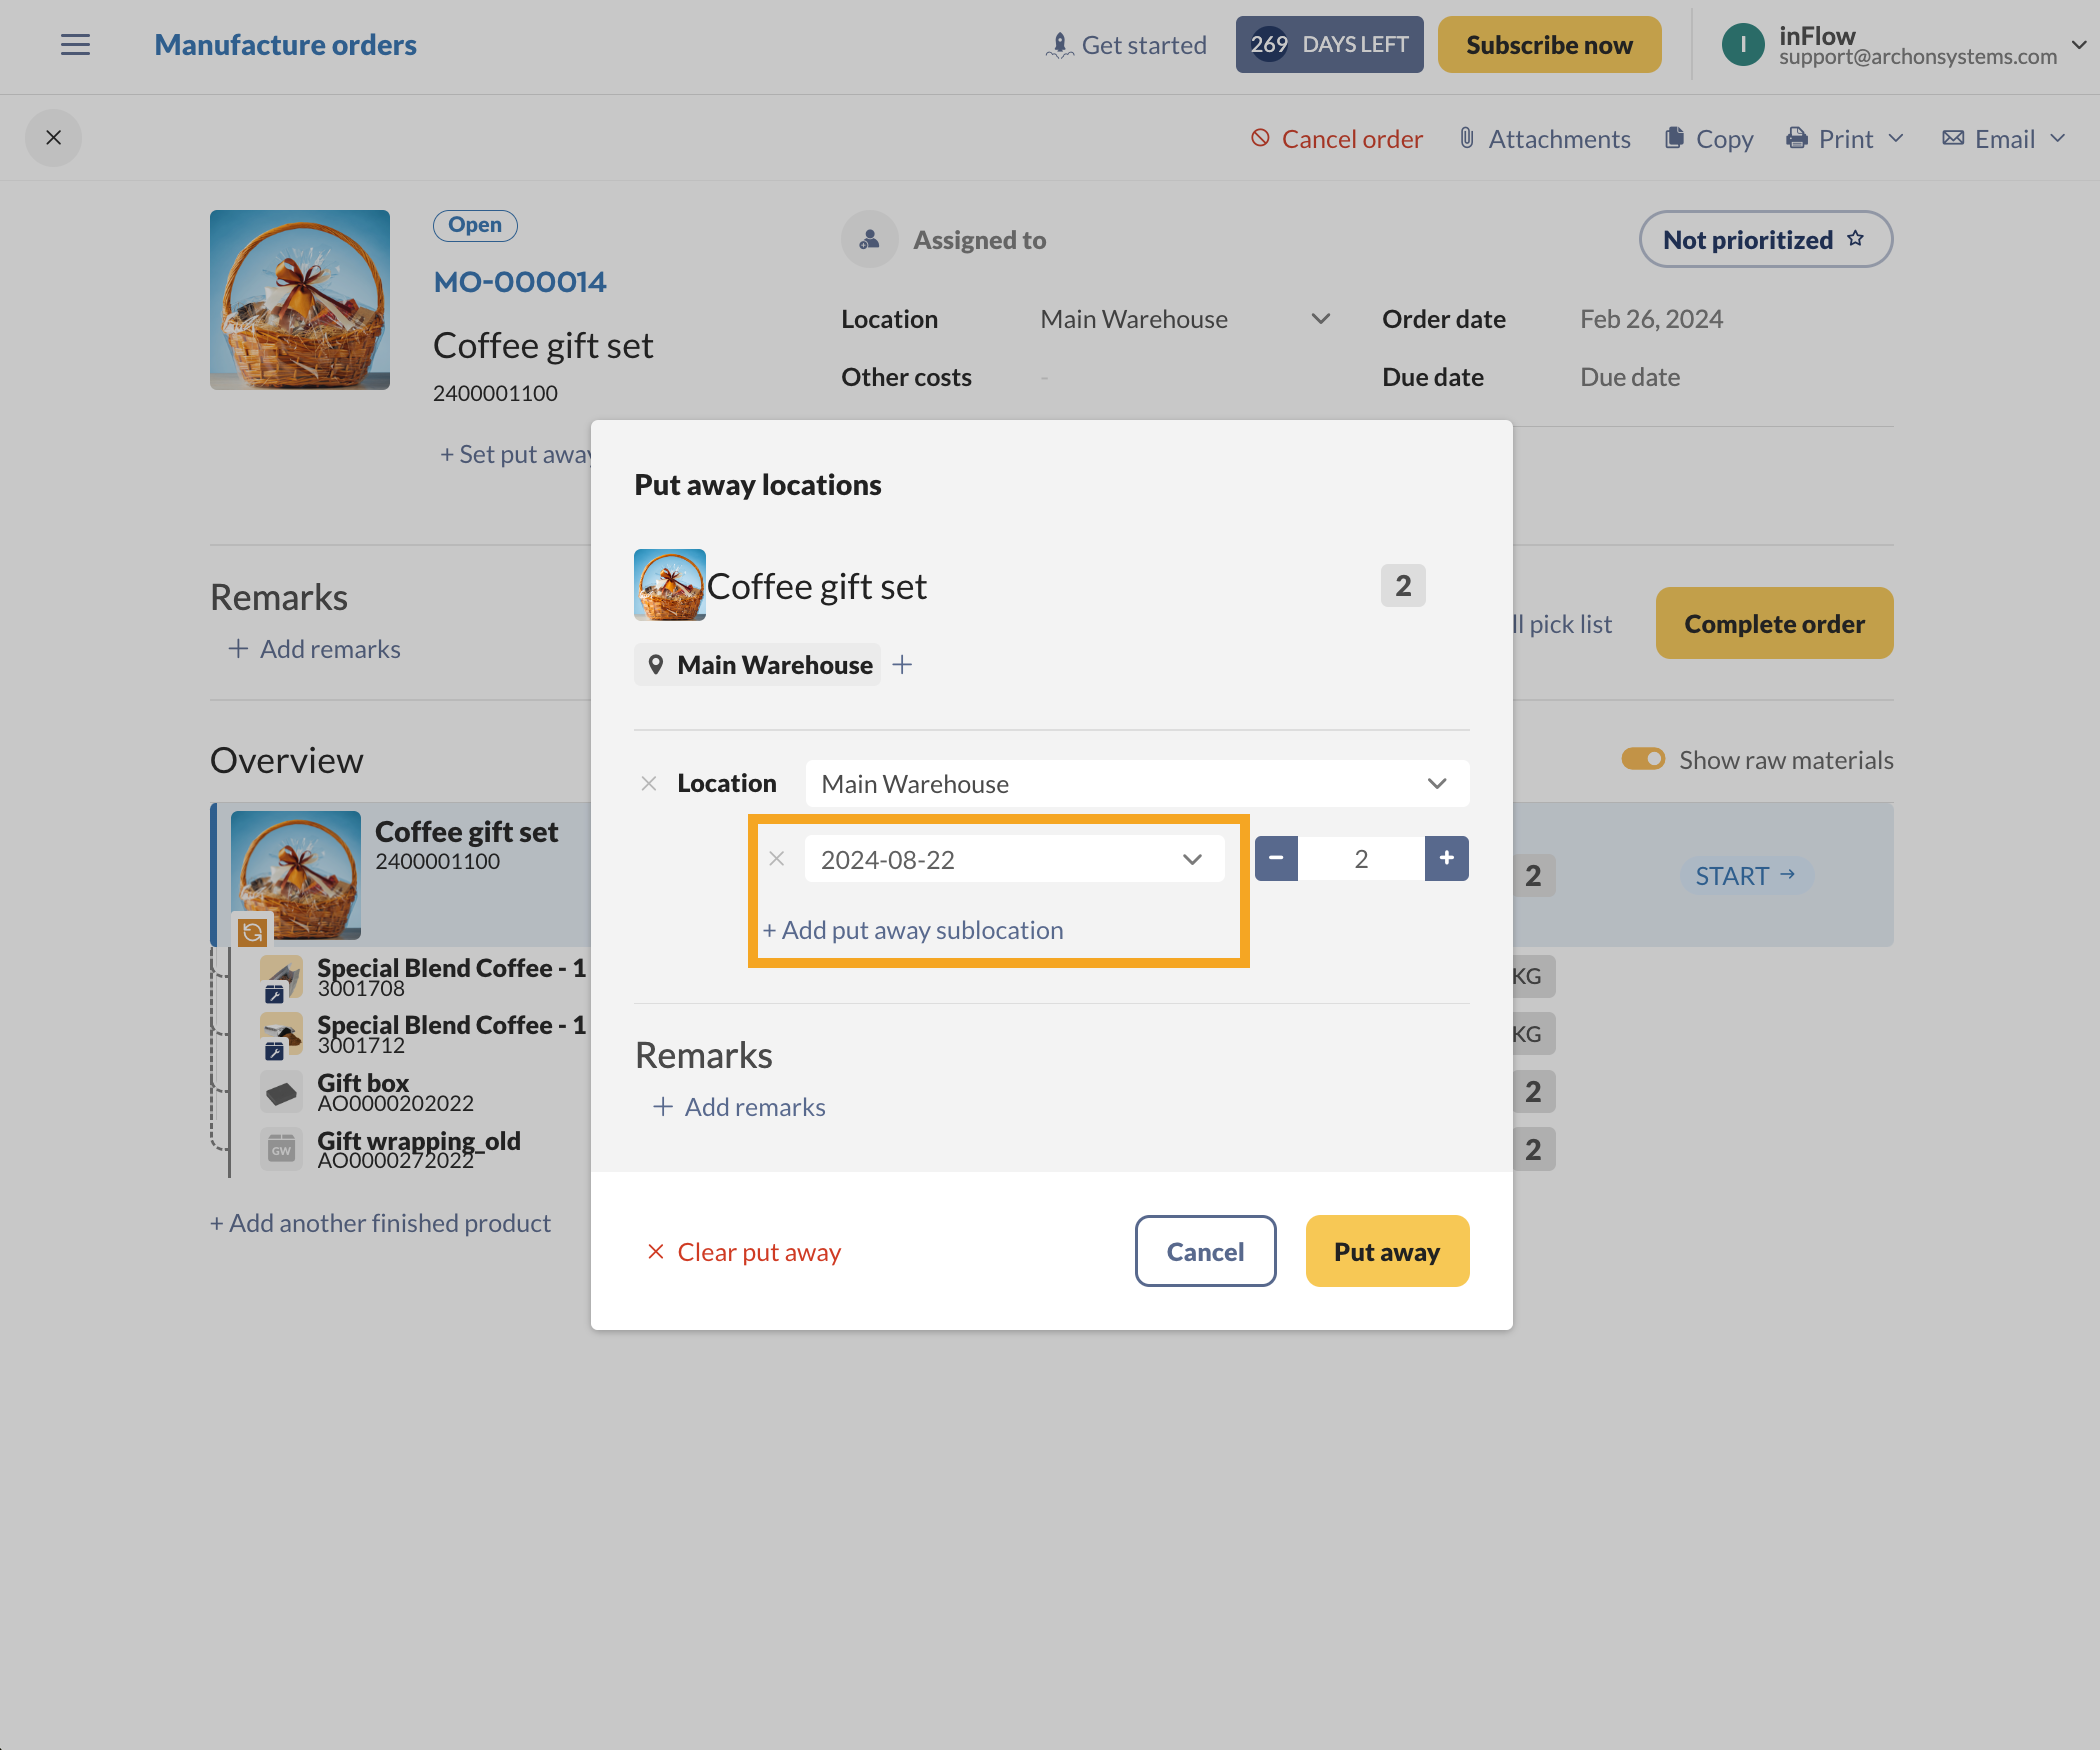
- Open a manufacture order (Main menu > Manufacture order list.)
- Select Set put away location.
- Under the location field, enter the lot/batch number in the sublocation field. Click on Add put away sublocation to add additional sublocations.
- Click the Put away button when done.
Setting up individual product records
If you are already using inFlow sublocations to track actual sublocations, the above workaround will not work for you.
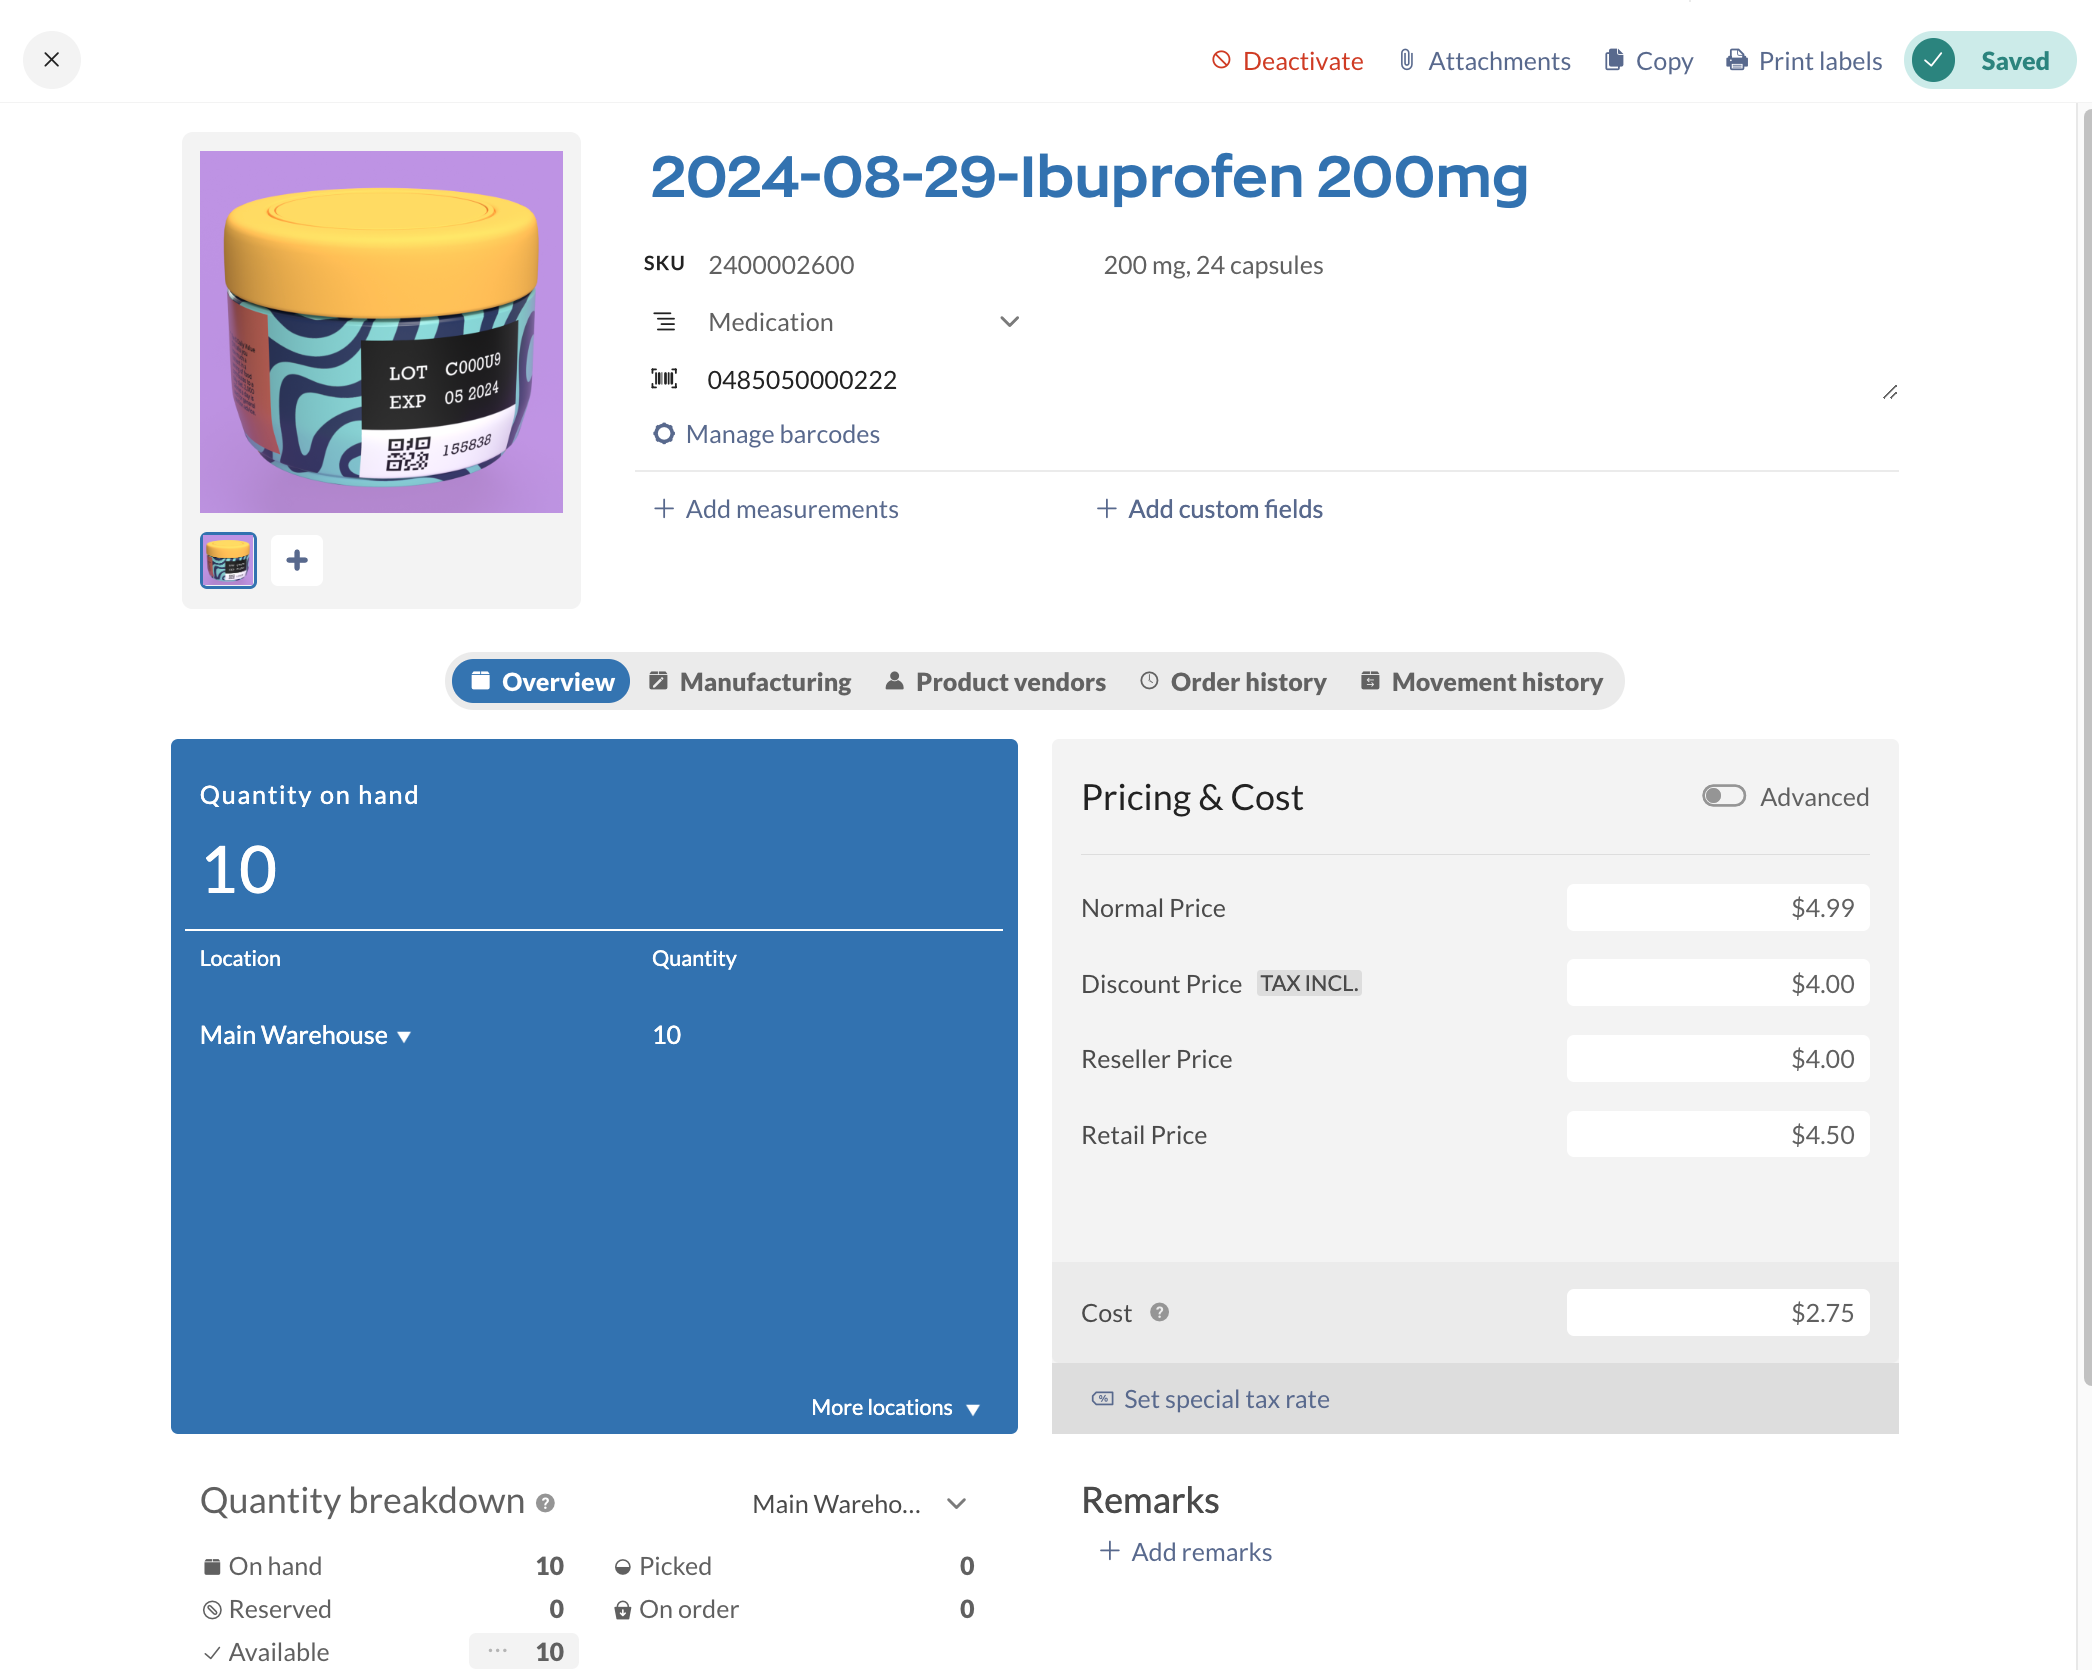
Another option you can try is setting up individual product records for each lot number/batch number (an example name would be LOTNUMBER-PRODUCTNAME).
To create your product
- Go to Main Menu > Inventory > New Product.
- Enter all the relevant details for your product, and be sure to use the lot number as the item code.
- Save your product record.
You may try setting up a category named after the model number of your product so you can make searching on sales orders easier on yourself later. Have a look at the article on how to categorize products for more info.
To create another lot number of the same product
- Open the product record for an item that has the same lot number as the item you’d like to create.
- Click the Copy button at the top. This will replicate the record and simply ask you to enter a new item code.
- Enter the lot number and click Save.
You can also set these items up ahead of time (let’s say your vendor sends you a list of these numbers) by importing the information into the system.
Simply match the lot number column to the Product name field in inFlow, and be sure to include any relevant details, such as product name or model category, in separate columns within that spreadsheet. For more information on importing data, please see our article on how to import data into inFlow.
Reporting: tracking movements of lot numbers/batch numbers
- Go to inFlow’s reports.
- Click on the Audit log tab, then Inventory movement log. Select either the Summary or Details report option.
- Set the filters and columns for the report.
- Click Generate to view the report.
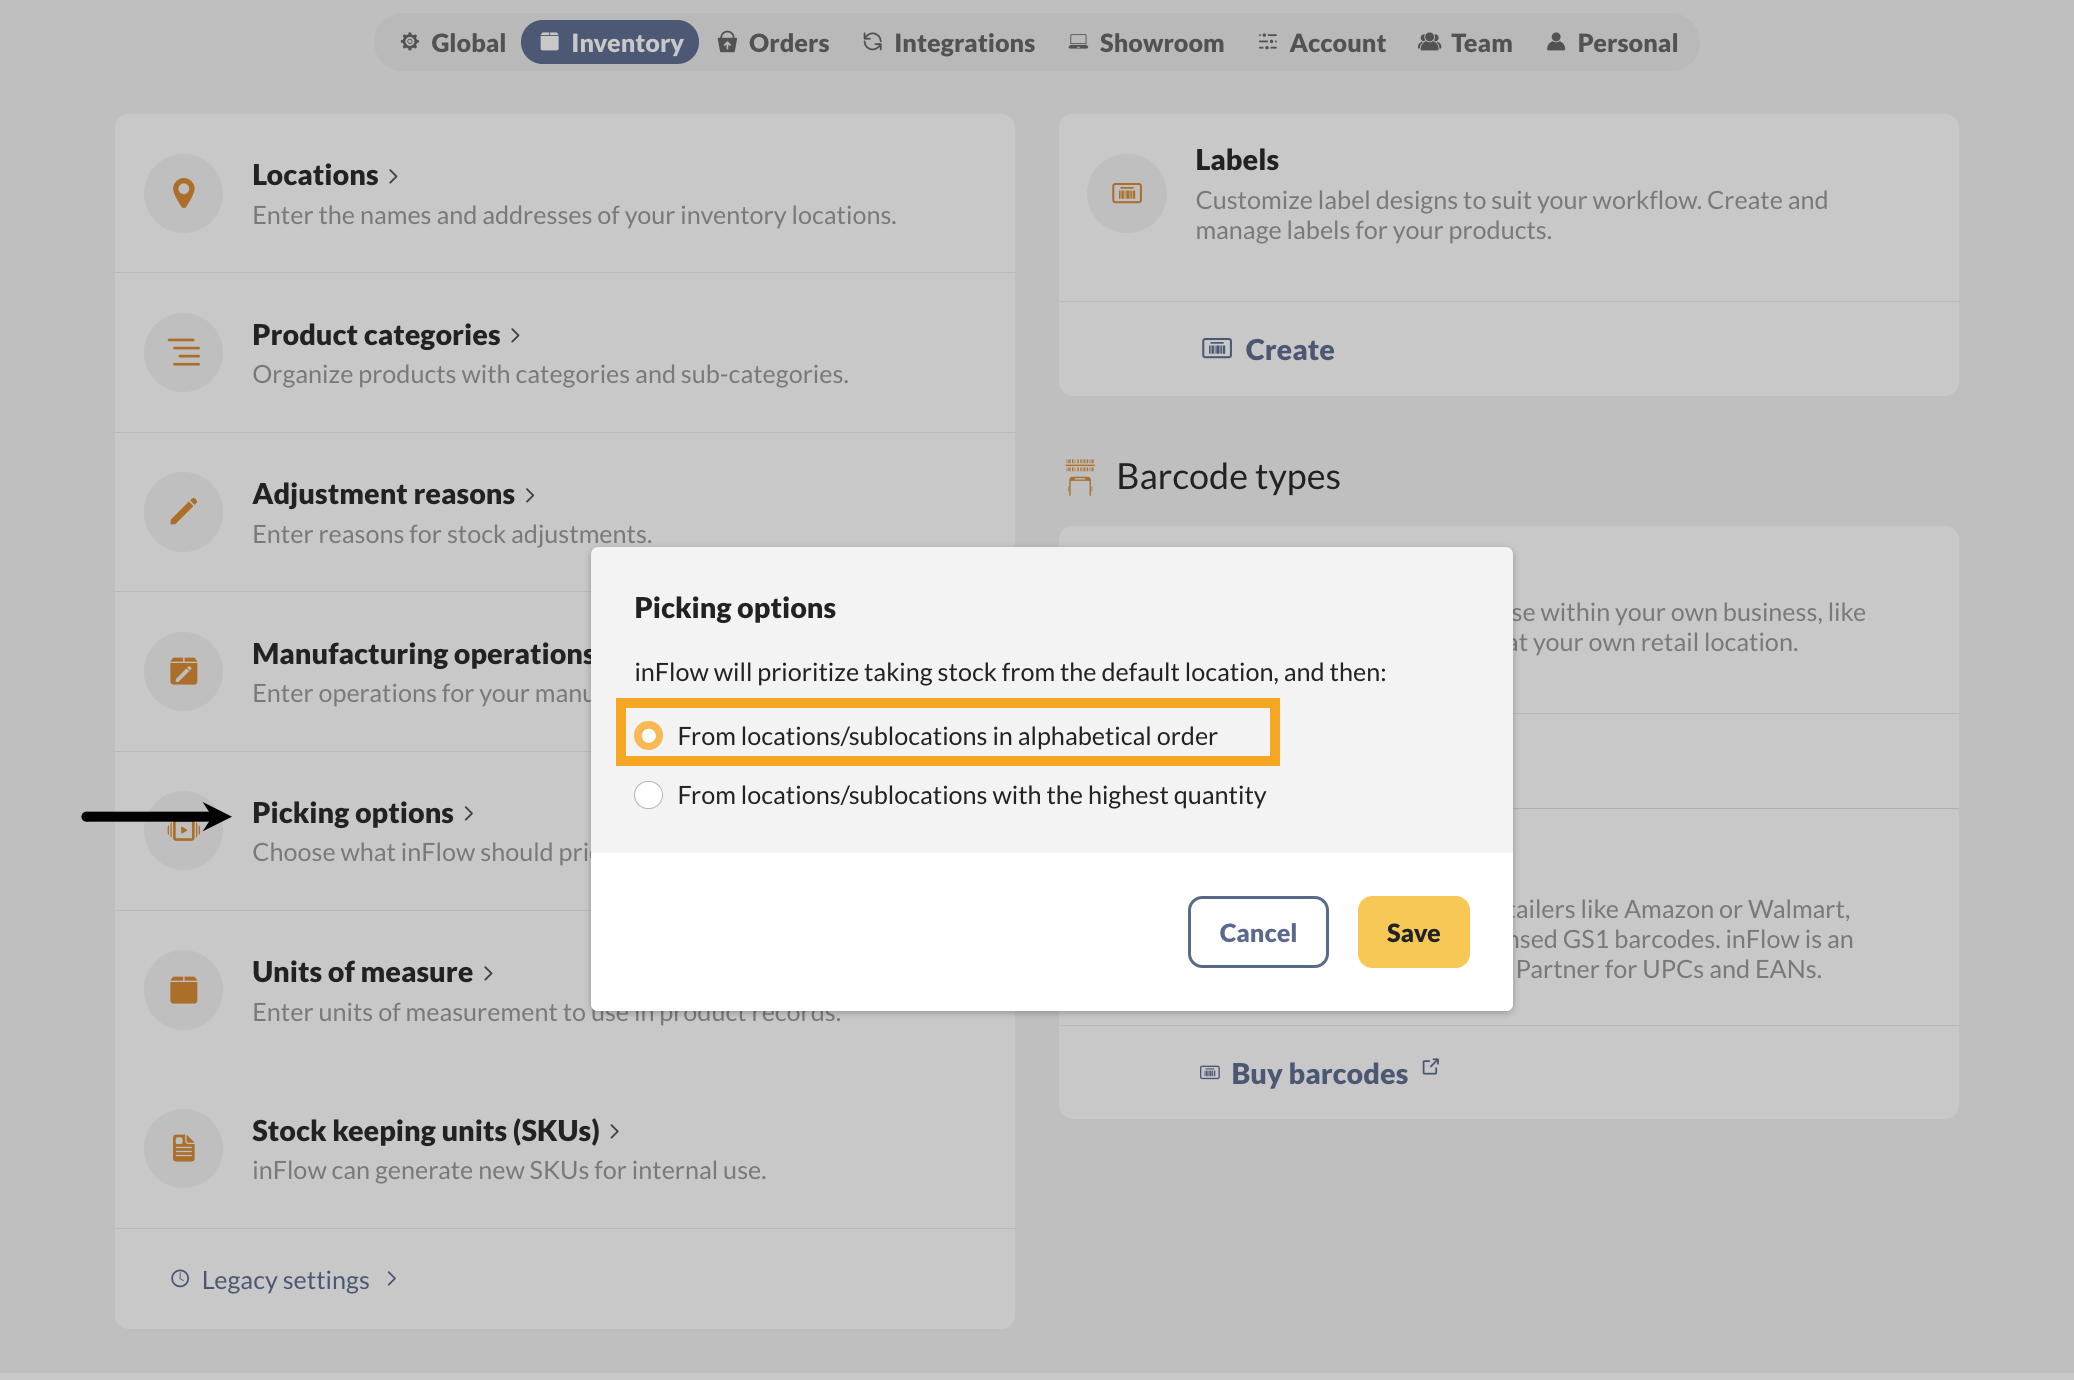
Location settings for product picking
By default, when in the picking process, if your location/sublocation goes to zero, inFlow will pick from the next location/sublocation with the highest quantity.
If you are using sublocations to track batch/lot numbers, it would be helpful to change the picking setting to pick by alphabetical order.
This will ensure that products from the batch or lot are picked from the designated sublocation, rather than from the sublocation with the most quantity available. Please refer to the steps below to set this up.
- Go to inFlow’s Inventory settings.
- Click on Picking options.
- Select your preferred picking setting.
- Click Save.
Webinar
Check out this webinar for complete steps on how you can track lot/batch/expiry dates in inFlow.

Windows
There are currently two ways to handle lot numbers or expiration dates in inFlow:
- Using sublocations
This uses inFlow’s sublocations feature, which you rename in order to track the lot, batch, or expiration date information. - Setting up individual product records
This option allows you to create multiple product records of the same product with lot, batch, or expiration date information.
Using sublocations
If you’re not already using sublocations in inFlow, you could try using them to keep track of these numbers. This isn’t exactly what it’s designed for, but it’s worked well for a number of people.
This same trick will work for lot numbers, batch numbers, expiry dates, and so on. We recommend you enter expiry dates in a YYYY-MM-DD format so that they can be sorted properly.
To activate sublocations
- Go to Main Menu > Options > Settings.
- Under Track inventory by click on Locations broken down into sublocations.
To purchase/receive your products
- Open your purchase order.
- Click the Receive tab and split your items out line by line.
- You can then enter the expiry date/ lot number/ etc. into the sublocation column for each unit.
This will allow you to stock each item in a separate sublocation.
To sell/ship the items
- Open your sales order.
- Click the Fulfill tab (or Pick tab if you have shipping turned on) and select your items from the correct sublocation.
To track the movement of a specific lot number/batch number
- View the Movement History by going to Main Menu > Inventory > Movement History.
- In Sublocation, type in the lot number that you want to look up.
- Click Refresh.
From the Movement History screen, you can also double-click on the row to bring up any related orders. This will let you quickly look up who that particular item was sold to (as an example).
Setting up individual product records
If you are already using inFlow sublocations to track actual sublocations, the above workaround will not work for you. What you may try is setting up an individual item record for each lot number/batch number (an example name would be LOTNUMBER-PRODUCTNAME).
To create your product
- Go to Main Menu > Inventory > New Product.
- Enter all the relevant details for your product, and be sure to use the lot number as the item code.
- Save your product record.
You may try setting up a category named after the model number of your product so you can make searching on sales orders easier on yourself later. Have a look at the article on how to categorize products for more info.
To create another lot number of the same product
- Open the product record for an item that has the same lot number as the item you’d like to create.
- Click the Copy button at the top. This will replicate the record and simply ask you to enter a new item code.
- Enter the lot number and click Save.
You can also set these items up ahead of time (let’s say your vendor sends you a list of these numbers) by importing the information into the system.
Simply match the lot number column to the Product field in inFlow, and be sure to include any relevant details, such as product name or model category, in separate columns within that spreadsheet. For more information on importing data, please see our article on how to import data into inFlow.
Location settings for product picking
By default, when in the picking process, if your location/sublocation goes to zero, inFlow will pick from the next location/sublocation with the most amount of quantity.
If you’re using sublocations to track batch/lot numbers, then it would be helpful to change the picking setting to pick by alphabetical order so that products from the batch or lot will be picked from instead of the sublocation with the most quantity available. See below for steps to set this up.
Please note this setting can only be selected on inFlow for Web. Once set, the changes will apply to all inFlow applications.
- Go to inFlow’s Inventory setting.
- Click on Picking options.
- There will be two options listed, select From locations/sublocations in alphabetical order.
- Click Save.
Webinar
Check out this webinar for complete steps on how you can track lot/batch/expiry dates in inFlow.


0 Comments