Custom document troubleshooting (Windows)
If you are having trouble using your custom documents, see below for suggestions.
While we offer the use of custom documents in inFlow, due to their high levels of customization and the limitations of Microsoft Words’s Mail Merge features, in-depth support for custom documents is not available.
The custom document template has no mail merge fields
inFlow Inventory’s custom documents use Microsoft Word’s Mail Merge feature to put the data from your invoices, etc., into the actual document. When you are creating or modifying the document template to use for the custom documents, make sure you insert some mail merge fields. Please see the full instructions for custom documents here.
The custom document template was created in another version of Word
For example, if you uploaded the custom document template as a .DOCX file from Microsoft Word 2007 and then tried to use it with an older version of Microsoft Word on another computer, this would cause problems. Please take a look at Microsoft’s Office Compatibility Pack for Word here.
The custom document template was incorrectly uploaded
Please double-check the type of document that was uploaded to ensure it was a .DOC or .DOCX file with mail merge fields set appropriately.
Looking for an easier option to customize documents? Then check out inFlow’s Document Designer!
Custom fields are not pulling information into the template correctly
This can happen if you add another column to your invoice table in which you’d like to include the information from a custom field. You will find that the program skips to the next line before populating the information.
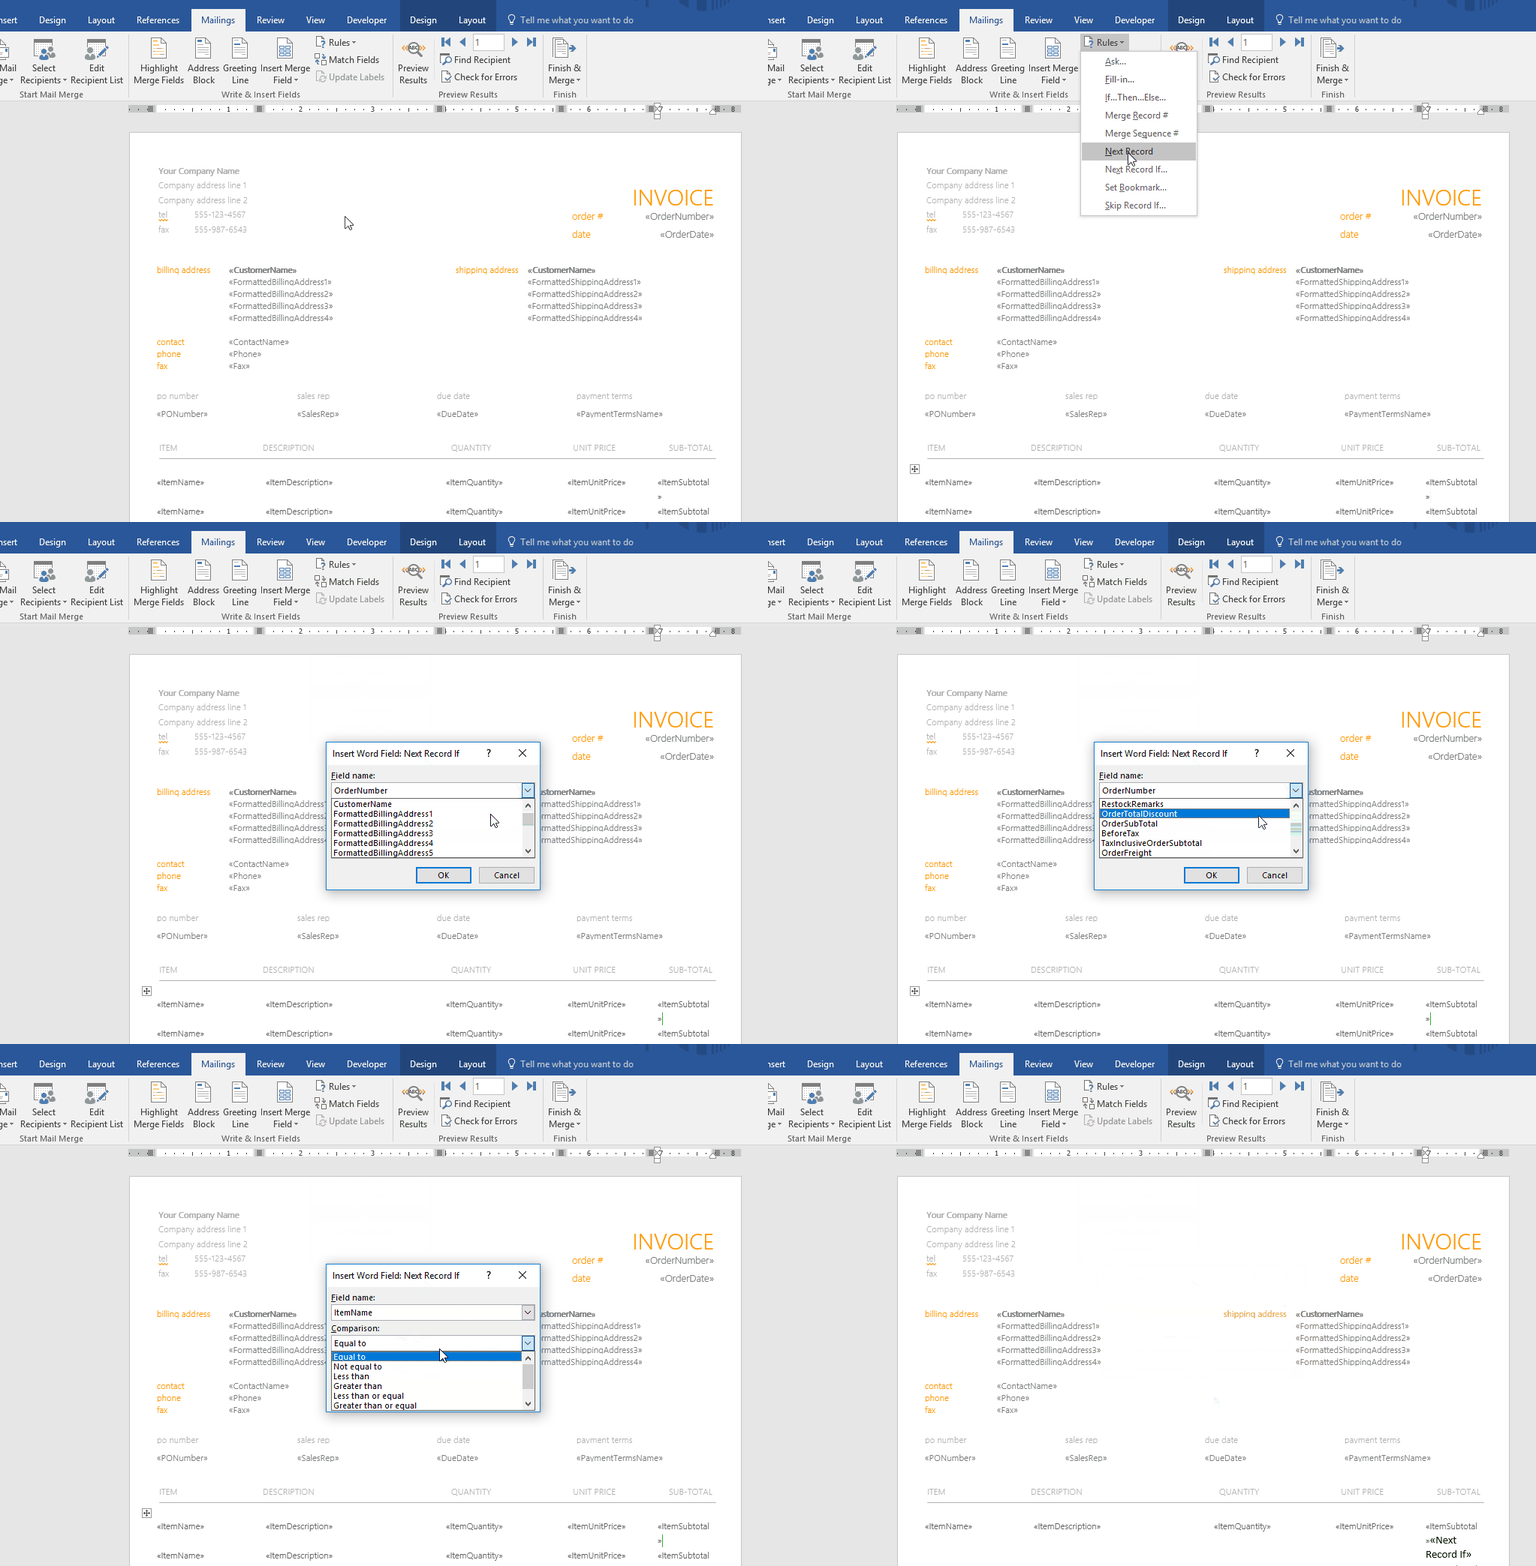
The key to ensuring that your information appears correctly is being certain that all items you wish to include are being addressed in the correct order by the program. In this case, the template would tell inFlow to move to the next line of information before it reached the custom field we wanted to include. By moving the <NextRecordIf> rule to after the last column we’ve added, we’re able to ensure that inFlow grabs that custom information before moving on to the next line.
If you’ve already removed the rule, you can re-create it by clicking “Rules” and setting NextRecordIf = “ItemName” as “Not Equal To” “blank”, as below.

It’s also a good idea to make the font smaller after you create the rule so it doesn’t take up so much space on your document and cause everything to look unaligned.
I have tried to create a text box (I want a column header), but it doesn’t seem to work
In older versions of Word, there seems to be a problem with where text boxes aren’t preserved through a mail merge. (Reference: https://support.microsoft.com/kb/286841) However you can convert your textbox into a frame, which does seem to work, you can find more info here: https://word.tips.net/Pages/T001823_Converting_a_Text_Box_to_a_Frame.html. Another neat trick is to simply copy, paste, and move existing text boxes in the template you’re adjusting, then use them to create your new header.
My order remarks aren’t being populated into my document. Why is that?
Your custom document tries to show the Order Remarks. If you’re putting your remarks in the Fulfill/Pick/Ship tabs, those won’t show up as they have their own remarks (PickRemarks, ShipRemarks).


0 Comments